Loading ...
Loading ...
Loading ...
11
Removing the transportation packaging:
Remove the cardboard. Be careful when using
the knife so as not to damage the surface of the
appliance.
Take the supplied accessories from the protective
parts of the packaging.
m Warning!
Only remove the transporting securing units with which
the slide-in bases and the storage compart-ments in
the appliance are protected after completing the
installation as otherwise, parts could be damaged.
Check the appliance for damage.
Do not install the appliance if there is visible damage.
If there are queries, please contact the dealer.
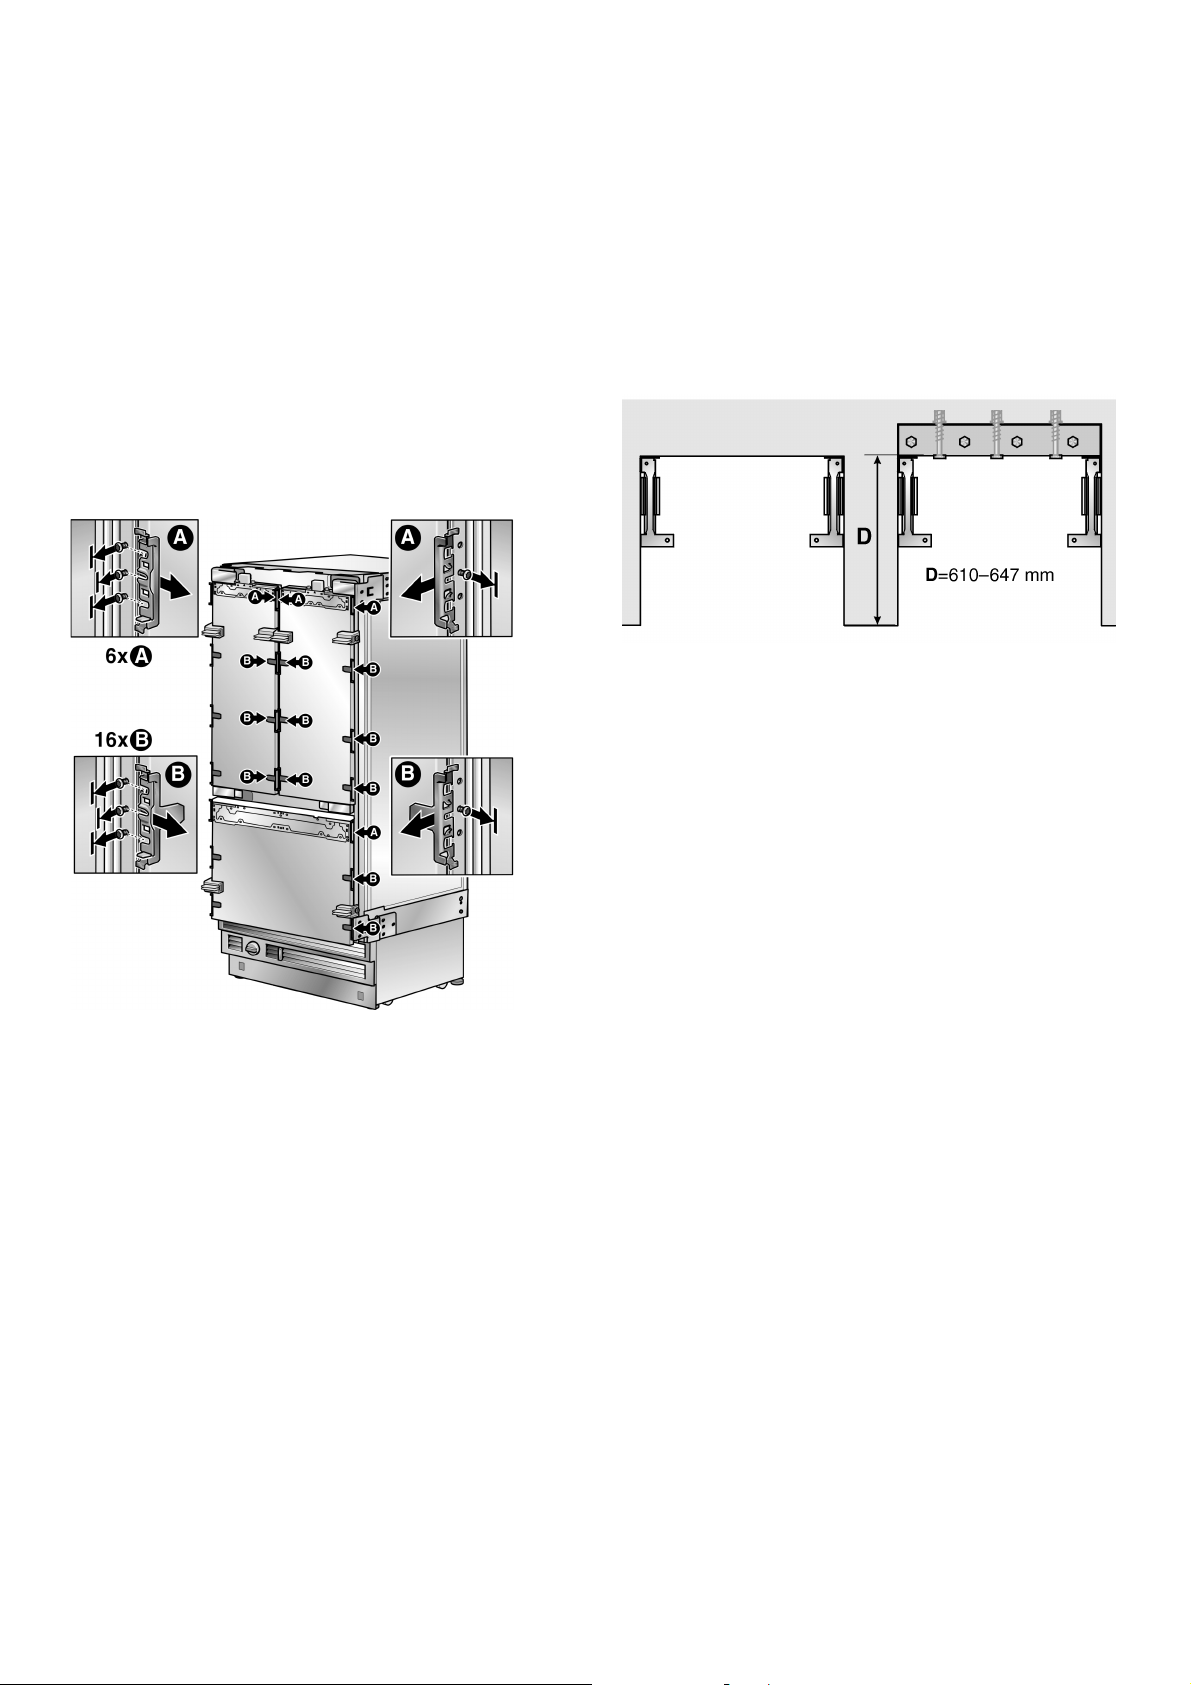
4. Preparing the appliance
Remove the lateral fastenings and fastening sheets
with which the cabinet fronts are attached. To do this,
loosen the fastening screws and remove the stops.
Note:
Keep the stops safe as otherwise they may become lost.
5. Preparing the installation niche
Note:
For each appliance, two anti-tilt ribs are needed.
Determine the fastening points of the anti-tilt ribs.
Determine the actual dimensions according to the
section “Installation Dimensions”.
m Caution!
Ensure that in the wall area there are no electrical wires
or pipes which could be damaged by pipes. Risk of
injury or damage!
If a installation niche is deeper than the appliance, lay a
strong wooden plank behind the anti-tilt ribs
and screw tightly to the subsurface or the wall.
The length of the plank should correspond to the width
of the installation niche!
Important note:
As far as possible, always screw the wooden plank
to the rear wall of the niche.
In the case of some fitted shapes, it may be necessary to
screw in at an angle the wood screws used to fasten the
anti-tilt ribs to the rear wall.
Important information for securing against tilting:
– The set supplied, contains fastening screws for
various subsurfaces. Select the fastening screws
corresponding to the local conditions.
– If it is not possible to securely fasten the anti-tilt ribs
and consequently, not possible to securely fasten the
appliance using the fastening screws supplied, select
another suitable method for securely fastening the
anti-tilt ribs.
– In the case of some fitted shapes, it may be necessary
to screw in at an angle the wood screws used to
fasten the anti-tilt ribs to the rear wall.
Loading ...
Loading ...
Loading ...