Loading ...
Loading ...
Loading ...
7
A
A
t
t
t
t
a
a
c
c
h
h
i
i
n
n
g
g
t
t
h
h
e
e
E
E
q
q
u
u
a
a
t
t
o
o
r
r
i
i
a
a
l
l
M
M
o
o
u
u
n
n
t
t
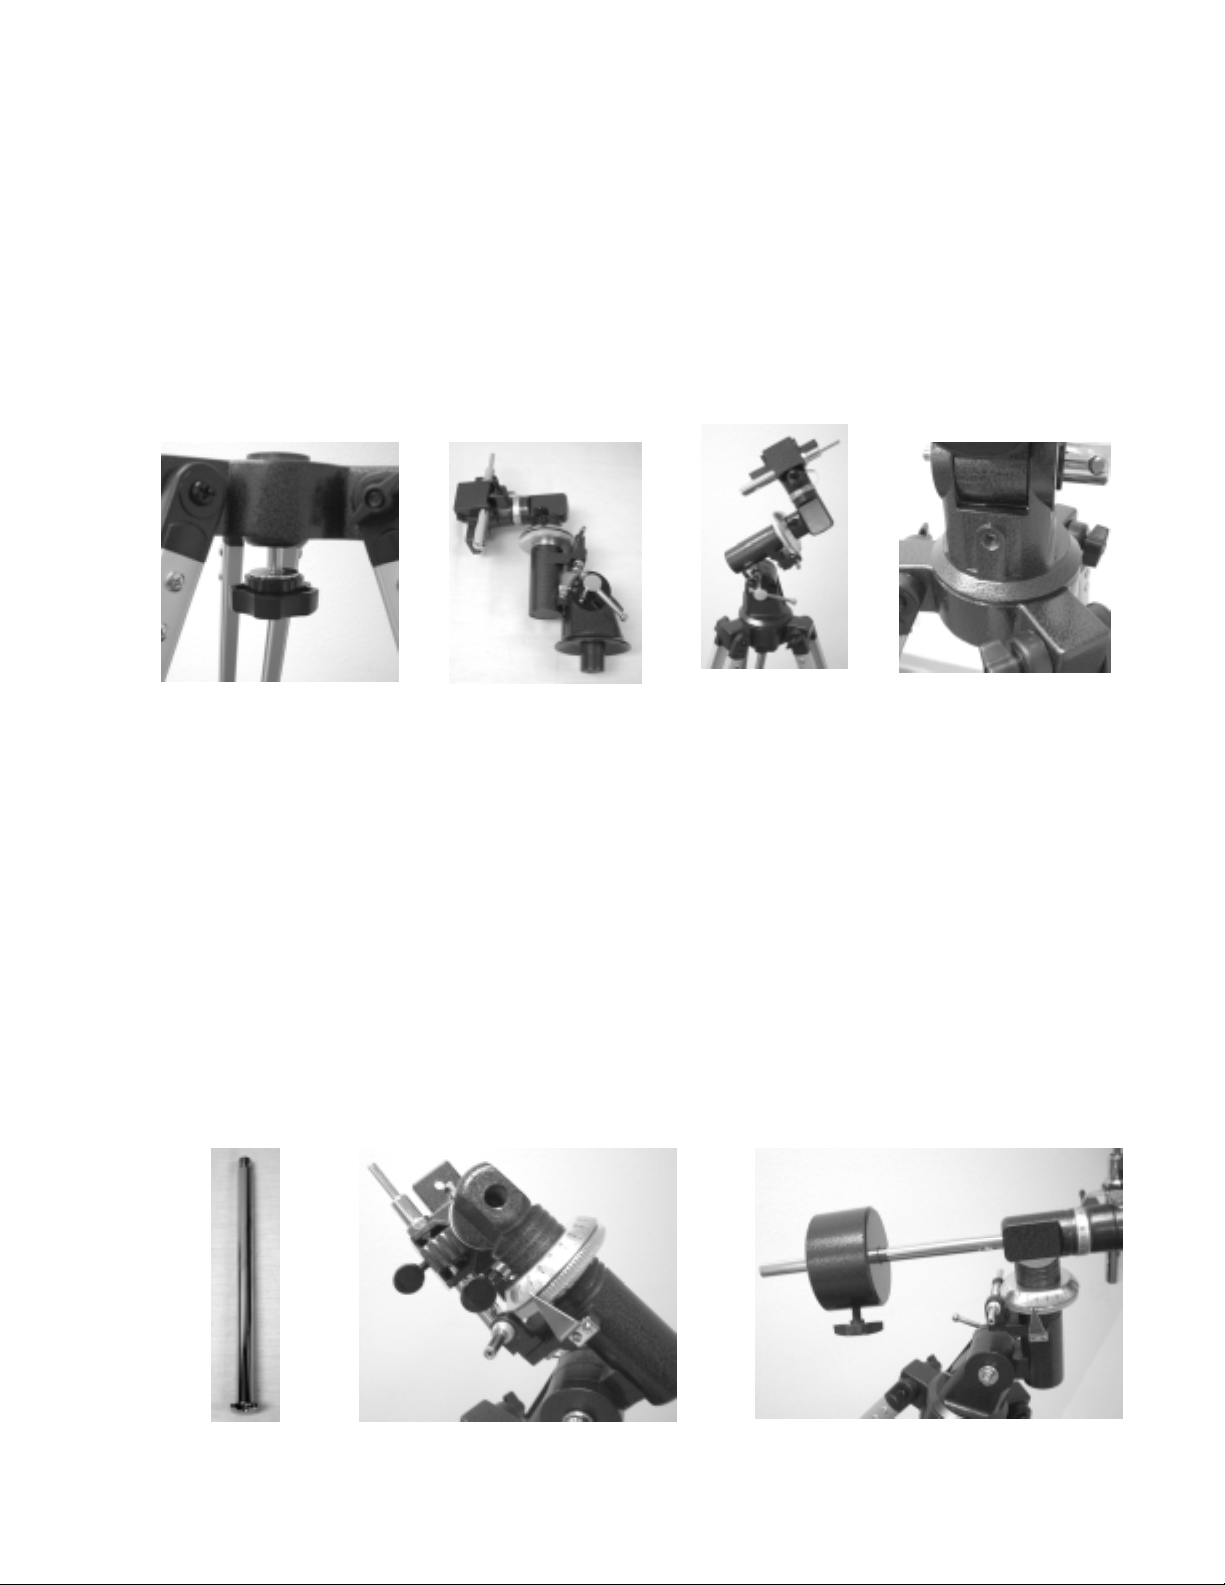
The equatorial mount allows you to tilt the telescopes axis of rotation so that you can track the stars as they move
across the sky. The PowerSeeker mount is a German equatorial mount that attaches to the tripod head. To attach
the mount:
1. Remove the equatorial mount from the box (Figure 2-8). The mount has the latitude locking bolt attached to
it (Figure 2-27). The latitude adjustment screw attaches to the threaded hole in the mount as shown in Figure
2-10.
2. The mount will attach to the tripod head and more specifically to the knob with bolt attached under the tripod
head (Figure 2-7). Push the mount (large flat portion with a small tube sticking out) into the center hole of the
tripod head until it is flush and hold it steady. Then, reach under the tripod head with your other hand and
turn the knob counterclockwise which will thread it into the bottom of the mount. Continue turning until it is
tight. The completed assembly of the mount to the tripod is seen in Figure 2-9.
Figure 2-7 Figure 2-8 Figure 2-9 Figure 2-10
I
I
n
n
s
s
t
t
a
a
l
l
l
l
i
i
n
n
g
g
t
t
h
h
e
e
C
C
o
o
u
u
n
n
t
t
e
e
r
r
w
w
e
e
i
i
g
g
h
h
t
t
B
B
a
a
r
r
&
&
C
C
o
o
u
u
n
n
t
t
e
e
r
r
w
w
e
e
i
i
g
g
h
h
t
t
(
(
s
s
)
)
To properly balance the telescope, the mount comes with a counterweight bar and one or two counterweights
(depending on the model you have). To install them:
1. Remove the counterweight safety screw from the counterweight bar (at the opposite end of the threaded rod)
by unthreading it counterclockwise – see Figure 2-11.
2. Install the large threads of the counterweight bar into the threaded hole in the Dec. axis of the mount and turn
clockwise-- see Figure 2-12 until it is tight. Now you are ready to attach the counterweight(s).
3. Orient the mount so that the counterweight bar points toward the ground.
4. Loosen the locking knob on the side of the counterweight so that the threads do not protrude through the
center hole of the counterweight.
5. Slide the counterweight onto the counterweight bar about half way up and tighten the locking knob securely.
The correct orientation of the weight is shown in Figure 2-13.
6. Slide the second counterweight (if your model has a second weight) onto the counterweight bar flush up
against the first one and then lock securely.
7. Replace the safety screw and thread it on securely. The completed assembly is shown in Figure 2-13.
Figure 2-11 Figure 2-12 Figure 2-13
Loading ...
Loading ...
Loading ...