Loading ...
Loading ...
Loading ...
27
Aligning the Primary Mirror
Now adjust the primary mirror screws to re-center the reflection of the small secondary mirror, so it’s silhouetted
against the view of the primary. As you look into the focuser, silhouettes of the mirrors should look concentric.
Repeat steps one and two until you have achieved this.
Remove the collimating cap and look into the focuser, where you should see the reflection of your eye in the
secondary mirror.
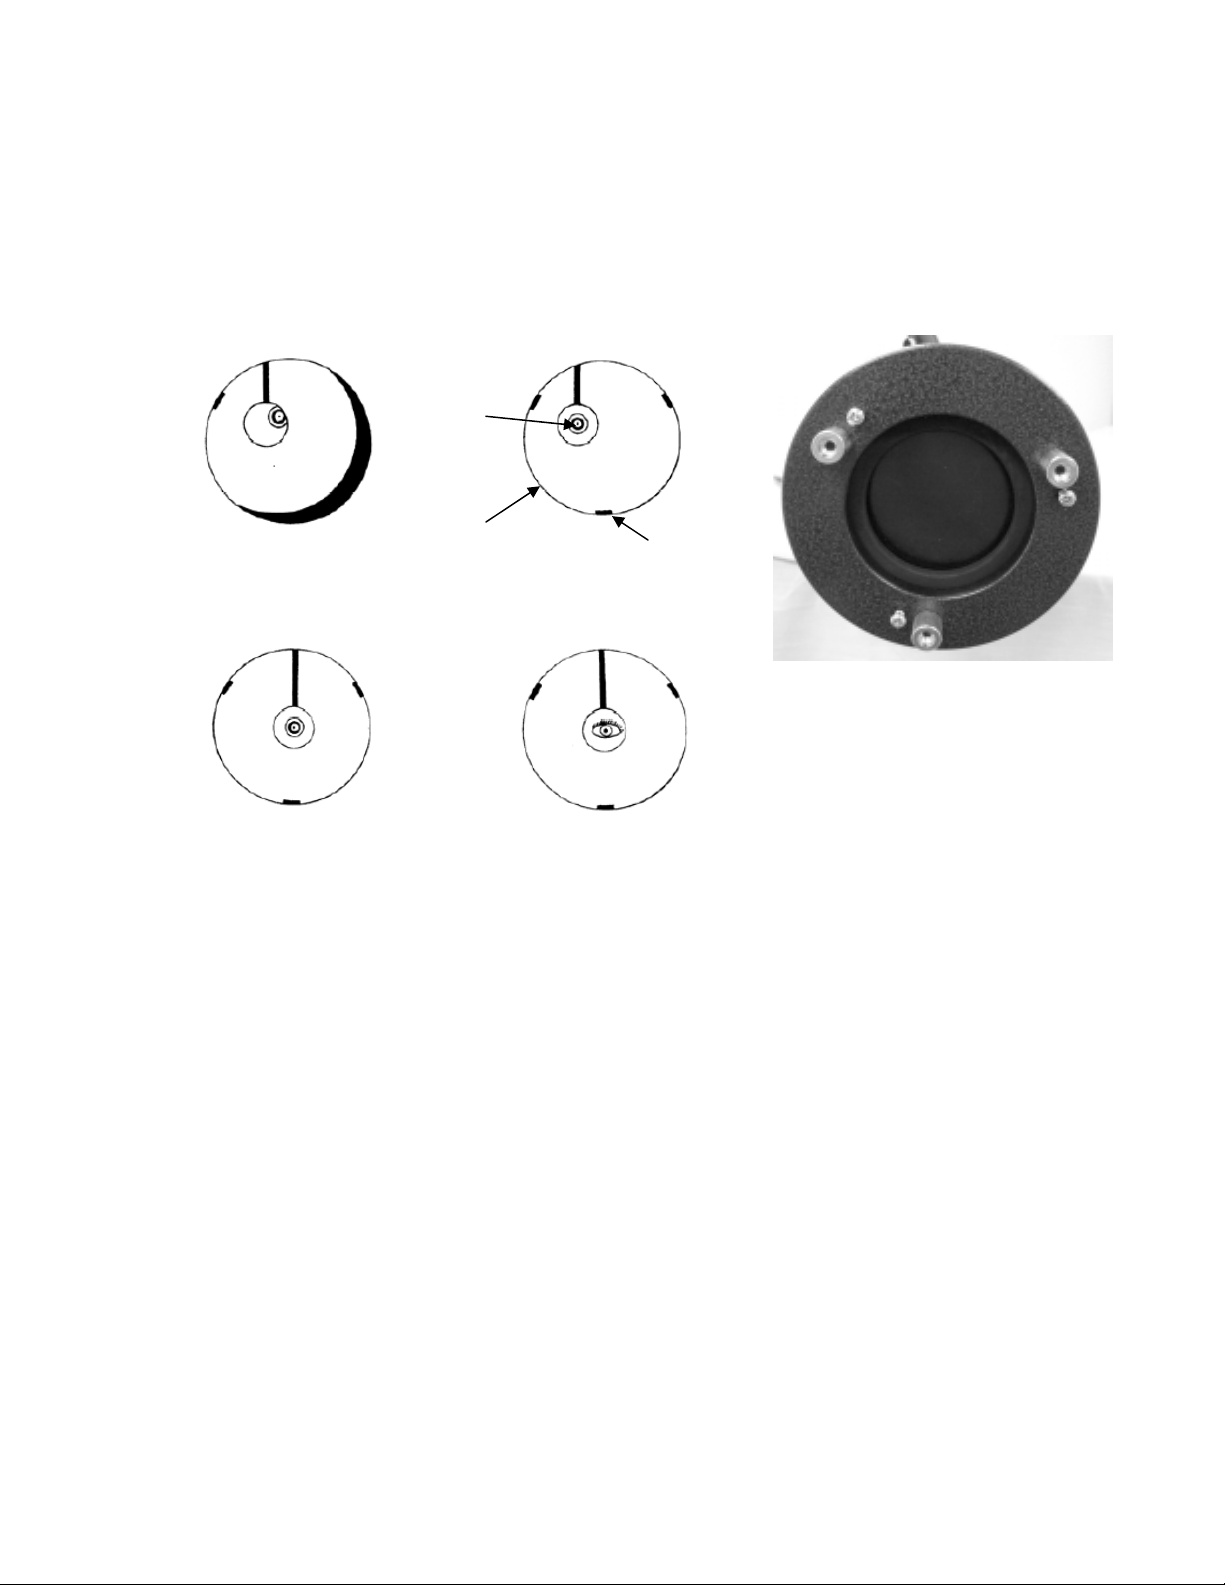
Newtonian collimation views as seen through the focuser using the collimation cap
Secondary mirror needs adjustment.
Primary mirror needs adjustment.
Both mirrors aligned with the collimating
cap in the focuser.
Both mirrors aligned with your eye
looking into the focuser.
Figure 7-1 PowerSeeker 114EQ
Night Time Star Collimating
After successfully completing daytime collimation, night time star collimation can be done by closely adjusting the
primary mirror while the telescope tube is on its mount and pointing at a bright star. The telescope should be set up
at night and a star's image should be studied at medium to high power (30-60 power per inch of aperture). If a non-
symmetrical focus pattern is present, then it may be possible to correct this by re-collimating only the primary
mirror.
Procedure (Please read this section completely before beginning):
To star collimate in the Northern Hemisphere, point at a stationary star like the North Star (Polaris). It can be found
in the north sky, at a distance above the horizon equal to your latitude. It’s also the end star in the handle of the
Little Dipper. Polaris is not the brightest star in the sky and may even appear dim, depending upon your sky
conditions. For the Southern Hemisphere, point at Sigma Octantis.
Prior to re-collimating the primary mirror, locate the collimation screws on the rear of the telescope tube. The rear
cell (shown in Figure 7-1) has three large thumbscrews (on some models they are not thumbscrews) which are used
for collimation and three small thumbscrews which are used to lock the mirror in place. The collimation screws tilt
the primary mirror. You will start by loosening the small locking screws a few turns each. Normally, motions on
the order of an
1
/
8
turn will make a difference, with approximately a
1
/
2
to
3
/
4
turn being the maximum required for
the large collimation screws. Turn one collimation screw at a time and with a collimation tool or eyepiece see how
the collimation is affected (see the following paragraph below). It will take some experimenting but you will
eventually get the centering you desire.
It is best to use the optional collimation tool or collimating eyepiece. Look into the focuser and notice if the
secondary reflection has moved closer to the center of the primary mirror.
Secondary
Mirror
Primary
Mirror
Mirror Clip
Loading ...
Loading ...
Loading ...