Loading ...
Loading ...
Loading ...
22
M
M
o
o
t
t
o
o
r
r
D
D
r
r
i
i
v
v
e
e
To allow tracking of celestial objects, Celestron offers a single axis DC motor drive for the PowerSeeker equatorial
mount. Once polar aligned, the motor drive will accurately track objects in Right Ascension as they move across the
sky. Only minor adjustments in Declination will be necessary to keep celestial objects centered in the eyepiece for
long periods of time. Some models come standard with this motor drive and it is sold as an optional accessory
( Model # 93514 ) for other models.
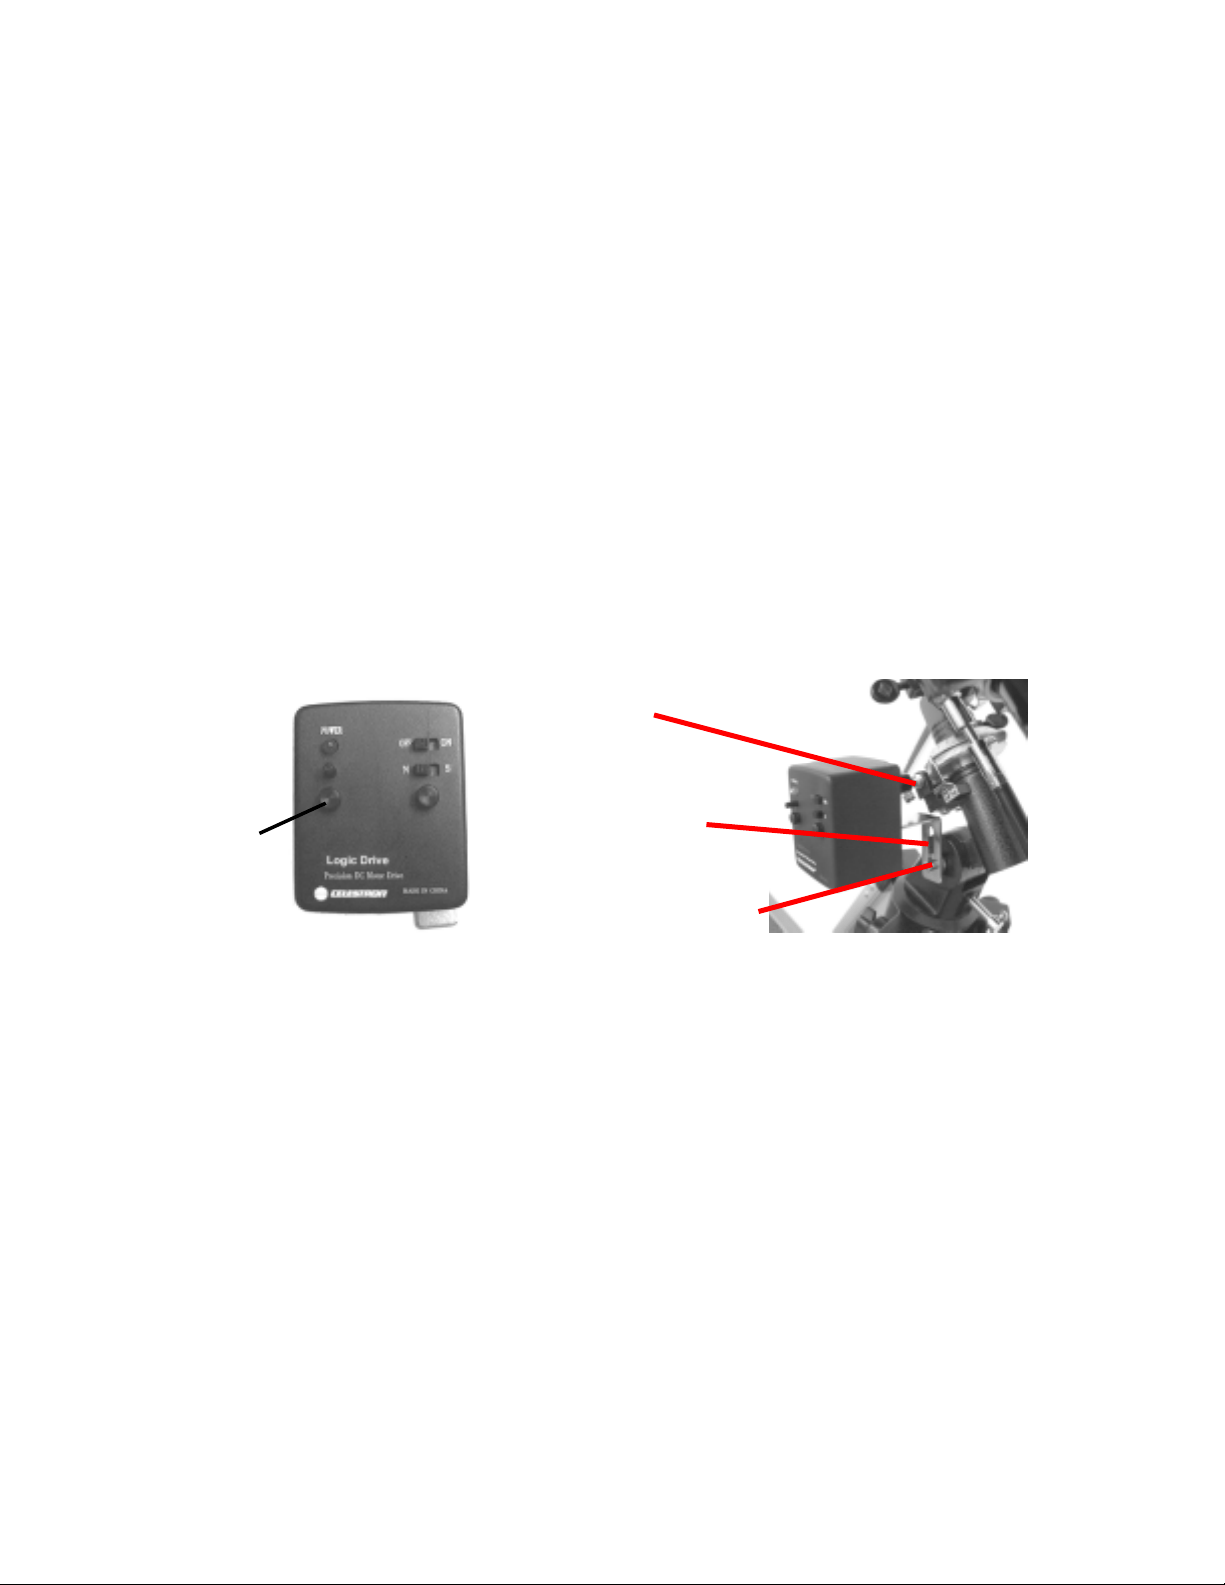
Installation of the Motor Drive – for those purchasing it as an optional accessory.
The motor drive attaches to the PowerSeeker equatorial mount via a flexible coupler that mounts to the R.A. slow
motion shaft and a motor bracket that holds the motor in place. To install the motor drive see the description and
photos below:
1. Make sure the R.A. slow motion cable is attached to the R.A. shaft opposite of the latitude scale.
2. Remove the Allen head bolt located on the side of the polar shaft.
3. Slide the open end of the flexible motor coupler over the R.A. shaft. Make sure that the screw on the flexible
motor coupler is positioned over the flat portion of the R.A. shaft.
4. Tighten the motor coupler screw with a flathead screwdriver.
5. Rotate the motor on the shaft until the slotted cutout on the motor bracket aligns with the threaded hole in the
center of the mount’s latitude pivot axis.
6. Place the Allen head bolt through the motor bracket and thread it into the hole on the side of the pivot axis.
Then, tighten the bolt with an Allen wrench.
Figure 4-11 Figure 4-12
Operating the Motor Drive
The motor drive is powered by one 9-volt alkaline battery. This can power the drive for up to 40 hours, depending
on motor speed setting and ambient temperature. The battery should be installed already but if not (or replacing the
battery), unscrew the two mounting screws – Figure 4-11. Remove the control panel plate from the motor assembly
and then remove the motor bracket from the motor. Then, you will be able to get to the battery connected to cables
for installing or replacing. Finally, reverse all steps to remount the motor drive to the mount.
The motor drive is equipped with a speed rate regulator (in Figure 4-11 it is above the mounting screw) that allows
the motor drive to track at a faster or slower speed. This is useful when observing non-stellar objects like the moon
or Sun which travel at a slightly different rate than the stars. To change the speed of the motor, slide the On/Off
switch to the “ON” position and the red power indicator light will illuminate. Then, turn the speed rate regulator
knob clockwise to increase the speed of the motor and counterclockwise to decrease the speed.
To determine the proper rate of speed, the telescope should be roughly polar aligned. Find a star on the celestial
equator (approximately 0° declination) and center it in a low power eyepiece. Now turn the drive on and let the
telescope track for 1 or 2 minutes. If after a few minutes, the star drifts to the West, the motor is tracking too slowly
and you should increase the motor speed. If the star is drifting to the East, then decrease the motor speed. Repeat
this process until the star remains centered in the eyepiece for several minutes. Remember to ignore any star drift in
declination.
The drive also has a “N/S” switch to be set if operating in the Northern or Southern Hemisphere.
Flexible Motor Coupler
Motor Bracket
Allen Head Bolt
Mounting
Screws
Loading ...
Loading ...
Loading ...