Loading ...
Loading ...
Loading ...
13
USING THE SINGLE-SERVE
COFFEEMAKER
MAKING COFFEE WITH PODS
IMPORTANT: Complete the initial cleaning
steps before brewing. Follow instructions in
Setting Up Your Single-Serve Coffeemaker,
page 12.
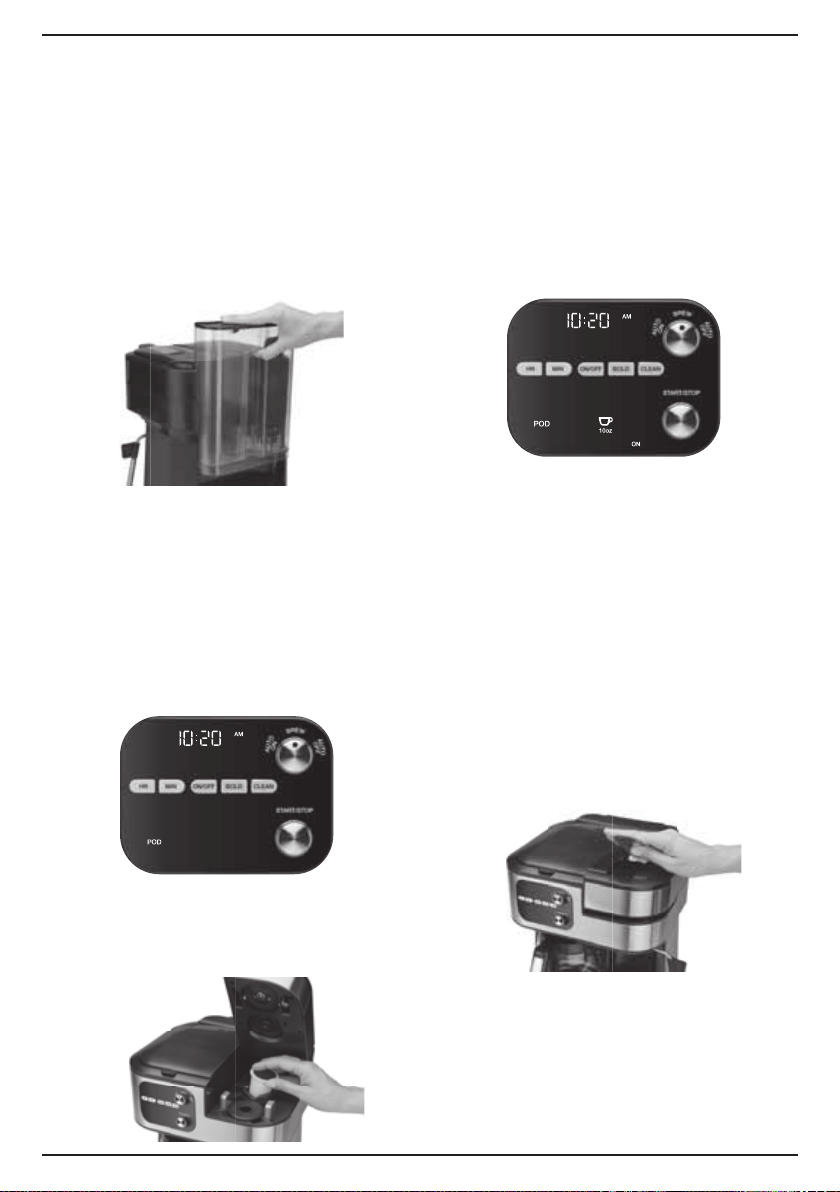
BREWING
1. Remove single-serve water reservoir.
2. Fill reservoir to desired level, then replace
on unit.
3. Place mug on the drip tray. The drip tray can
be removed to accommodate travel mugs.
4. Select a pod.
NOTE: Do not remove the foil lid or
puncture the capsule.
5. Turn the START/STOP knob clockwise to
enter POD setting mode. The POD indicator
will illuminate.
6. Open the brew head. The POD indicator
will turn off while brew chamber is open.
Place a pod in the brewing chamber and
close brew head. The POD indicator will
turn back on.
Caution: There are two sharp needles
in the brewing chamber that puncture
the pod, one above and one below.
To avoid risk of injury, do not put your
fingers in the single-serve brewing
chamber.
7. Turn the START/STOP knob clockwise to
choose your desired brew POD size of 6, 8,
or 10 oz. and press knob for selected size.
The ON indicator will illuminate and the
selected brew size will flash slowly while
brewing.
NOTE: To cancel brewing, simply press
the START/STOP knob once again and the
brewing process will be stopped.
Caution: There is very hot water in the
capsule chamber during the brewing
process. To avoid risk of injury, do not
lift the handle or open the capsule
chamber during the brewing process.
8. Once fully dispensed, one short beep will
sound. The POD indicator and the brew size
chosen will illuminate again. The ON indicator
will turn off signifying the brew is complete.
9. Lift the handle, then remove and dispose of
the used pod. Close the brew head.
Caution: Pod will be hot.
10. Enjoy your cup of coffee! Your brewer is
ready to use again.
NOTE: When ADD WATER indicator is on,
no brewing can be done. Once you refill the
reservoir, your unit is ready to brew.
Loading ...
Loading ...
Loading ...