Loading ...
Loading ...
Loading ...
83
Recorder
Audio Record/Playback (USB Memory)
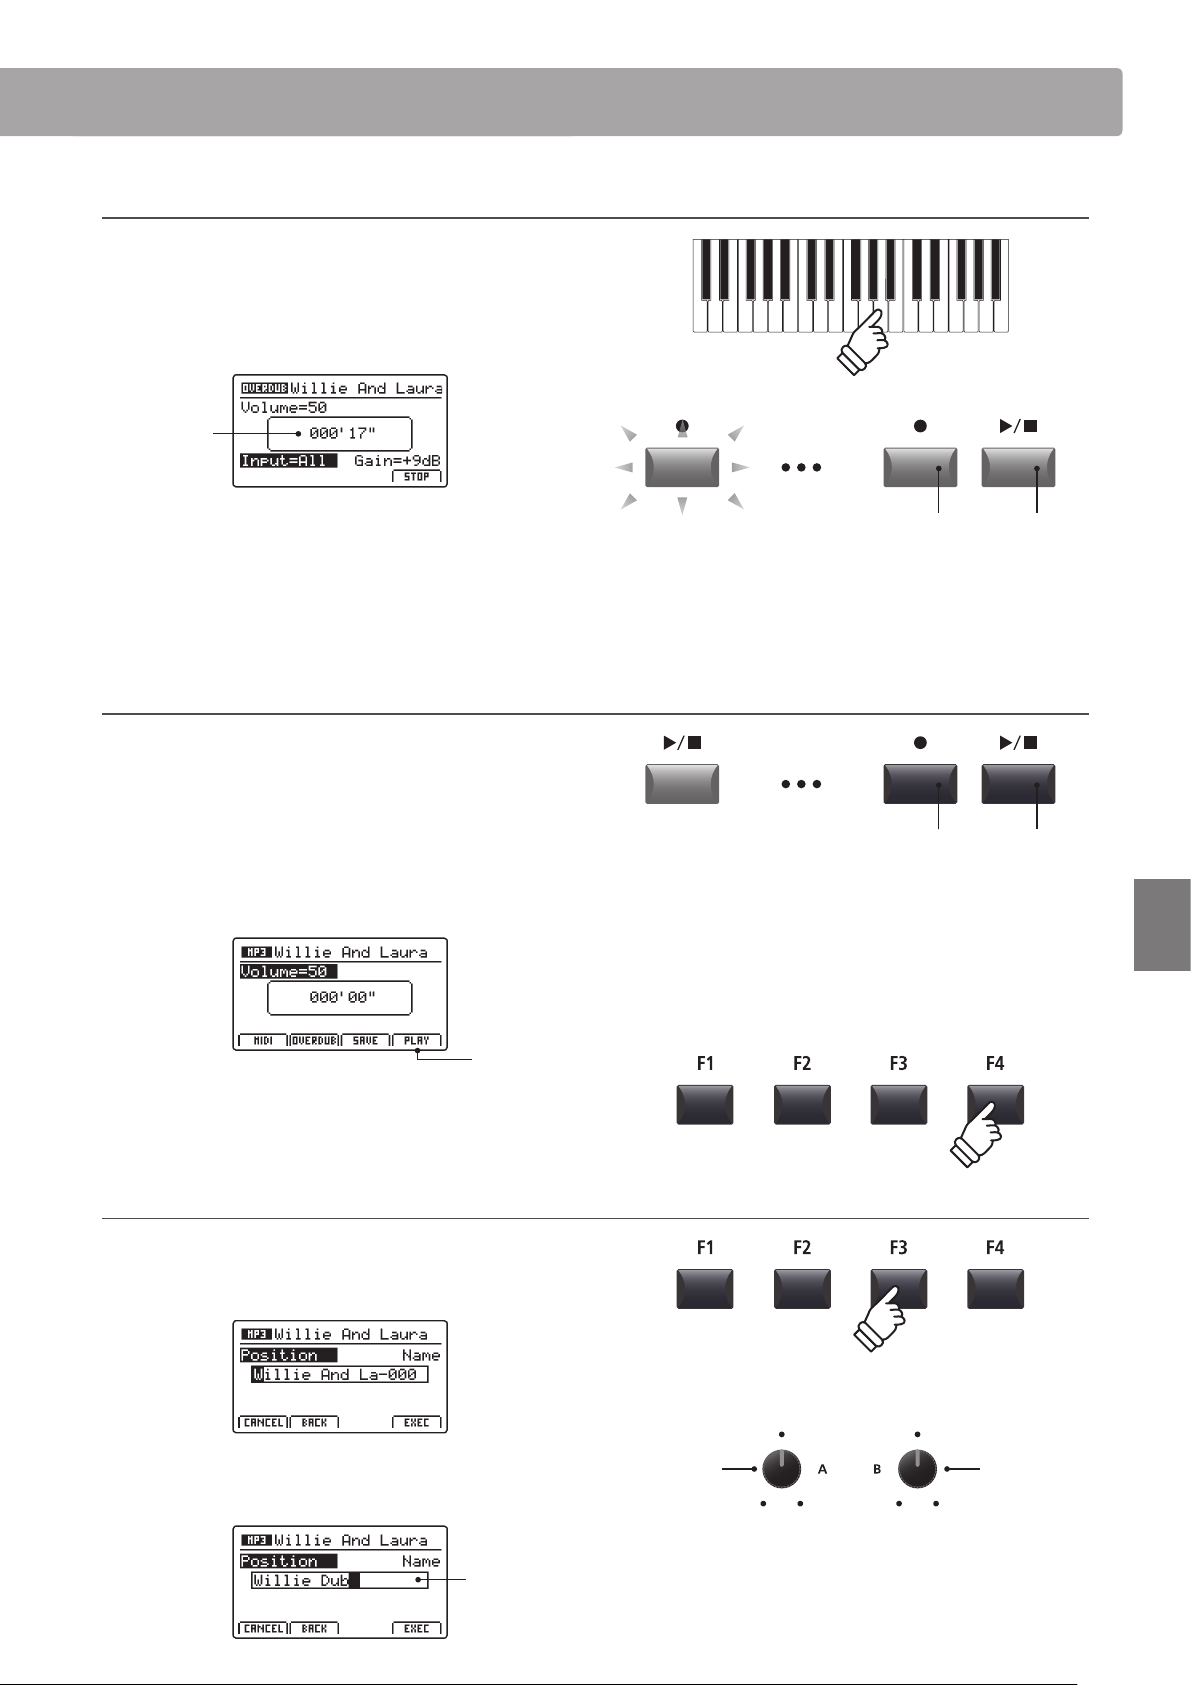
7. Starting the overdub (record)
Press a key on the keyboard.
The LED indicators for the and / buttons will turn ON,
the time counter shown in the centre of the LCD will being to
increase, and overdubbing will start.
Time
counter
* Overdubbing can also be started by pressing the / button. This allows
a rest period or empty bar to be inserted at the beginning of the song.
* The metronome can be enabled before overdubbing to assist with timing
etc. When enabled, a one bar count-in will be added before overdubbing
begins.
8. Stopping and auditioning the overdub
Press the / recorder control button.
The LED indicators for the and / buttons will turn OFF, and
overdubbing will stop.
* The F4 function button (STOP) can also be used to stop overdubbing.
After a brief pause, the Audio player screen will be shown in the
LCD display.
Audition
overdub
Press the F4 function button (PLAY) to audition the overdub
before saving.
9. Selecting the save function, entering the audio le name
Press the F3 function button (SAVE).
The save audio screen will be shown in the LCD display.
Turn control knobs A and B to move the cursor position and
select the characters for the audio le name.
Audio
le name
LED indicators ON:
Overdubbing is in progress
Move cursor
position
Select
character
* Saved audio les are limited to a maximum name length of 18 characters.
* The saved audio le will be stored in the root folder of the USB memory
device. It is not possible to store the le in a dierent folder.
LED indicators OFF:
Recording has stopped
* Press the and / recorder control buttons simultaneously to erase the
overdubbed audio le from memory.
Loading ...
Loading ...
Loading ...