Loading ...
Loading ...
Loading ...
16 | NORD STAGE 3 USER MANUAL OS V2.5X
THE ARPEGGIATOR
As a final exercise, let’s create a sound using the Synth section and its
arpeggiator.
1 Make sure that only the Synth section is turned on and perform a
SOUND INIT (Shift + Unison). Set the Amp Env ATTACK time to 0,
the DECAY to around 3, select a sawtooth waveform and open up
the filter a little bit. This will produce a percussive sound.
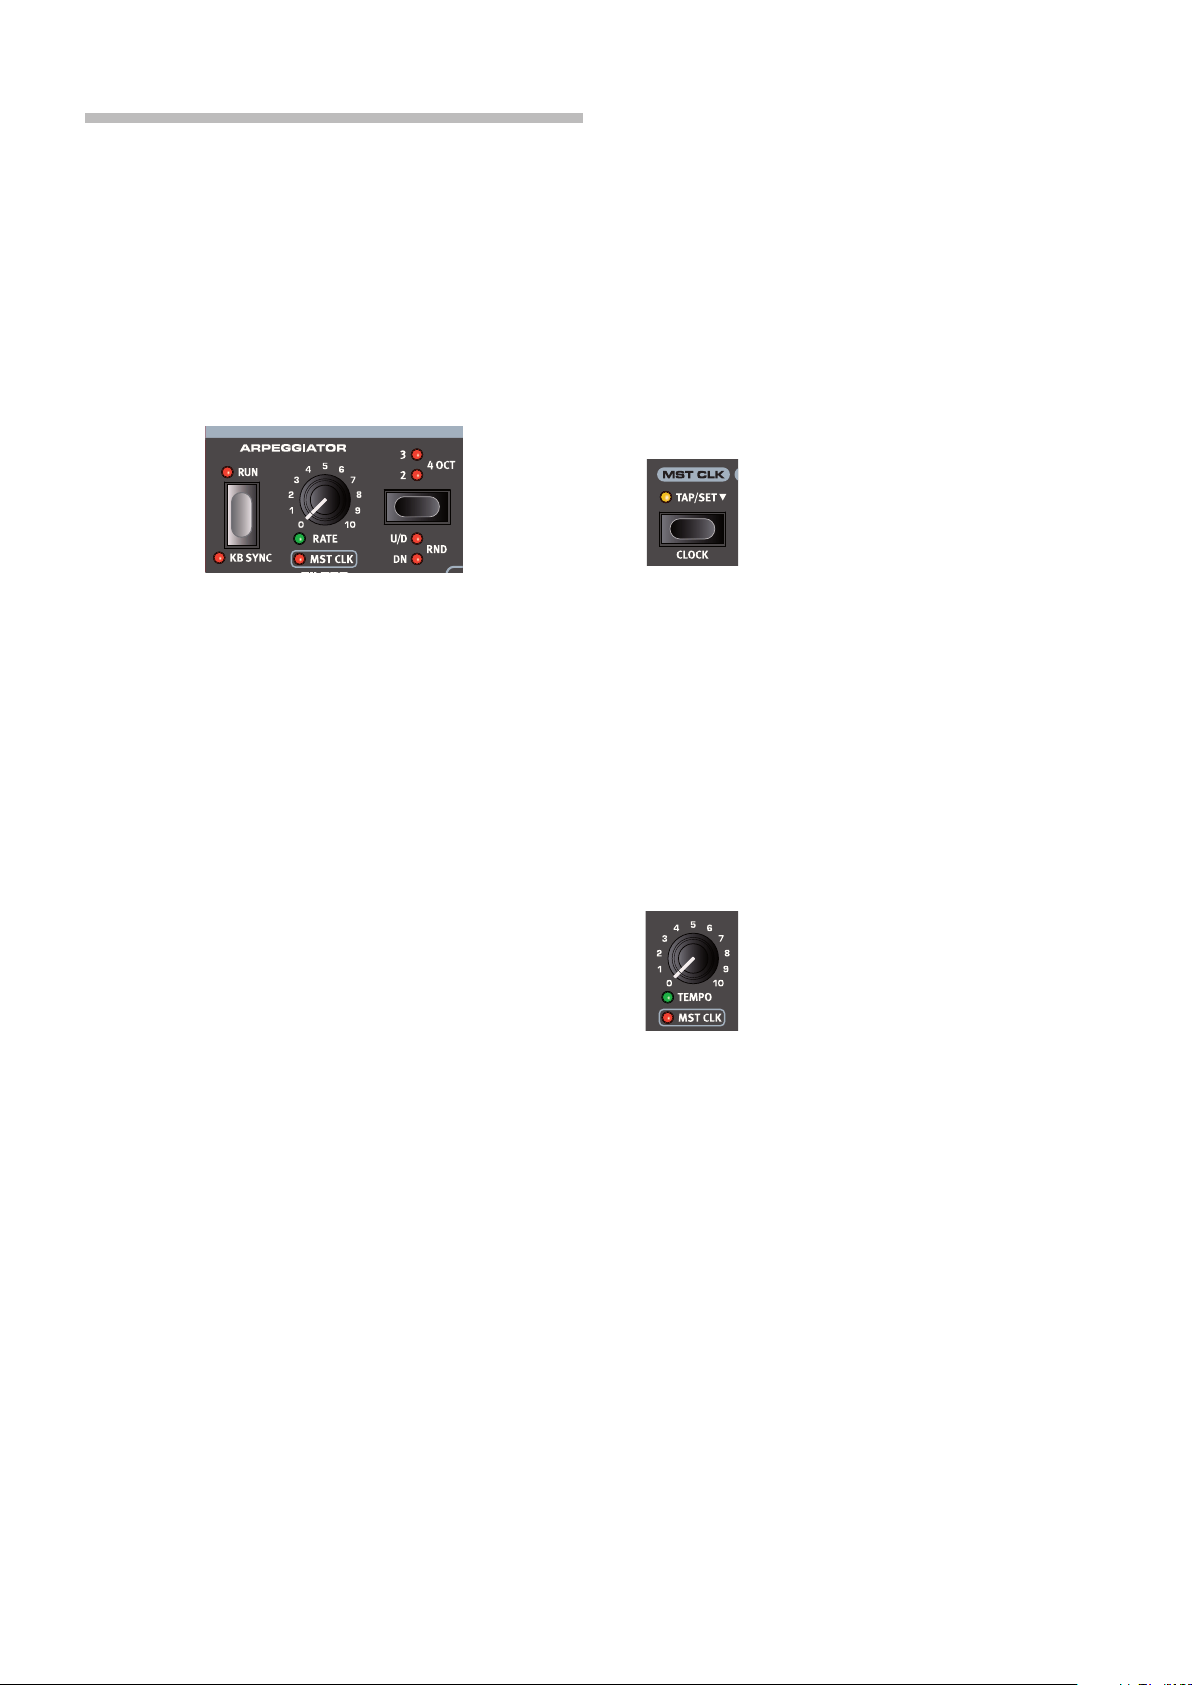
2 Press ARP RUN, play a chord on the keyboard and turn the Arpeg-
giator Rate knob. This will play the notes that are held down, one
after the other in a repeating fashion.
3 Press SHIFT and the Arpeggiator selector button to select a differ-
ent direction.
When no direction LED is lit, the direction is Up, from the lowest
key and up to the highest and then it starts over again. The other
directions are DN (down), UP/DN (up and down) and RD (random).
4 Press the selector button repeatedly to select a range.
When none of the range-LEDs are lit, the range is exactly the
keys that are held down. A setting of 2 OCT extends the range by
transposing the arpeggio one octave up and plays this octave after
the initial octave, 3 OCT adds yet another octave and 4 OCT gives a
range of four octaves.
5 Press the KB HOLD button to keep the arpeggio going without the
need for pressing the keys.
MASTER CLOCK
Now that we have an arpeggio going, let’s try the Master Clock feature
to synchronize the arpeggio and to bring in an effect as well.
1 Hold SHIFT and turn the Arpeggiator RATE knob to lock the arpeg-
gio to the Master Clock, the MST CLK LED lights up.
2 Press down on the Mst Clk TAP/SET button in the Program area to
dial in a tempo with the PROGRAM Dial. You could also press CLOCK
(Shift + Tap/Set) to view and adjust Master Clock settings without
having to keep the button pressed down. The display will indicate
the BPM. Set this to 130 BPM for this exercise. Release the button
to exit, or press EXIT (Shift) if in “Clock” mode.
Tap four times on the Mst Clk button to set the tempo on the fly.
3 Turn the Arpeggio RATE knob to select the meter subdivision (or
note values) that the arpeggio should play. The setting is shown
in the Program area display as the knob is being turned. Notice
how 1/4 is half the “speed “ of 1/8. A “T” after a numerical value
indicates triplets. Set the subdivision to 1/8.
4 Turn on the DELAY effect and make sure that the source is set to
Synth by pressing the SOURCE button repeatedly until the Synth
LED lights up.
If you carefully adjust the delay time, you could match it to fit the
rhythm of the arpeggio, but there is another way. Let’s synchronize
the delay to the same clock as the arpeggio.
5 Hold SHIFT and turn the Delay TEMPO knob to activate Master
Clock for the Delay. The MST CLK LED lights up.
6 Turn the Delay TEMPO knob and again refer to the Program area
display to monitor the setting.
7 Try 1/16, which will be half the note value or twice the “speed” of
the arpeggio. Turn up the Amount knob up to but not beyond 12
o’clock to hear the delay taps together with the arpeggiated notes.
The arpeggio, the LFO on the synth, the Delay and the Effect 1 rate can
be synchronized to the Master Clock in this fashion.
What’s more, the Master Clock operates on both panels simultaneously
so you can control arpeggios, LFOs and effects on both Panel A and B.
Some of the units have division settings that are larger than 1/1 that
allows for sweeps that are longer that one bar. And you can of course
synchronize some functions, while leaving others free-running if you like.
Loading ...
Loading ...
Loading ...