Loading ...
Loading ...
Loading ...
Installing New Thermostat
1. Disconnect power to avoid product damage during
installation of new thermostat.
2. Remove the PTAC/PTHP front cover.
3. Locate the terminal strip on the front of the control box.
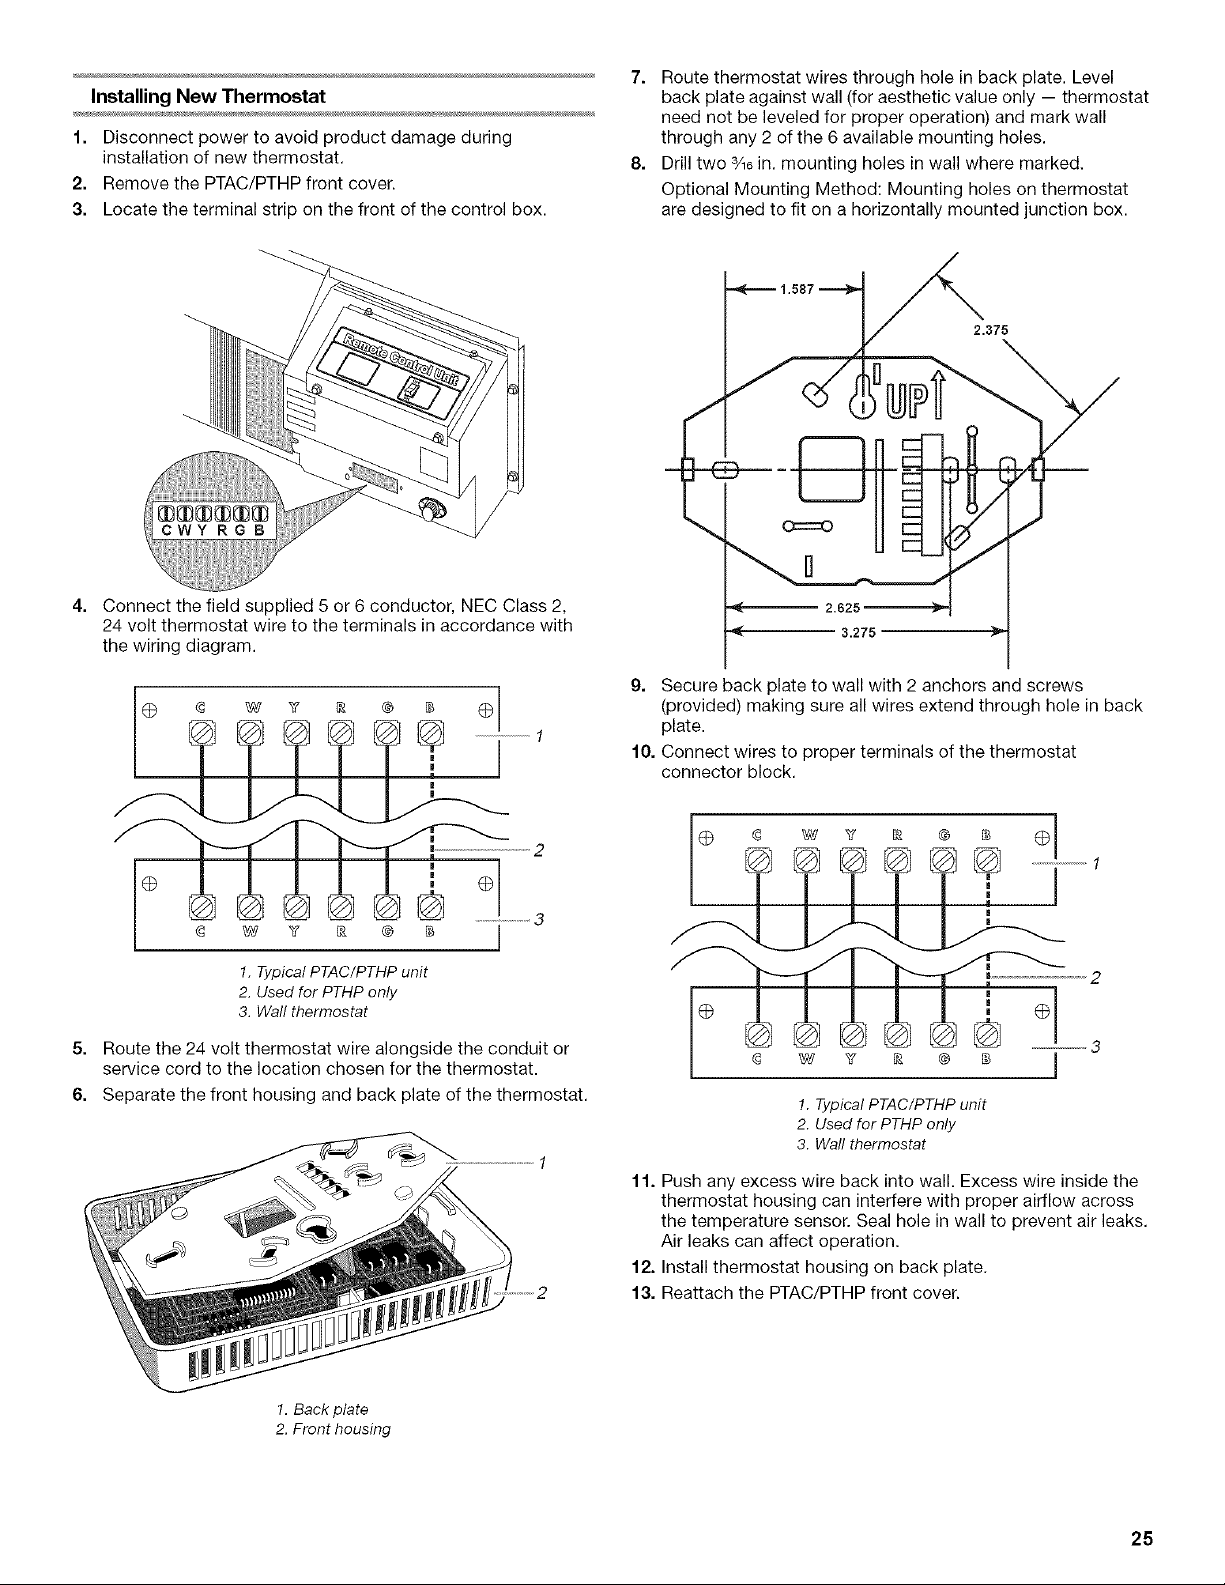
7. Route thermostat wires through hole in back plate. Level
back plate against wall (for aesthetic value only -- thermostat
need not be leveled for proper operation) and mark wall
through any 2 of the 6 available mounting holes.
8. Drill two 3/16in. mounting holes in wall where marked.
Optional Mounting Method: Mounting holes on thermostat
are designed to fit on a horizontally mounted junction box.
4=
Connect the field supplied 5 or 6 conductor, NEC Class 2,
24 volt thermostat wire to the terminals in accordance with
the wiring diagram.
..........
[
1. Typical PTAC/PTHP unit
2. Used for PTHP only
3. Wall thermostat
5. Route the 24 volt thermostat wire alongside the conduit or
service cord to the location chosen for the thermostat.
6. Separate the front housing and back plate of the thermostat.
2.375
3.275
9. Secure back plate to wall with 2 anchors and screws
(provided) making sure all wires extend through hole in back
plate.
10. Connect wires to proper terminals of the thermostat
connector block.
!. Typical PTAC/PTHP unit
2. Used for PTHP only
3. Wall thermostat
11. Push any excess wire back into wall. Excess wire inside the
thermostat housing can interfere with proper airflow across
the temperature sensor. Seal hole in wall to prevent air leaks.
Air leaks can affect operation.
12. Install thermostat housing on back plate.
13. Reattach the PTAC/PTHP front cover.
1, Back plate
2. Front housing
25
Loading ...
Loading ...
Loading ...