Loading ...
Loading ...
Loading ...
78
ninjakitchen.eu
HOW TO CORRECTLY INSERT THE PROBE
NOTE: DO NOT use the probe with frozen protein or for cuts of meat thinner than 1.5cm.
FOOD TYPE: PLACEMENT CORRECT INCORRECT
Steaks
Pork chops
Lamb chops
Chicken breasts
Burgers
Tenderloins
Fish fillets
• Insert probe horizontally
into the centre of the
thickest part of the meat.
• Make sure the probe
is close to (but not
touching) the bone and
away from any fat or
gristle.
• Make sure the tip of the
probe is inserted straight
into the centre of the
meat, not angled toward
the bottom or top of it.
NOTE: The thickest
part of the fillet may
not be the centre. It is
important that the end
of the probe hits this
area so that desired
results are achieved.
Whole chicken • Insert probe horizontally
into the thickest part of
the breast, parallel to, but
not touching, the bone.
• Make sure the tip
reaches the centre of
the thickest part of the
breast and doesn’t go
all the way through the
breast into the cavity.
77 ninjakitchen.eu
USING THE PROBE IN DIFFERENT
COOKING SCENARIOS:
Cooking 2 or more proteins of the same
size to dierent levels of outcome:
• Set the Preset feature to the highest
desired level of outcome.
• Insert the probe in the protein with the
higher desired level of outcome.
• Place proteins inside the unit and start
the cooking program. When the lower
desired level of outcome is reached on
the display, remove the protein without
probe.
• Continue cooking the remaining protein
until the next desired level of outcome
is reached.
Cooking 2 or more proteins of dierent
sizes:
• Insert probe in the smaller protein and
use the Preset feature to choose the level
of outcome.
• When that protein is done cooking,
remove it from the unit.
• Using oven gloves, transfer probe
to the larger protein and use the arrows
to the left of the display to choose its
level of outcome.
Cooking 2 or more dierent types of
protein:
• Insert probe in the protein with the lower
desired level of outcome.
• Use the Manual feature to choose the
desired internal temperature.
• When that protein is done cooking,
remove it from the unit.
• Using oven gloves, transfer probe to the
other protein and use the Manual feature to
choose the desired internal temperature.
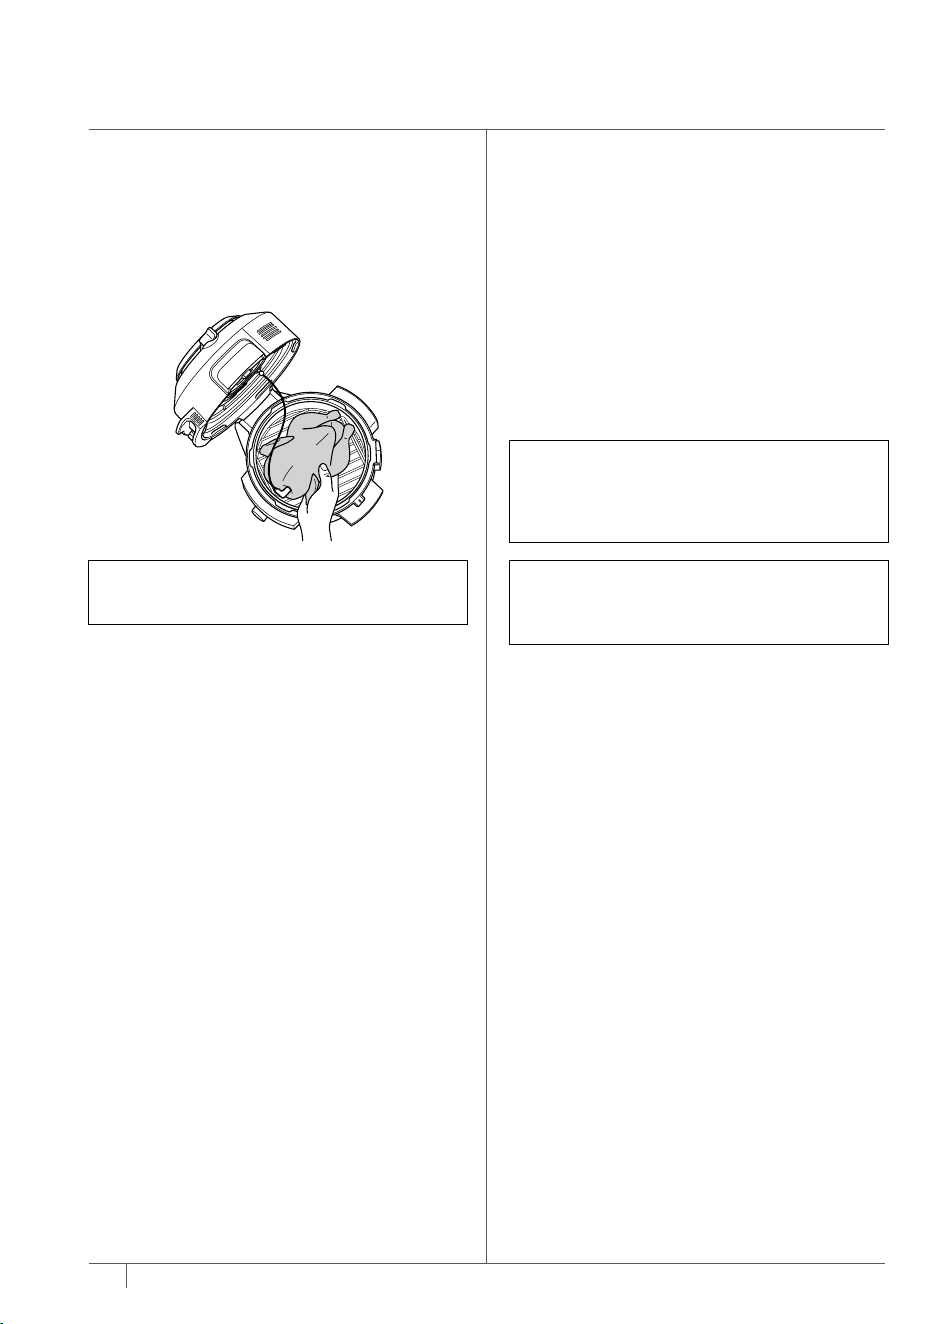
6 Insert the probe horizontally into the
centre of the thickest part of the
piece of protein. Refer to the chart
on the next page for further probe
placement instructions.
7 Place food with inserted probe in the
unit and close the lid.
8 The unit will automatically stop when
desired outcome is almost reached,
as it accounts for carry-over cooking.
Remove food from the unit immediately
to prevent over-cooking.
9 The protein will continue to carry-over
cook to your set outcome, which will take
about 3-5 minutes. This is an important
step, as not resting could lead to results
looking "less" cooked. Carry-over cook
times can vary based on size of protein,
cut of protein and type of protein.
NOTE: Make sure the probe wire is not
hanging outside of the unit/lid.
NOTE: The probe will be HOT. Use either
oven gloves or tongs to take the probe
out of the food.
NOTE: To check the internal temperature
of other pieces of protein, press and hold
MANUAL and insert the probe into each
piece of meat.
USING YOUR NINJA® FOODI®
MAX SMARTLID MULTI-COOKER
USING THE NINJA® FOODI®
DIGITAL COOKING PROBE - CONT.
ENGLISH
Loading ...
Loading ...
Loading ...