Loading ...
Loading ...
Loading ...
Before You Begin English | 12 |
Before You Begin
Getting Started
Data Rating Label
Record the Model and Serial number on page 58 (see
“Data Rating Label”). The model and serial number must
be provided when calling Customer Support for assistance.
Enter this information on the Product Registration Form
included with this product then mail it to the indicated
address.
Oven Racks
Oven Rack Positions
The correct rack position depends on the recipe and the
cooking mode. The rack positions are numbered from
the bottom of the oven, like an elevator. Rack position 3
is the most frequently used position. Place rack(s) in the
proper position before turning on the oven.
Placing Full Access
®
Racks in the Oven
CAUTION
To help prevent burns, never remove or reposition the
oven racks while the oven is ON or while the oven is
cooling.
WARNING
Aluminum foil should NEVER be used to cover the oven
racks or to line the oven. It can damage the oven and
cause a fire hazard if heat is trapped under it.
Figure 4: Oven Rack Positions
2
1
3
4
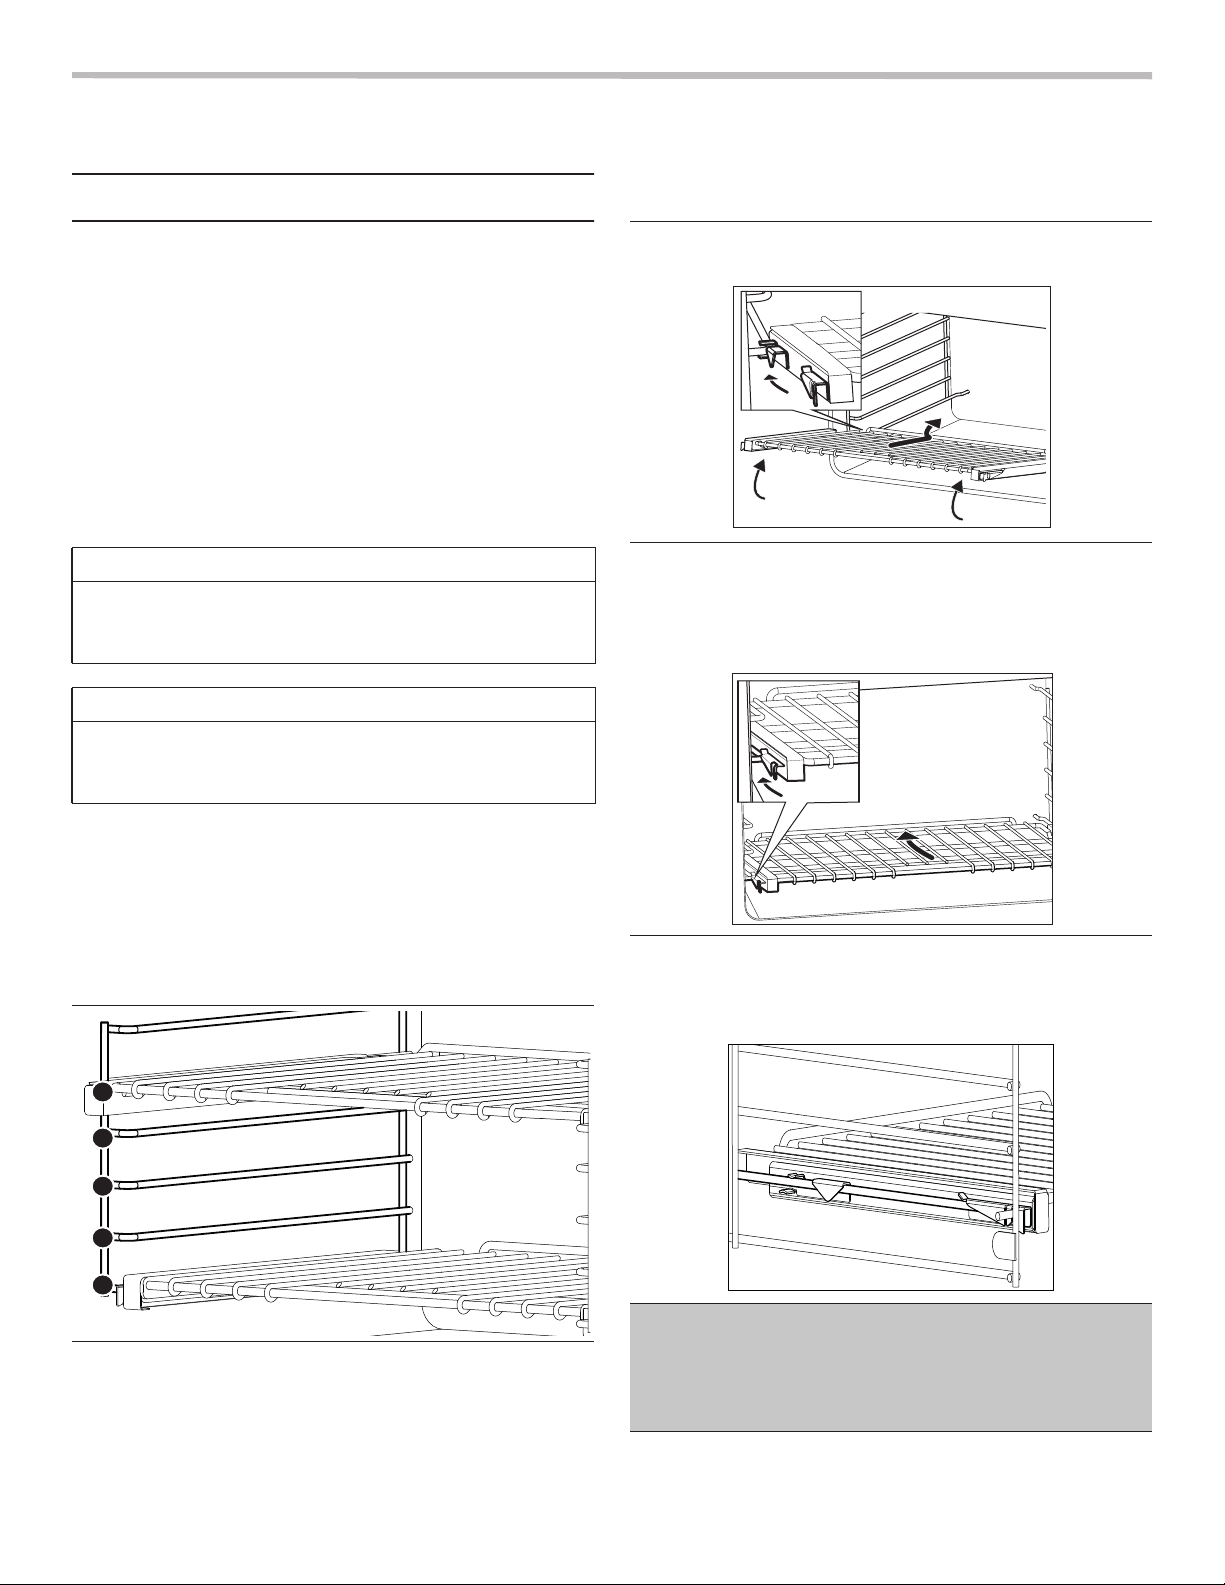
5
1. Hold the rack on a slight angle. Place the safety hooks
under the front of the rack guides.
2. Push the rack into the oven, lifting the rack stops over
the front of the rack guides.
3. Hold the rack straight.
4. Push the rack in until it is even with the front hooks.
5. Lift the rack up.
6. Push the rack in completely.
7. Engage the rack’s front hooks on the rack guides.
IMPORTANT: When placing the gliding rack in the oven,
make sure the front supports on the rack guides rest in the
large slots at the front corners of the rack. This is
necessary to keep the rack in the correct position while
fully inserted into the oven.
Figure 5: Inserting the Gliding Oven Rack
Loading ...
Loading ...
Loading ...