
Loading ...
Loading ...
Loading ...
Weil-McLain 94 Series 3 Water and steam boilers — for Gas, Light Oil, & Gas/Light Oil-Fired Burners
8 Part No. 550-110-275/1018
Assembling the block
Sections are top heavy. Unbolted sections may fall if not
supported, resulting in severe personal injury or death.
Prepare the back section first
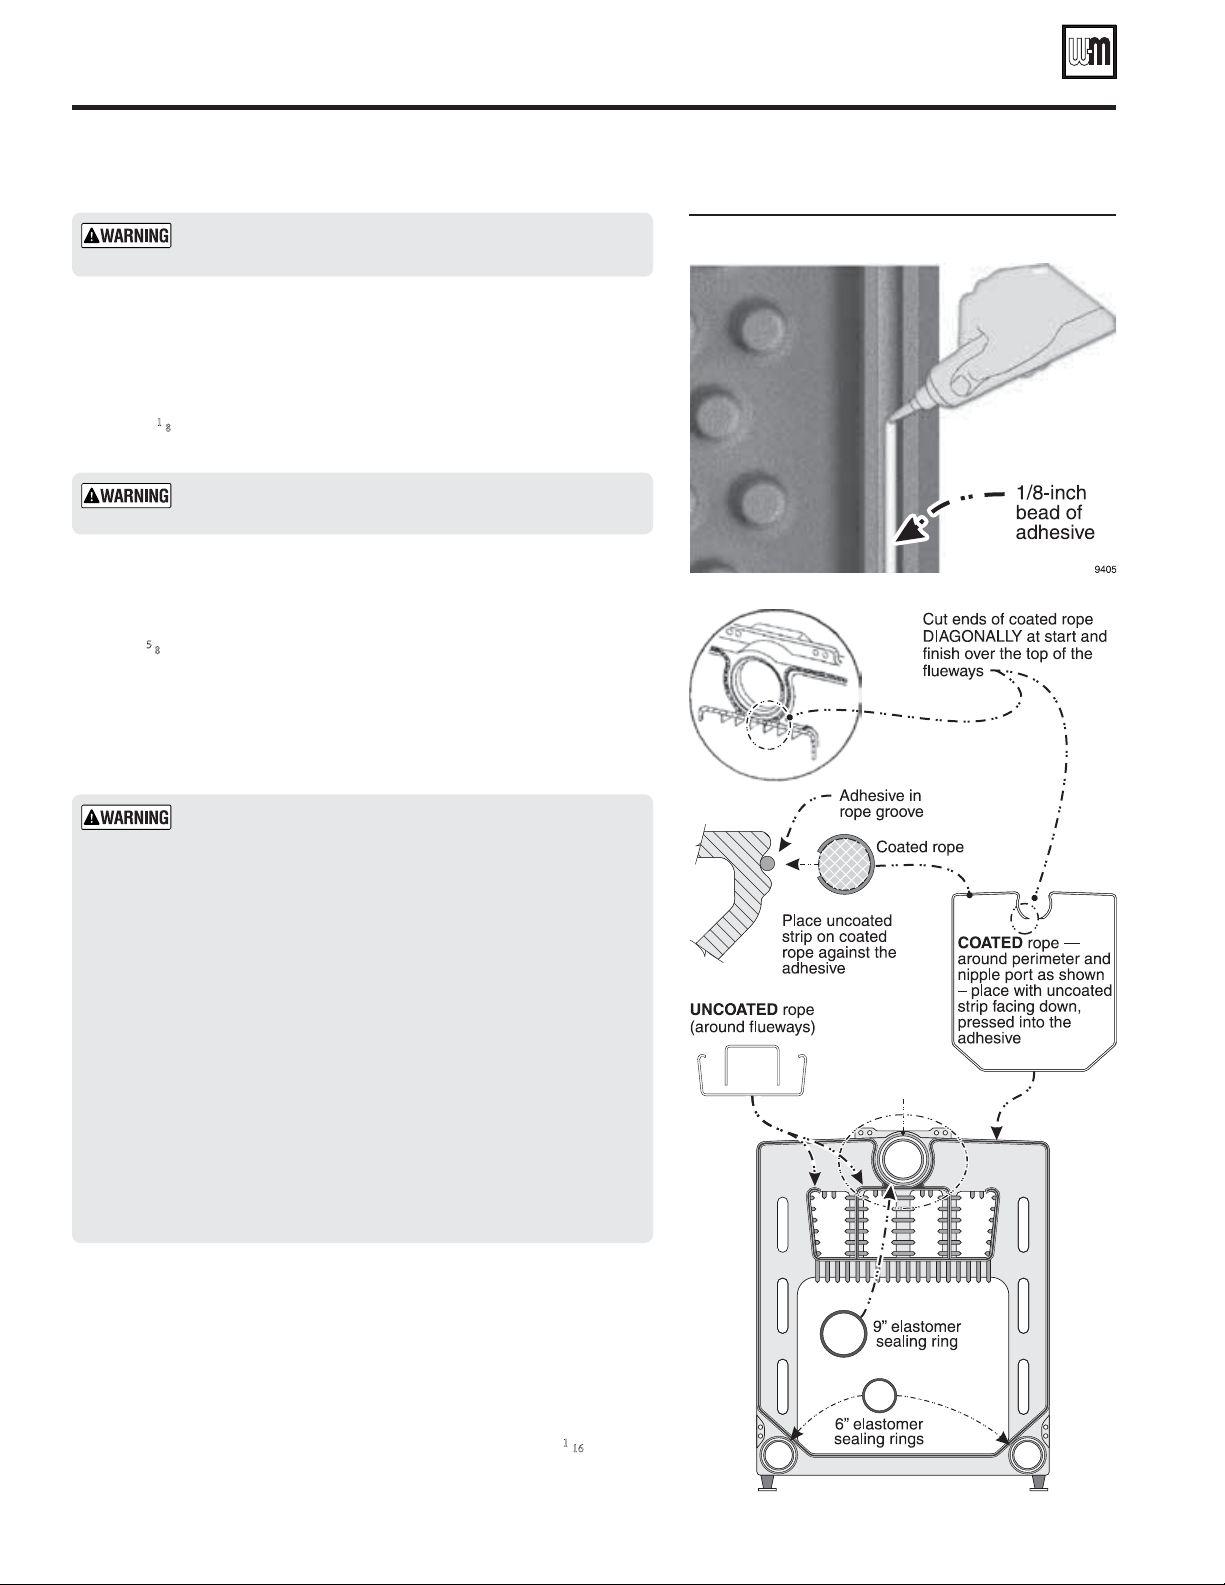
1. Place ¼" x 3" steel plates on the floor or foundation, spaced 51 inches
apart, as shown in Figure 1, page 4.
2. Apply
1
⁄8" continuous bead of sealing rope adhesive in sealing rope
grooves around section perimeter and around flueways — see Figure 6.
Do not get any adhesive on the machined port surfaces.
Place sealing rope in grooves
1. Place
5
⁄8" coated and uncoated sealing rope in the rope grooves as shown
in Figure 6.
2. See WARNING below — place coated rope and uncoated rope as
described.
3. Around curves, grasp rope at 1" intervals and push together.
Do not
stretch the rope
.
The boiler is supplied with TWO types of section sealing
rope — uncoated and coated with a narrow uncoated strip.
Use the uncoated rope only on the flueways as shown in
Figure 6.
Use the coated rope around the perimeter and around the
upper nipple port as shown in Figure 6. The uncoated side
of the rope must be pressed into the adhesive as shown in
order to obtain a proper adhesion.
DO NOT pre-cut rope for sections. Cut rope as each section
is placed.
A gas-tight seal must be maintained to prevent possibility
of flue gas leakage and carbon monoxide emissions, causing
severe personal injury or death.
Do not use petroleum-based cleaning or sealing com-
pounds in boiler system. Severe damage to system com-
ponents can result, causing substantial property damage.
Install nipple port sealing rings
1. Remove any grit from port machined surfaces with clean rag.
2. Place 9" and 6" sealing rings in appropriate port openings as shown in
Figure 6, page 8. If sealing ring slips out of groove, stretch ring gently
for several seconds, then reposition in groove.
3. Apply a continuous bead of silicone sealant no larger than
1
⁄16" around
entire outside edge of the outer machined surface of the port. See Fig-
ure 7. Do not apply silicone sealant on, next to or under sealing ring.
Figure 6 Sealing rope installation
Loading ...
Loading ...
Loading ...