Loading ...
Loading ...
Loading ...
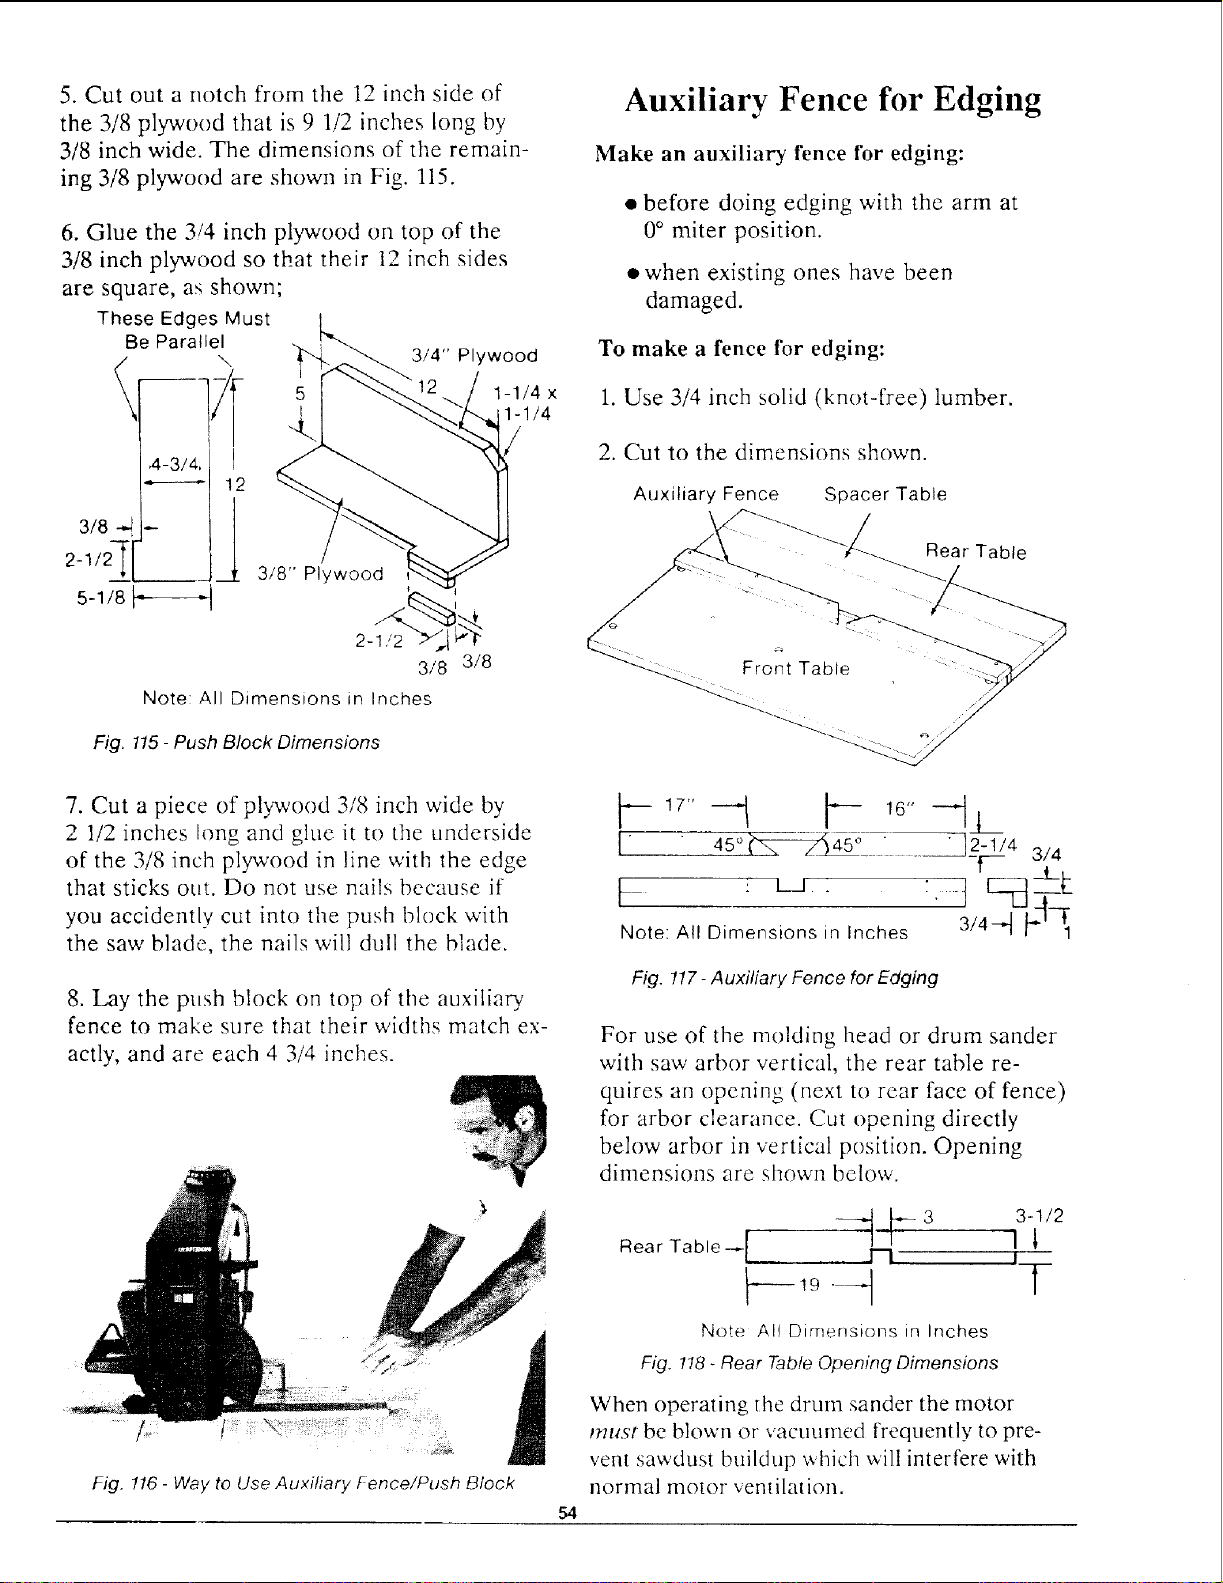
5. Cut out a notch from the 12 inch side of
the 3/8 plywood that is 9 1/2 inches Long by
3/8 inch wide. The dimensions of the remain-
ing 3/8 plywood are shown in Fig. 115.
6. Glue the 3,'4 inch plywood on top of the
3/8 inch plywood so that their 12 inch sides
are square, as shown;
These Edges Must
Be Parallel
,4 L I
2-1/2 7
5-1/8
3/4" Plywood
1-1/4 x
1-!/4
3/8" Plywood
2-1/2
3/8 3/8
Note: All Dimensions in Inches
Fig. 115- Push Block Dimensions
Auxiliary Fence for Edging
Make an auxiliary fence for edging:
• before doing edging with the arm at
0° miter position.
• when existing ones have been
damaged.
To make a fence lbr edging:
1. Use 3/4 inch solid (knot-free) lumber.
2. Cut to the dimensions shown.
Auxiliary Fence Spacer Table
Rear Table
7. Cut a piece of plywood 3/8 inch wide by
2 1/2 inches long and glue it to the underside
of the 3/8 inch plywood in line with the edge
that sticks out. Do not use nails bccause if
you accidently cut into the push block w'ith
the saw blade, the nails will dull the blade.
8. Lay the push block on top of the auxiliary.
fence to make sure that their widths match ex-
actly, and are each 4 3/4 inches.
Fig. 116 - Way to Use Auxiliary Fence/Push Block
_--- 17" --'--_ _o 16" _- JL
{" 45°_-: ....._-_2t'7"_4 3/4
1__[ _L
Note: All Dimensions in Inches 3/4-"t ?-'_1
Fig. !17- Auxiliary Fence for Edging
54
For use of the molding head or drum sander
with saw arbor vertical, the rear table re-
quires an opening (next to rear face of fence)
for arbor clearance. Cut opening directly
below arbor in vertical position. Opening
dimensions are shown below.
Rear Table _[, _.db 3 "1[3-1/2
I
1--19--t l
Note AH Dirnensionsin Inches
Fig. 118 - Rear Table Opening Dimensions
When operating the drum sander the motor
must be blown or vacuumed frequently to pre-
vent sawdust buildup which will interfere with
normal motor ventilation.
Loading ...
Loading ...
Loading ...