Loading ...
Loading ...
Loading ...
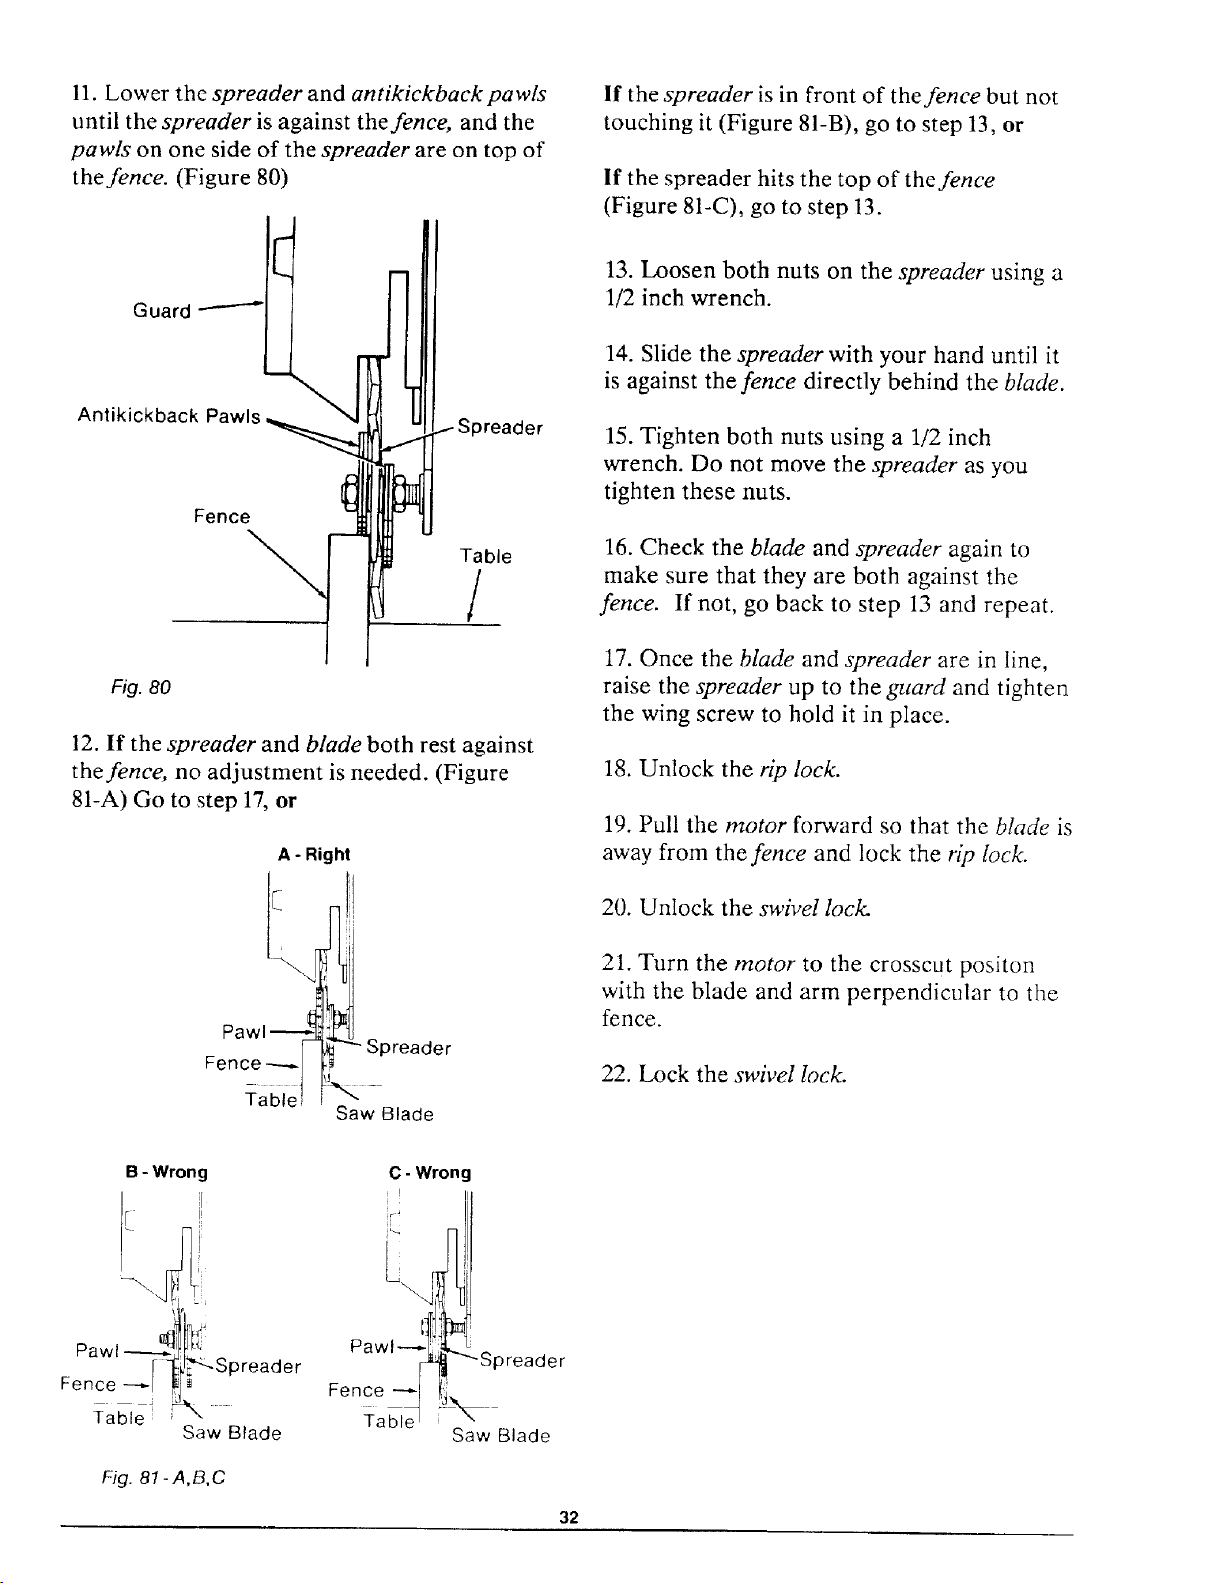
11. Lower the spreader and antikickbackpawls
until the spreader is against the fence, and the
pawls on one side of the spreader are on top of
the fence. (Figure 80)
4
An
Fence_
Table
/
)reader
Fig. 80
12. If the spreader and blade both rest against
the fence, no adjustment is needed. (Figure
81-A) Go to step 17, or
A - Right
Pawl ----_ _
Fence ---_F
,_ Spreader
Saw Blade
If the spreader is in front of the fence but not
touching it (Figure 81-B), go to step 13, or
If the spreader hits the top of the fence
(Figure 81-C), go to step 13.
13. Loosen both nuts on the spreader using a
1/2 inch wrench.
14. Slide the spreader with your hand until it
is against the fence directly behind the blade.
15. Tighten both nuts using a 1/2 inch
wrench. Do not move the spreader as you
tighten these nuts.
16. Check the blade and spreader again to
make sure that they are both against the
fence. If not, go back to step 13 and repeat.
17. Once the blade and spreader are in line,
raise the spreader up to the guard and tighten
the wing screw to hold it in place.
18. Unlock the rip lock.
19. Pull the motor forward so that the blade is
away from the fence and lock the @ lock.
20. Unlock the swivel lock.
21. Turn the motor to the crosscut positon
with the blade and arm perpendicular to the
fence.
22. Lock the swivel lock.
B - Wrong
r !
" [
Pawl ----_ _'
[ _l_Spreader
Fence -----/ _I_
Table _
Saw Blade
Fig. 81- A,B, C
Fence
Table
C - Wrong
!
L.
)reader
Saw Blade
32
Loading ...
Loading ...
Loading ...