Loading ...
Loading ...
Loading ...
4. Turn the blade with your hand several
times and check to see if the square is flush
with the blade.
5. If the square is flush with the blade after
each rotation, no change is needed. (Figure 65)
Go to the next section, or
If there is a gap between the square and the
blade after any rotation, go to step 6.
(Figure 65)
L
Fence
l
Fence Fence
Square _ 3 _] •
Wrong l_ Wrong
Fig. 65
6. Unlock the swivel lock.
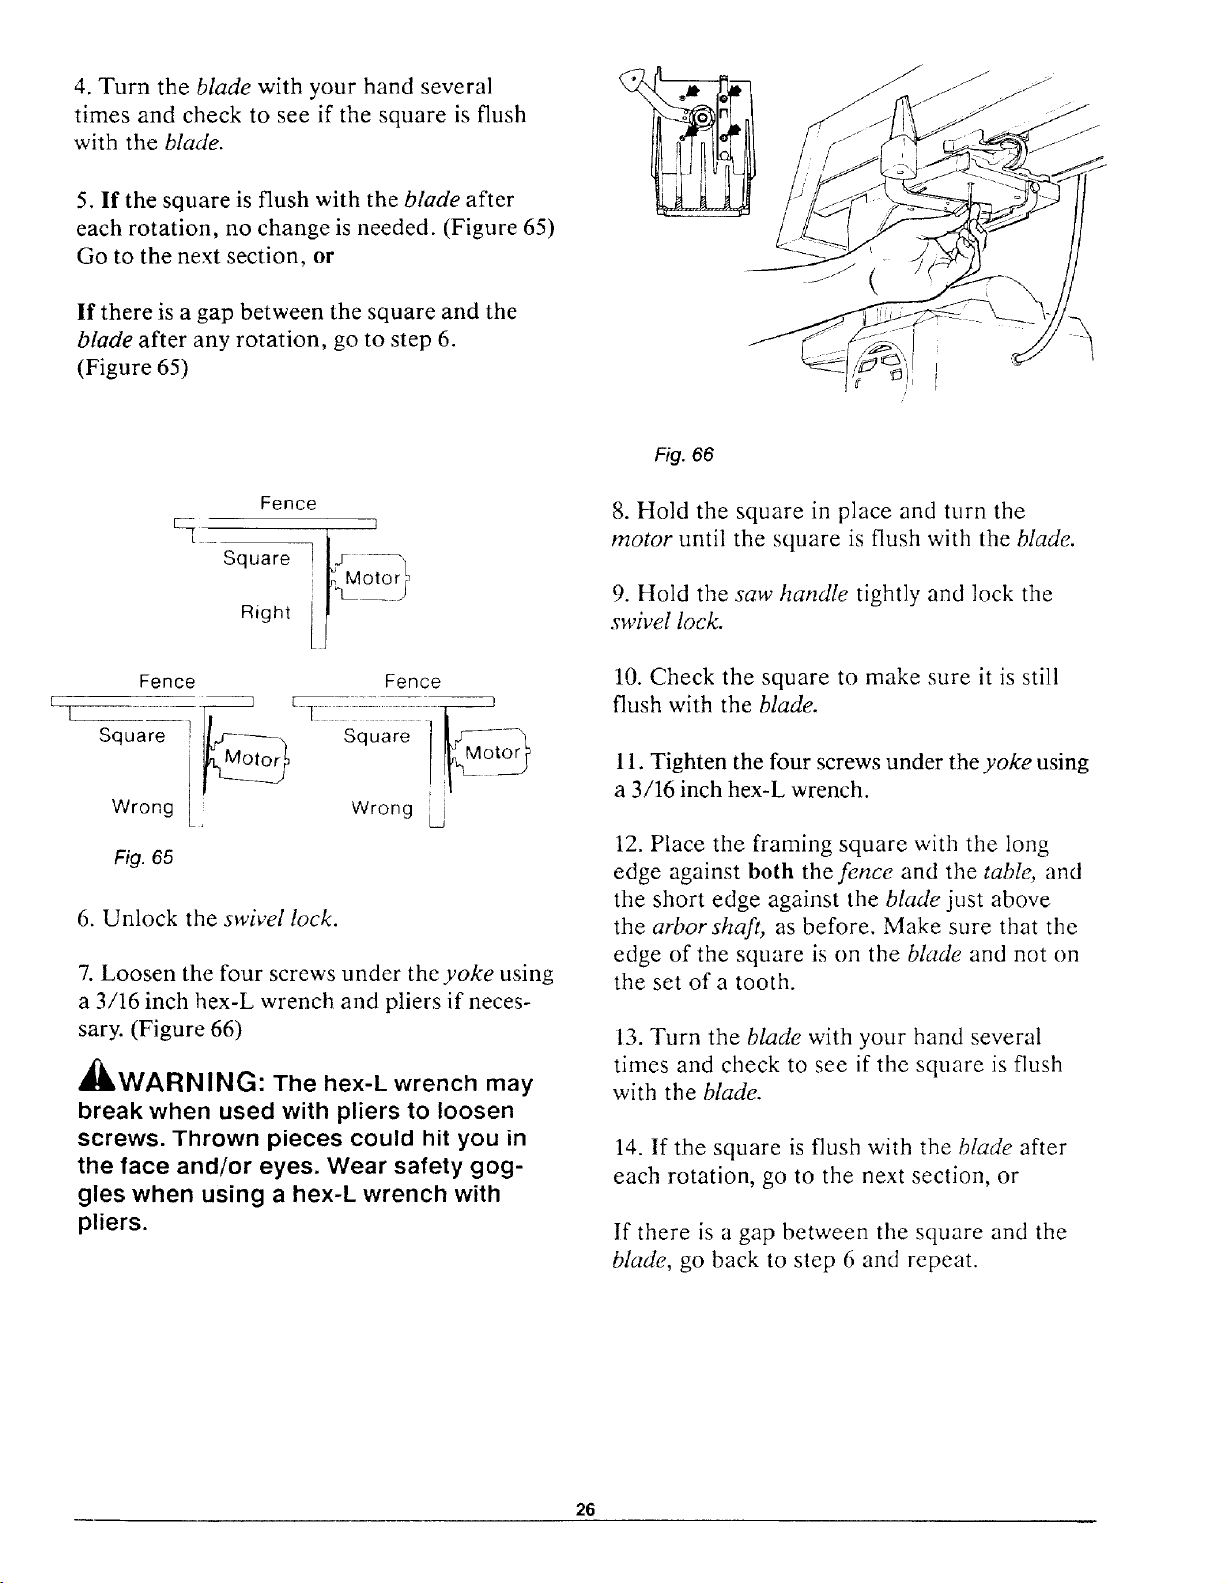
7. Loosen the four screws under the yoke using
a 3/16 inch hex-L wrench and pliers if neces-
sary. (Figure 66)
_,WARNING: The hex-k wrench may
break when used with pliers to loosen
screws. Thrown pieces could hit you in
the face and/or eyes. Wear safety gog-
gles when using a hex-L wrench with
pliers.
Fig. 66
8. Hold the square in place and turn the
motor until the square is flush with the blade.
9. Hold the saw handle tightly and lock the
swivel lock.
10. Check the square to make sure it is still
flush with the blade.
11. Tighten the four screws under theyoke using
a 3/16 inch hex-L wrench.
12. Place the framing square with the long
edge against both the fence and the table, and
the short edge against the blade just above
the arbor shaft, as before. Make sure that the
edge of the square is on the blade and not on
the set of a tooth.
13. Turn the blade with your hand several
times and check to see if the square is flush
with the blade.
14. If the square is flush with the blade after
each rotation, go to the next section, or
If there is a gap between the square and the
blade, go back to step 6 and repeat.
26
Loading ...
Loading ...
Loading ...