Loading ...
Loading ...
Loading ...
23. Turn the blade w'ith your hand several
times and check to see if the square is flush
with the blade.
24. I1"the square is flush with the blade, go to
the next. ccUon, or
If there is a gap between the square and the
blade, go back to step 6 and repeat.
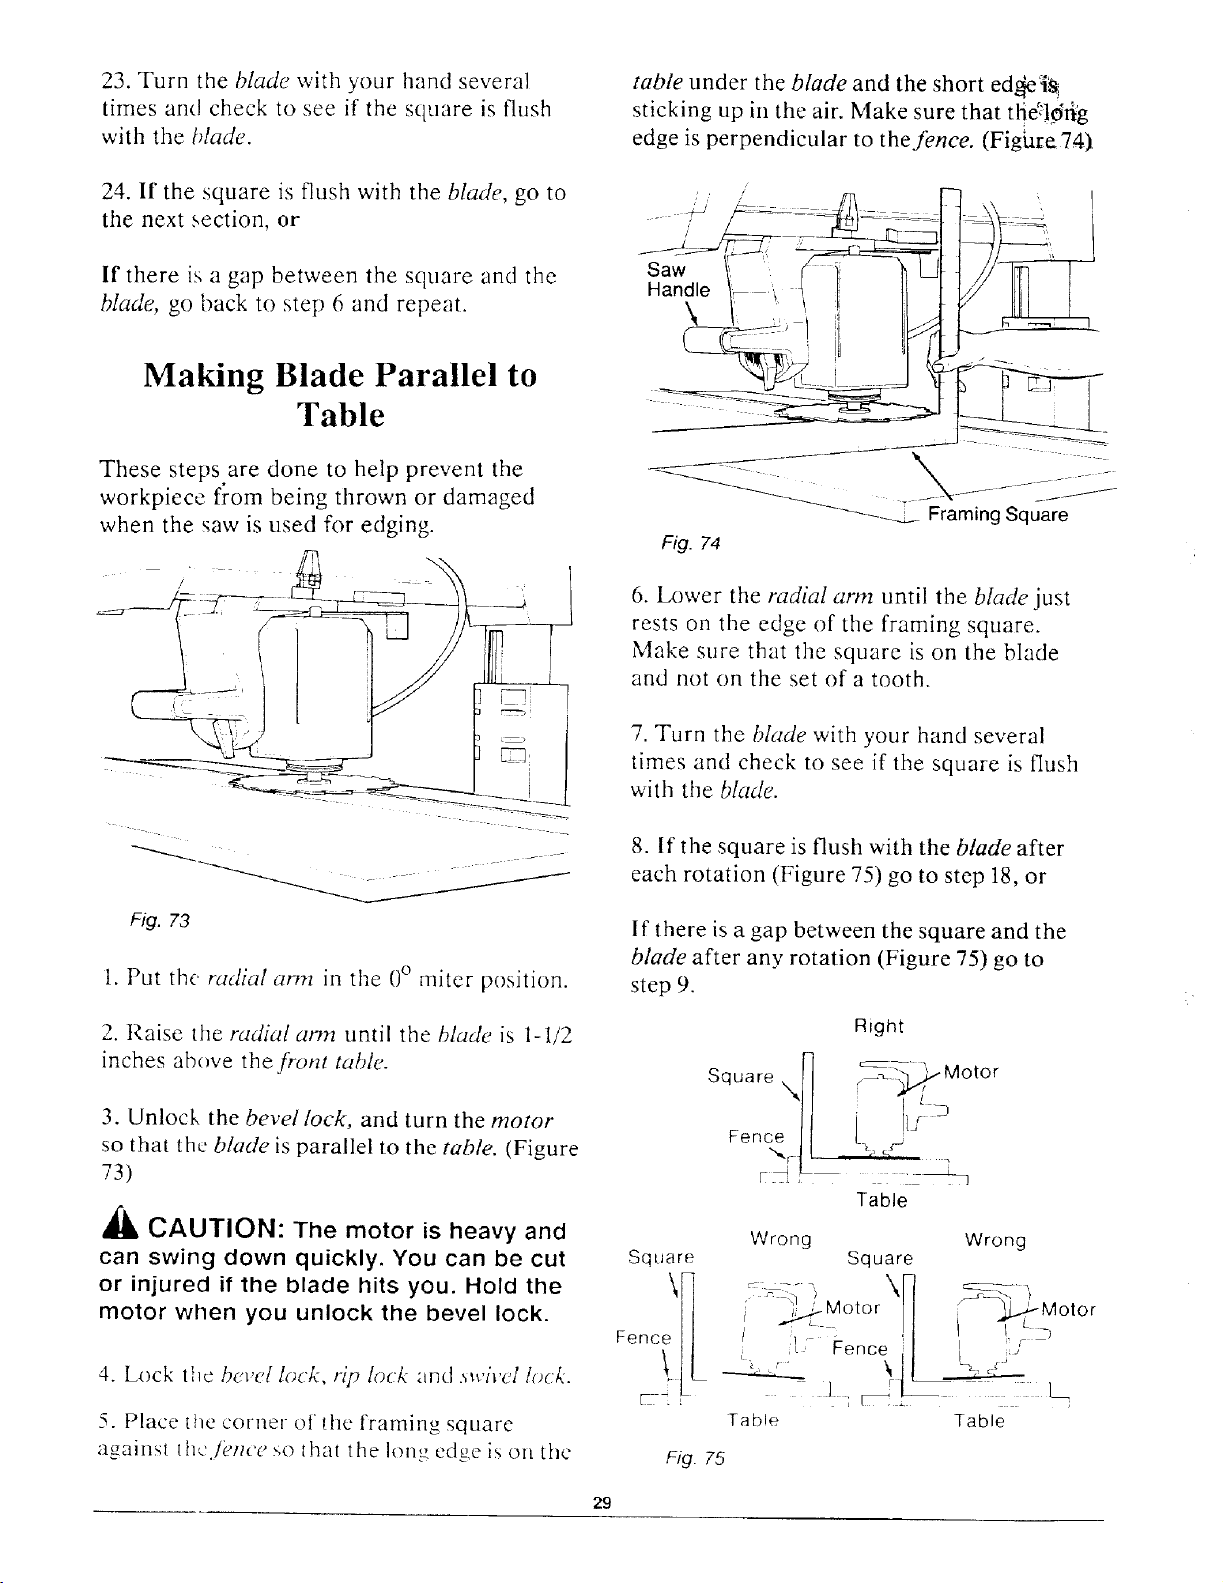
table under the blade and the short ed_e_i_
sticking up in the air. Make sure that tl_!6fig
edge is perpendicular to the fence. (Fighre 74)
/
Saw
Handle
\
Making Blade Parallel to
Table
These steps.are done to help prevent the
workpiece from being thrown or damaged
when the saw is used for edging.
Fig. 74
6. Lower the radial arm until the blade just
rests on the edge of the framing square.
Make sure that the square is on the blade
and not on the set of a tooth.
1. Put the radial arm in the 0° miter position.
2. Raise the radial arm until the blade is 1-1/2
inches above the front table.
3. Unlock the bevel lock, and turn the motor
so that the blade is parallel to the table. (Figure
/_)
_1_ CAUTION: The motor is heavy and
can swing down quickly. You can be cut
or injured if the blade hits you. Hold the
motor when you unlock the bevel lock.
4. Lock the bc'v_[" lock, rip lock and _wivel l<)ck.
5. Place the corner of d_e framing square
against lh_Libtzce so that the long edge is on the
7. Turn the blade with },our hand several
times and check to see if the square is flush
with the blade.
8. If the square is flush with the blade after
each rotation (Figure 75) go to step 18, or
If there is a gap between the square and the
blade after any rotation (Figure 75) go to
step 9.
Right
Fence
_r
]
Table
Wrong Wrong
Square Square
i'/i L ,i .Motorc l , _Motor!c-)
Fenc ' [" " i _
,- Fence ,
Table Table
Fig 75
29
Loading ...
Loading ...
Loading ...