Loading ...
Loading ...
Loading ...
Auxiliary Fence and Push
Block
An auxiliary fence must be used if the blade
is positioned between 1/2 inch and 2 inches
from the fence during ripping. An auxiliary
fence must always be used with a push block.
Their purpose is to keep your hands away
from the saw blade. They are also needed
when you use the molding head.
Make an auxiliary fence when:
• the blade is to be placed 2 inches or
less from the fence;
• an existing auxiliary fence is not the
same width all along its length;
• the existing auxiliary fence has been
damaged by blade contact.
To make auxiliary fence:
1. Use one piece of 3/8 inch plywood and two
pieces of 3/4 inch plywood.
2. Cut the 3/8 inch plywood to 40 inches
long by 5 1/2 inches wide.
3. Cut one piece of 3/4 inch plywood to 40 in-
ches long by 3 5/8 inches wide.
4. Cut other piece of 3/4 inch plywood to 40
inches long by 2 1/4 inches wide.
5. Glue the two 3/4 inch plywood pieces
together so that they line up square (flush)
on an edge.
6. Glue the 3/8 inch plywood piece at right
angle to and flush against the 2 1/4 inch wide
3/4 inch plywood.
7. Reinforce with nails.
............ i I
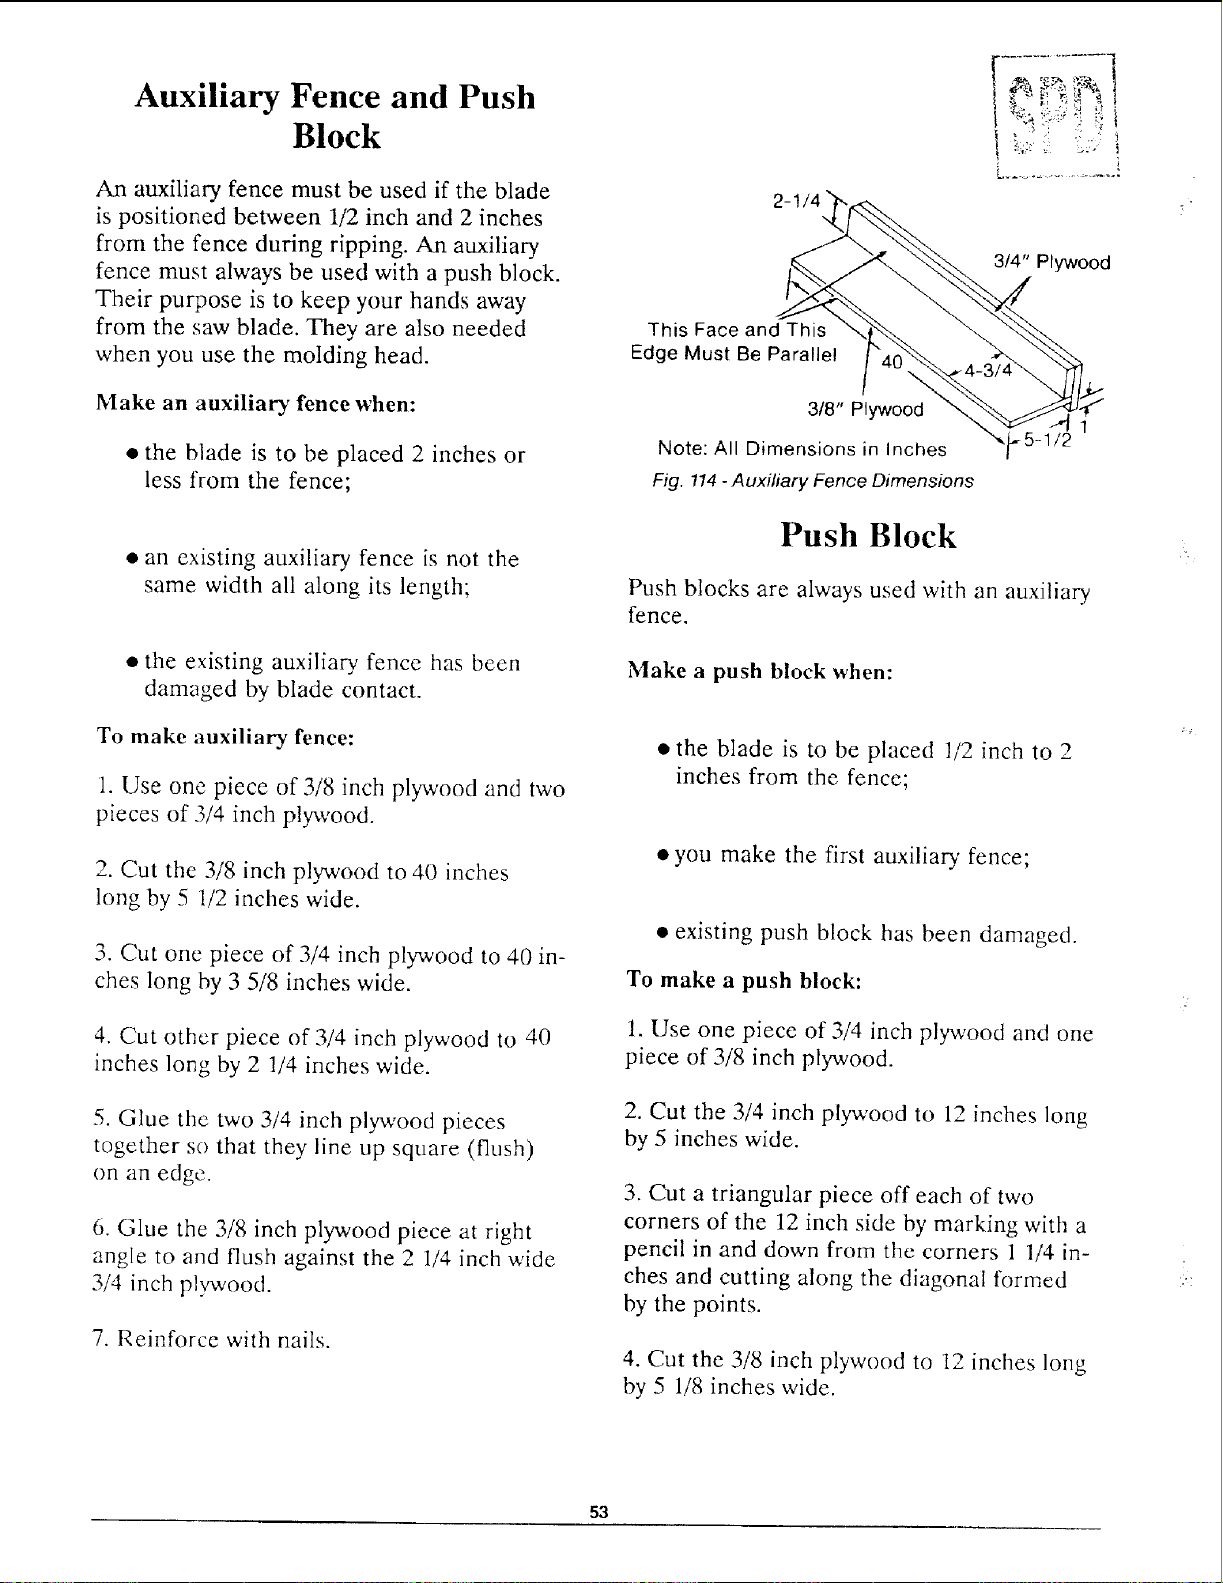
3/4" Plywood
This Face and This
Edge Must Be Parallel
3/8" Plywood
Note: All Dimensions in Inches
Fig. 114 - Auxiliary Fence Dimensions
Push Block
Push blocks are always used with an auxiliary
fence.
Make a push block when:
• the blade is to be placed 1/2 inch to 2
inches from the fence;
• you make the first auxiliary fence;
• existing push block has been damaged.
To make a push block:
1. Use one piece of 3/4 inch plywood and one
piece of 3/8 inch plywood.
2. Cut the 3/4 inch plywood to 12 inches long
by 5 inches wide.
3. Cut a triangular piece off each of two
corners of the 12 inch side by marking with a
pencil in and down from the corners 1 1/4 in-
ches and cutting along the diagonal formed
by the points.
4. Cut the 3/8 inch plywood to 12 inches long
by 5 1/8 inches wide.
53
Loading ...
Loading ...
Loading ...