Loading ...
Loading ...
Loading ...
i i
+
Alignment of the Blade
ALIGNMENT OF THE BLADE IS THE
MOST IMPORTANT STEP IN
ASSEMBLING YOUR RADIAL ARM
SAW.
The blade of your radial arm saw must be
aligned properly for two reasons: to make
cuts accurate, and to prevent binding of the
blade and workpiece which can cause jams or
thrown workpieces.
These adjustments must be done in order,
before using your saw for the first time. If
they are not done in order the saw will not
cut accurately. If you miss an adjustment, you
must go back to the adjustment you missed
and repeat all steps from that point on.
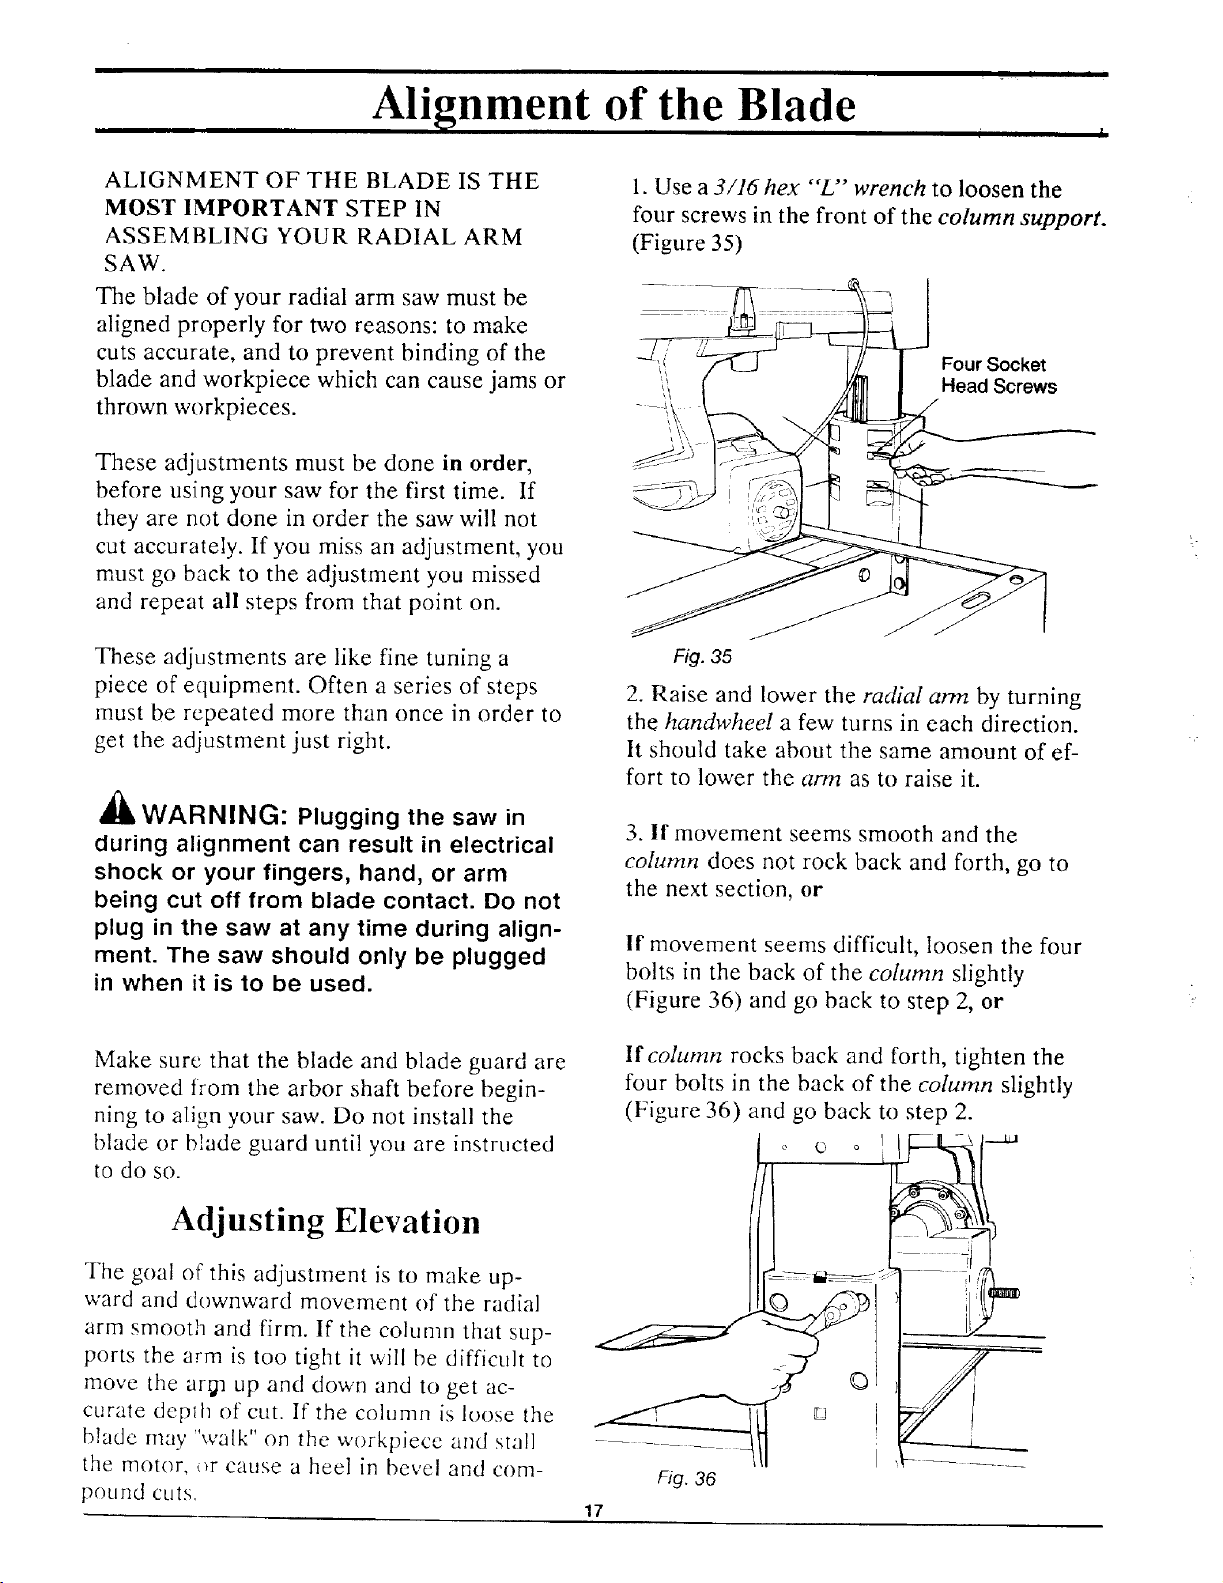
1. Use a 3/16 hex "'L'" wrench to loosen the
four screws in the front of the column support.
(Figure 35)
Four Socket
, Head Screws
These adjustments are like fine tuning a
piece of equipment. Often a series of steps
must be repeated more than once in order to
get the adjustment just right.
,WARNING: Plugging the saw in
during alignment can result in electrical
shock or your fingers, hand, or arm
being cut off from blade contact. Do not
plug in the saw at any time during align-
ment. The saw should only be plugged
in when it is to be used.
Fig. 35
2. Raise and lower the radial arm by turning
the handwhee! a few turns in each direction.
tt should take about the same amount of ef-
fort to lower the arm as to raise it.
3. If movement seems smooth and the
column does not rock back and forth, go to
the next section, or
If movement seems difficult, loosen the four
bolts in the back of the column slightly
(Figure 36) and go back to step 2, or
Make sure that the blade and blade guard are
removed from the arbor shaft before begin-
ning to align your saw. Do not install the
blade or blade guard until you are instructed
to do so.
Adjusting Elevation
The goal or" this adjustment is to make up-
ward and downward movement of the radial
arm smooth and firm. If the column that sup-
ports the arm is too tight it will be difficult to
move the ar_ up and down and to get ac-
curate deplh of cut. If the column is loose the
blade may "walk" on the workpiece and stall
the motor, or cause a heel in bevel and com-
pound cuts.
If column rocks back and forth, tighten the
four bolts in the back of the column slightly
(Figure 36) and go back to step 2.
o o I "
Fig. 36
17
Loading ...
Loading ...
Loading ...