Loading ...
Loading ...
Loading ...
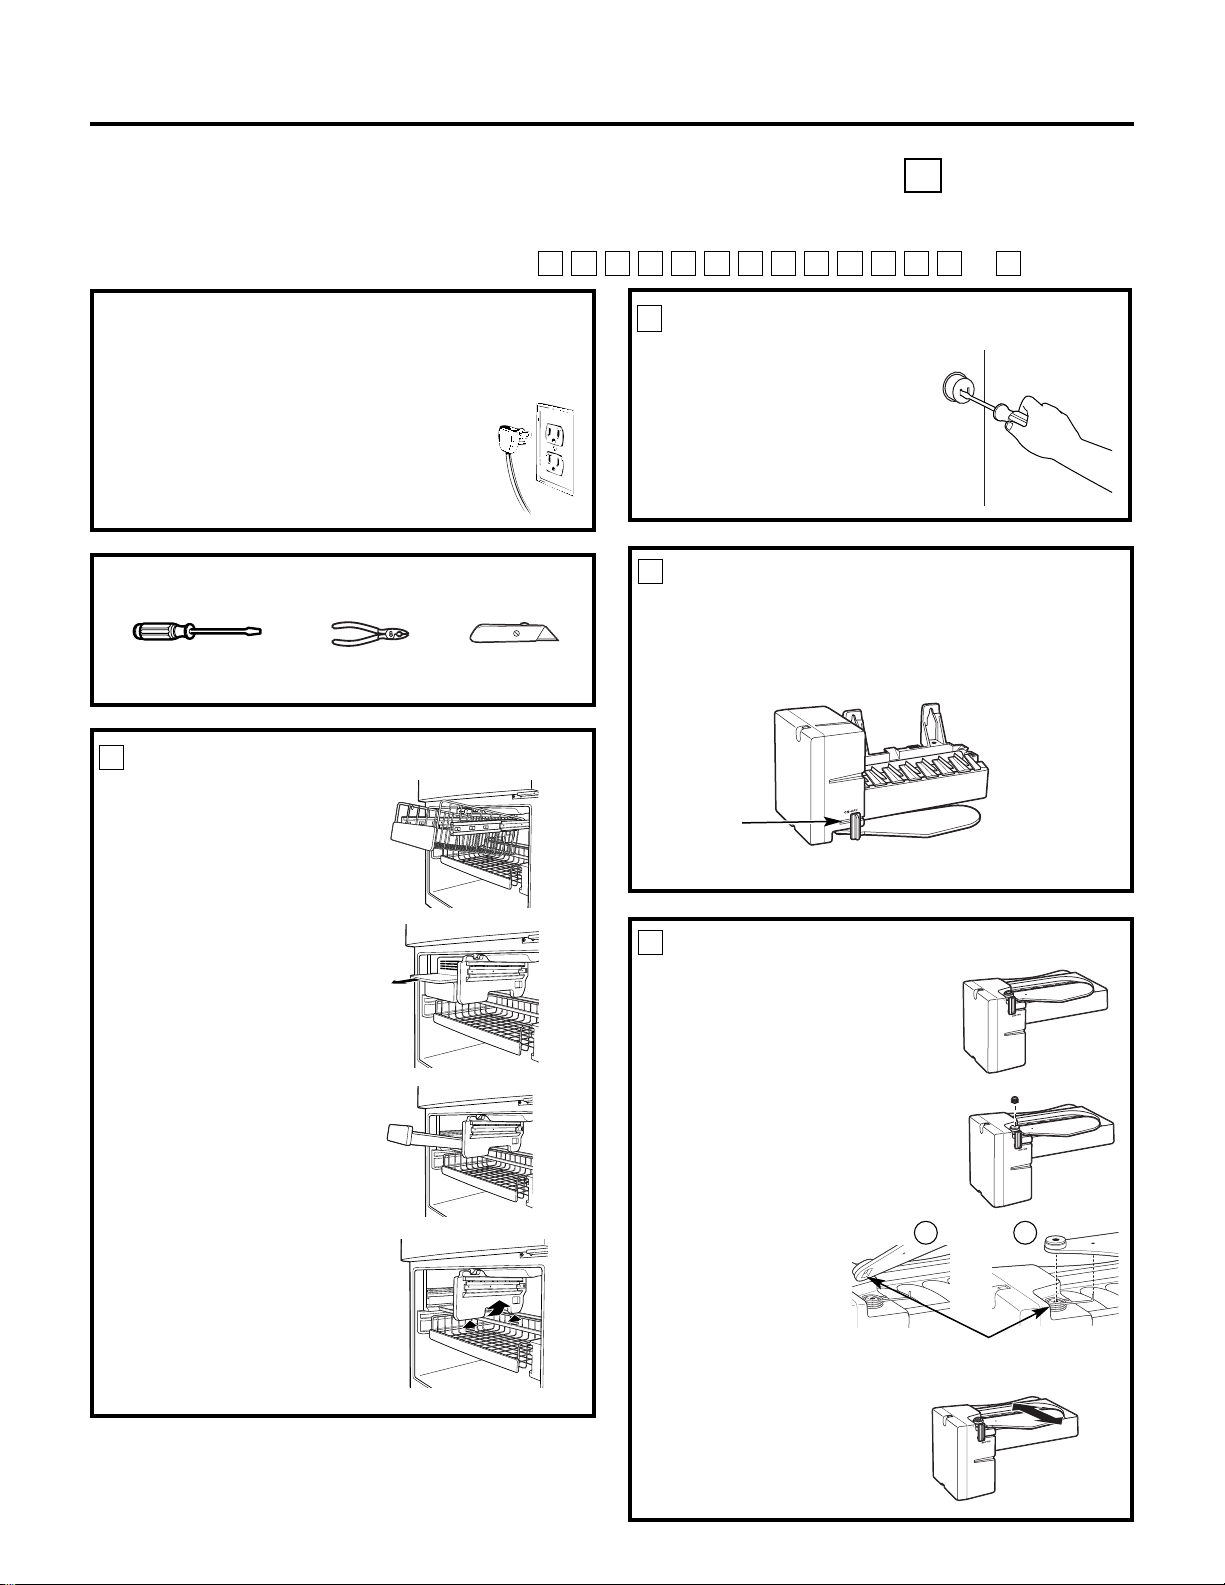
REPLACE FEELER ARM
• Turn over icemaker.
• Remove Phillips head screw.
Hold feeler arm (to keep it
from rotating) while loosening
the screw.
• Remove the feeler arm by
lifting it straight up.
Note: Do not remove the spring.
• Insert end of coil spring into
hole in feeler arm (curved)
(28) and position
keyed opening
onto shaft.
• Hold feeler arm
while tightening
Phillips head screw.
• Verify free range
of motion of
feeler arm.
Installation Instructions
BEFORE YOU BEGIN
Read each step thoroughly before proceeding.
•
CAUTION – Unplug the
Refrigerator. To eliminate the danger
of electric shock during installation,
you must unplug the refrigerator
from its electrical outlet.
Flat blade and Phillips
screwdrivers
Pliers
TOOLS YOU WILL NEED
Sharp knife
3
SET POWER SWITCH TO OFF
Set the icemaker power switch to OFF. Leave
the power switch in the OFF position until the
refrigerator is connected to the water supply to
prevent premature operation.
PREPARE FOR INSTALLATION
• Remove the storage
basket (on some models)
by pulling it out to the
stop position and lifting
it up and out.
Note: After removing
the basket, push the
extension arms back
into the freezer
compartment.
• Remove the chiller shelf
(on some models) by
pulling it straight out.
• Remove the ice bucket
by pulling it out and
lifting it up and out.
• Remove the center
vertical shelf support
(on some models) by
lifting it and rotating
its bottom to the right.
1
ICEMAKER INSTALLATION INSTRUCTIONS T
Are these the right instructions for your model? Follow the Installation Instructions indicated by
the label on the back of the refrigerator— or
TSRQPNMLKJHGFC
REMOVE THE OUTLET COVER
• Remove the outlet cover
with a flat-blade screwdriver.
2
4
Keyed Shaft
and Feeler Arm
28
28
Power
Switch
(Appearance may vary)
62
Loading ...
Loading ...
Loading ...