Loading ...
Loading ...
Loading ...
Installation Instructions
ATTACH THE PLASTIC WATER LINE
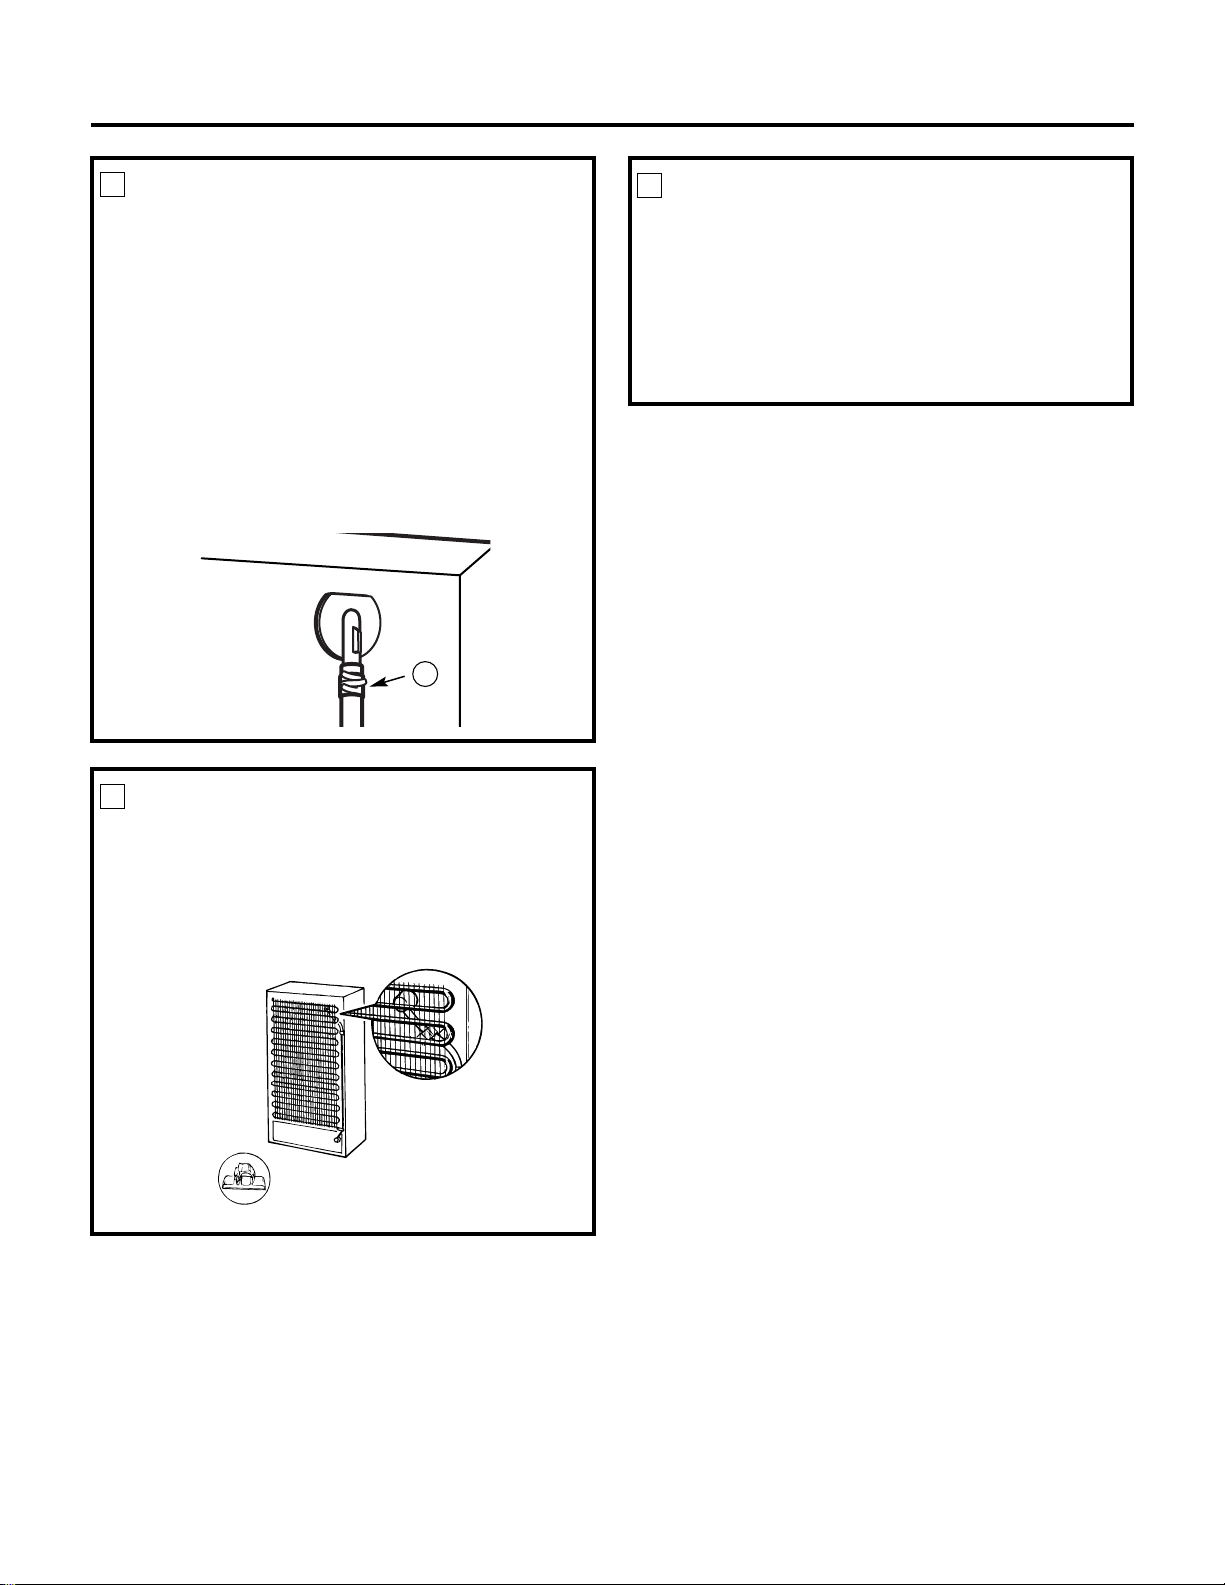
Fasten the plastic water line to the back of the
cabinet with adhesive-backed fasteners (5), spacing
the fasteners as shown to take up the slack in the
line. (It may be necessary to remove the screw from
the top right condenser mounting clip for better
access to the water tube inlet).
4
Adhesive-backed fasteners
for plastic water line
WATER VALVE INSTALLED
Refer to the Water Line Installation Instructions for
connection to the home water supply. After water
line installation is completed, set the icemaker
power switch to ON.
The icemaking cycle will not begin until the
icemaker and freezer compartment reach
operating temperature, then icemaking will
begin automatically.
5
25
CONNECT THE WATER LINE
• Squeeze the ends of the hose clamp (3) from
the kit with pliers and slide the clamp over the
water tube inlet.
• While still squeezing the clamp, insert the
plastic water line into the inlet as far as it will
go (approximately 1″ [25 mm]).
• Then slide the clamp downward to capture the
plastic water line in place.
• Make sure the fill tube is aimed down.
• If the condenser mounting screw was removed,
secure the condenser to the refrigerator by
replacing the mounting clip and screw.
DO NOT OVER-TIGHTEN THE SCREW.
3
Water tube
inlet
3
Loading ...
Loading ...
Loading ...