Loading ...
Loading ...
Loading ...
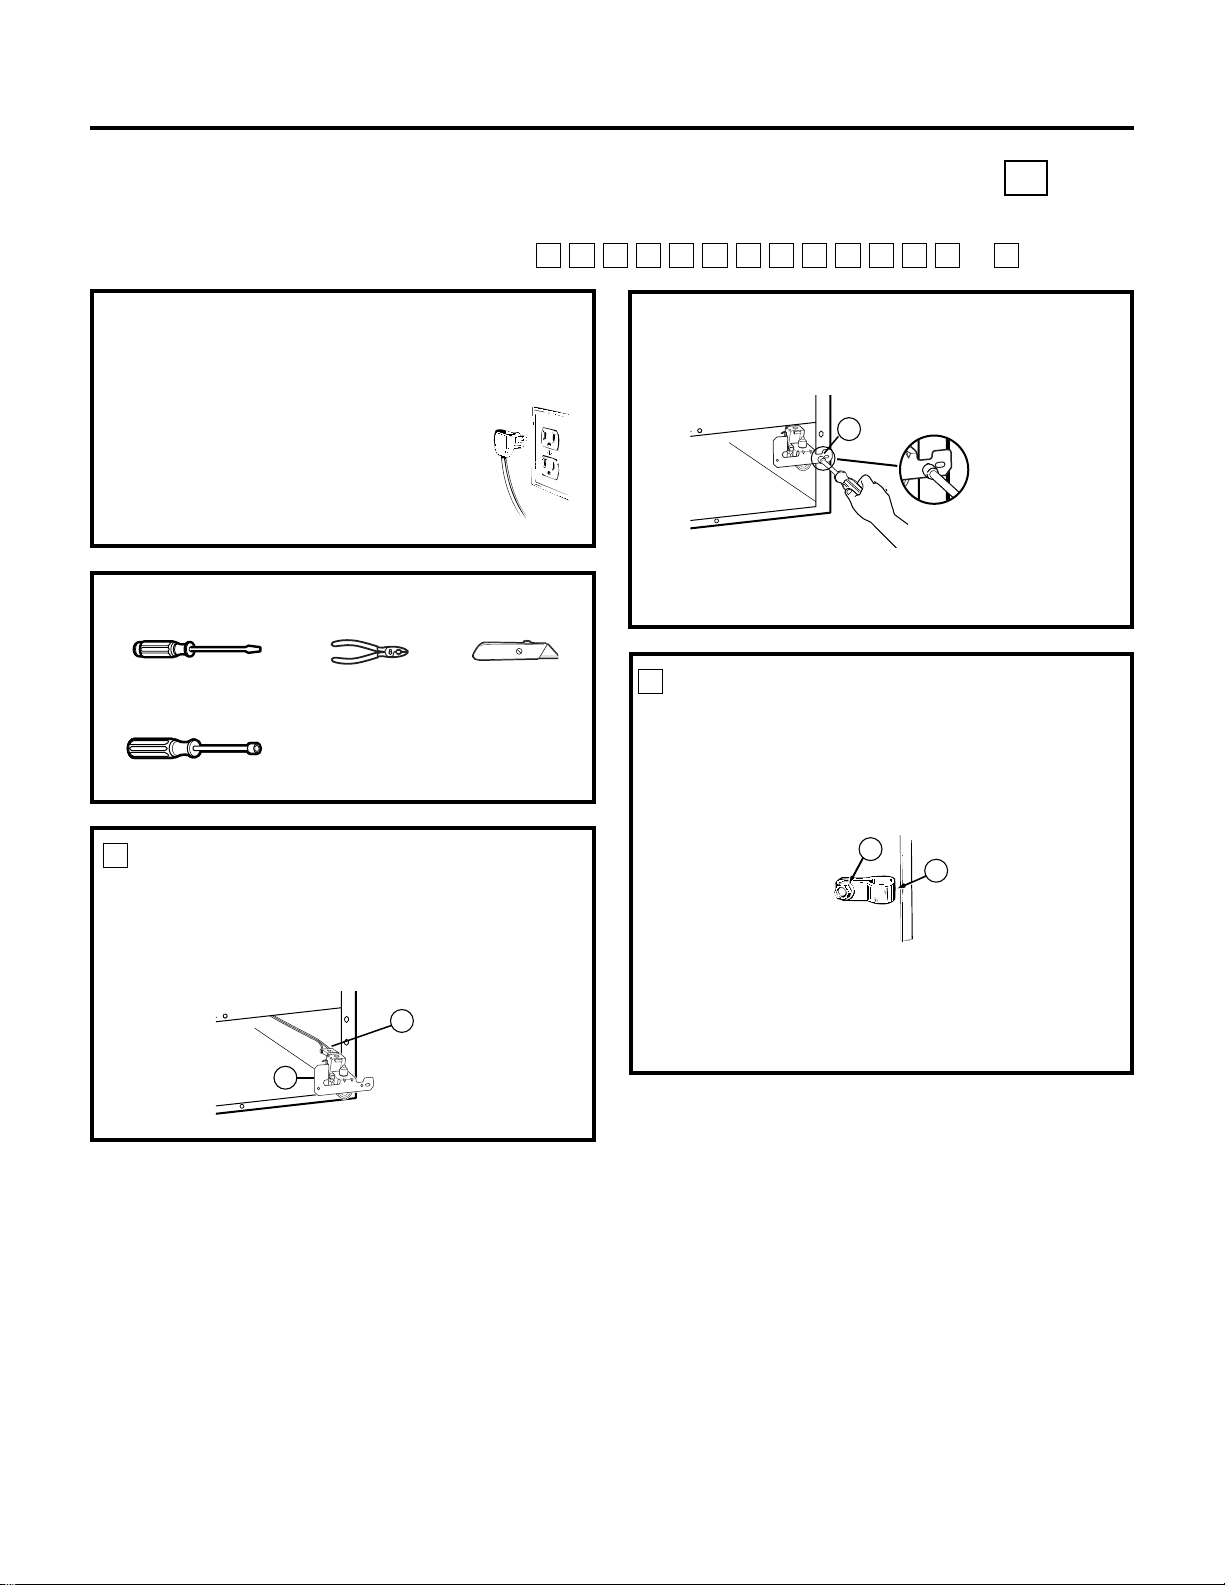
• Fasten the water valve to the cabinet edge hole
with the hex-head screw (13) from the kit.
DO NOT DRILL ANY ADDITIONAL HOLES.
• Check the plastic water line nut on the bottom
of the water valve to be sure it is hand tight.
DO NOT USE TOOLS.
52
Installation Instructions
BEFORE YOU BEGIN
Read each step thoroughly before proceeding.
•
CAUTION – Unplug the
Refrigerator. To eliminate the danger
of electric shock during installation,
you must unplug the refrigerator
from its electrical outlet.
WATER VALVE ASSEMBLY INSTALLATION INSTRUCTIONS Q
Are these the right instructions for your model? Follow the Installation Instructions indicated by
the label on the back of the refrigerator— or
TSRQPNMLKJHGFC
Flat blade and Phillips
screwdrivers
Pliers
TOOLS YOU WILL NEED
Sharp knife
1/4″ and 5/16″ Nutdrivers
ATTACH THE WATER VALVE
• Locate the female connector plug (C). Plug the
female connector (C) onto the male terminals on
the water valve (4). Either wire can go on either
terminal.
1
INSTALL WATER LINE CLAMP
• Attach the water line clamp (strain relief) (8) from
the kit to the refrigerator. With the clamp directly
in line with the water valve, drive the screw (7)
from the kit through the clamp (8) at the indent
into the back of the cabinet.
• The metal clamp is for the house water line (see
Water Line Installation Instructions). It is not to be
used for the tubing from the water valve up to the
icemaker.
2
7
8
13
C
4
Loading ...
Loading ...
Loading ...