Loading ...
Loading ...
Loading ...
Installation Instructions
WATER VALVE INSTALLED
Refer to the Water Line Installation Instructions for
connection to the home water supply. After water
line installation is completed, set the icemaker
power switch to ON.
Even when the icemaker power switch is in the
ON position, power to the icemaker will be
interrupted when the freezer door/drawer is open.
This prevents ice ejecting from the icemaker from
missing the ice bucket and dropping into the back
of the freezer. To make sure the icemaker is working
properly, press the freezer light switch located on
the upper right side of the freezer compartment.
The power light on the icemaker will come on.
Note: After installing the icemaker, do not open the
door/drawer for approximately 4 hours. This will
allow the freezer to reach the correct operating
temperature for making ice, and will prevent water
from spilling out of the icemaker mold.
7
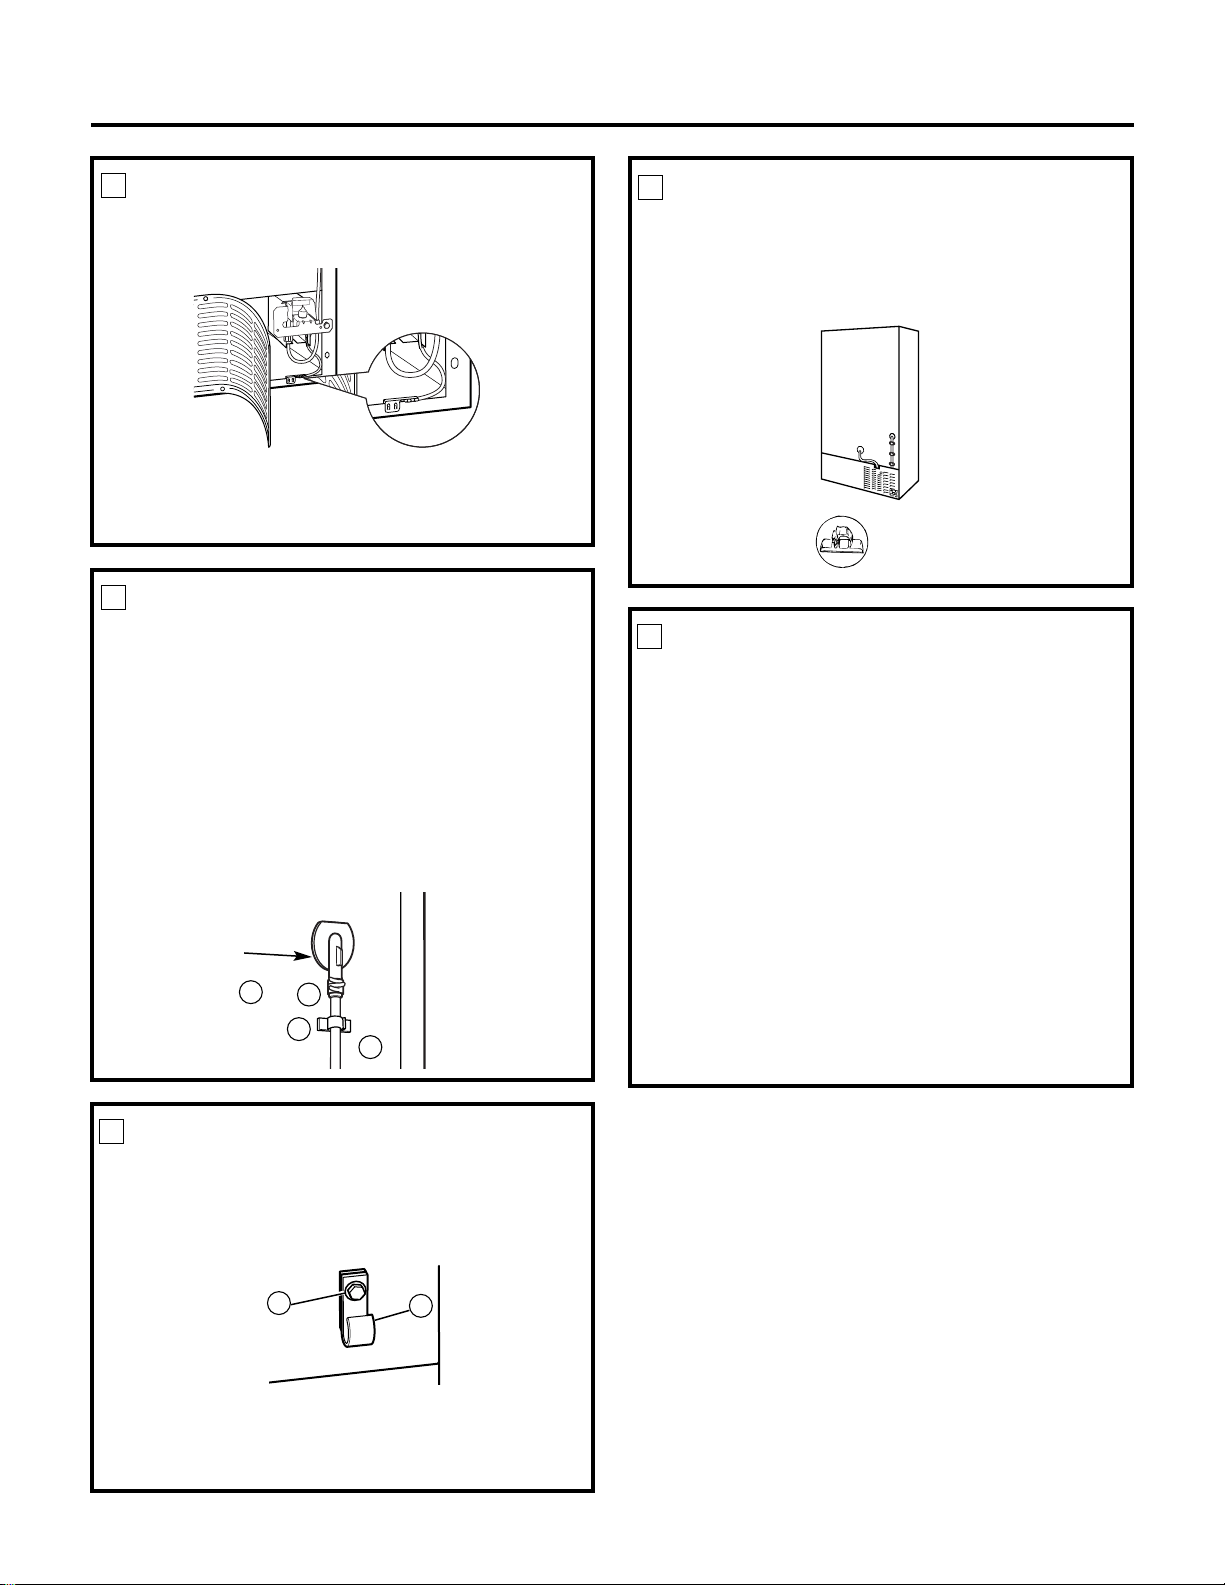
ROUTE AND ATTACH THE WATER
TUBE
• Fasten the plastic water tube to the back of the
refrigerator with three of the adhesive-backed
fasteners (5), spacing the fasteners as shown.
6
Adhesive-backed
fasteners for
water tube
INSTALL WATER LINE CLAMP
• Attach the water line clamp (strain relief) (8) from
the kit to the refrigerator. With the clamp directly
in line with the water valve, drive the screw (7)
from the kit through the clamp (8) at the indent
into the back of the cabinet.
• The metal clamp is for the house water line (see
Water Line Installation Instructions). It is not to be
used for the water tube from the water valve up to
the inlet.
5
7
8
CONNECT WATER TUBE
TO INLET
• Squeeze the ends of the hose clamp (3 or 6) from
the kit with pliers and slide the clamp over the
inlet, located on the right side of the refrigerator.
• While still squeezing the clamp, insert the free end
of the water tube (4) into the inlet as far as it will go.
• Then slide the clamp downward to capture the water
tube in place.
• Using one of the adhesive-backed fasteners (5),
secure the water tube to the back of the refrigerator
about 1/2″ below the inlet.
4
3
5
Inlet
4
ATTACH THE WATER VALVE (cont.)
• Clip the end of the ground wire to the
refrigerator cabinet.
3
IMPORTANT: To ensure a proper ground, the
end of the ground wire MUST be secured to the
refrigerator cabinet.
61
or
6
Loading ...
Loading ...
Loading ...