Loading ...
Loading ...
Loading ...
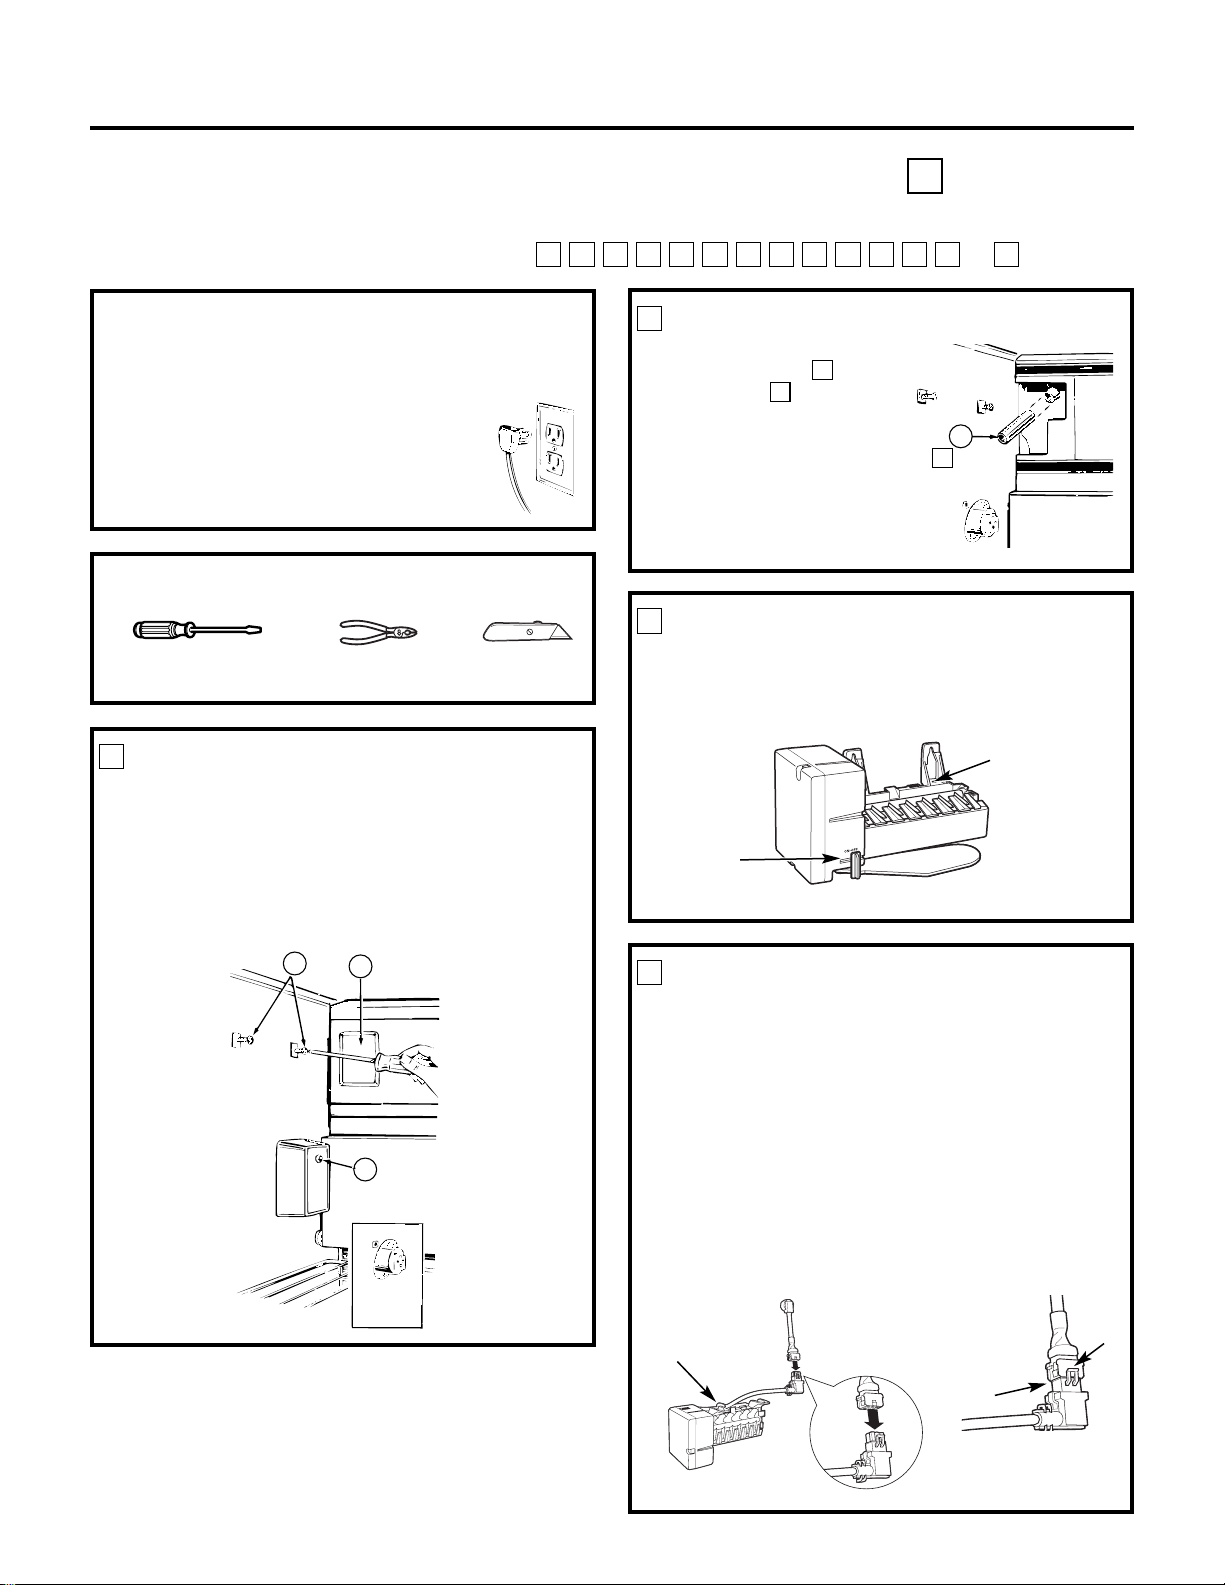
PREPARE FOR INSTALLATION
• Remove the screw (A) that holds the electrical
plug cover in place. You will not need this screw
and cover.
• Remove the light shield insert (B) and discard it.
• Loosen the two mounting screws (C)
approximately 1/2″ (13 mm). DO NOT REMOVE
THESE SCREWS.
INSTALL FILL TUBE EXTENSION
Cut the fill tube extension
(10) to the length
(refer to the
template on page 67) with
a sharp knife or single-edge
razor blade and slide it onto
the fill tube against the stop.
C
C
1
2
Installation Instructions
ICEMAKER INSTALLATION INSTRUCTIONS C
Are these the right instructions for your model? Follow the Installation Instructions indicated by
the label on the back of the refrigerator— or
TSRQPNMLKJHGFC
BEFORE YOU BEGIN
Read each step thoroughly before proceeding.
•
CAUTION – Unplug the
Refrigerator. To eliminate the danger
of electric shock during installation,
you must unplug the refrigerator
from its electrical outlet.
Flat blade and Phillips
screwdrivers
Pliers
TOOLS YOU WILL NEED
Sharp knife
Cover
removed
B
C
A
C
10
SET POWER SWITCH TO OFF
Set the icemaker power switch to OFF. Leave
the power switch in the OFF position until the
refrigerator is connected to the water supply to
prevent premature operation.
3
Power
Switch
POWER CORD ADAPTER
(on some models)
There is a power cord adapter (18) included with
the kit. Visually inspect to see if the power cord on the
icemaker matches the socket on the side wall of the
freezer compartment. If needed, secure the adapter
to the side of the icemaker power cord. When
connecting the adapter to the power cord, make sure
the seal is in place between the connectors, and ensure
that both connector locks are snapped in place. Secure
the power cord adapter to the icemaker by putting it
into the hook at the back of the icemaker and attaching
it to the icemaker with a wire tie (20).
4
Hook
Hole for
wire tie
Seal
Locks
10
(Appearance may vary)
Loading ...
Loading ...
Loading ...