
Loading ...
Loading ...
Loading ...
EN
12
1. Installing the Portalters.
Install the portalter by inserting it into
the group head and rotate the handle
from left to right. Once the portalter is
inserted properly, you can press one of the
brewing buttons on the keypad (AV model)
or move the paddle handle from right to
left (MP Model) to start the ow of water
through the portalter. Please refer to
the Software Programming Manual for a
description of the functions of the keypad.
It is important that the portalter is at
operating temperature prior to lling with
coffee. Allow hot water to pass through
the empty portalter for a few seconds
before the brewing process to pre-heat the
portalter.
Note: It is important to leave the portalter
installed in the espresso machine when
not in use. The portalter must remain
heated for the brewing process to function
correctly.
2. Brewing Coffee. It is now possible to remove
the portalter to make a coffee beverage.
Place some ground coffee in the portalter
basket using the single or double basket.
Press down on the ground coffee with the
supplied tamper and install the portalter
on the GS/3. On AV model press a brew
button to begin the brewing process, or
move the paddle handle from right to left
to begin brewing on MP model (see Fig.2).
NOTE: Some users believe it is important to
allow water to pass through the the group
head prior to installing the portalter
to ush any remaining coffee oils and
particles from the group head. Some
also ush just after brewing for the same
reason. Please experiment to make the
best possible procedure for your coffee.
There are many techniques for brewing
espresso. You can nd instructions for
many techniques on websites, blogs and
forums. Some are even monitored by
professional baristas around the world.
5. Operation
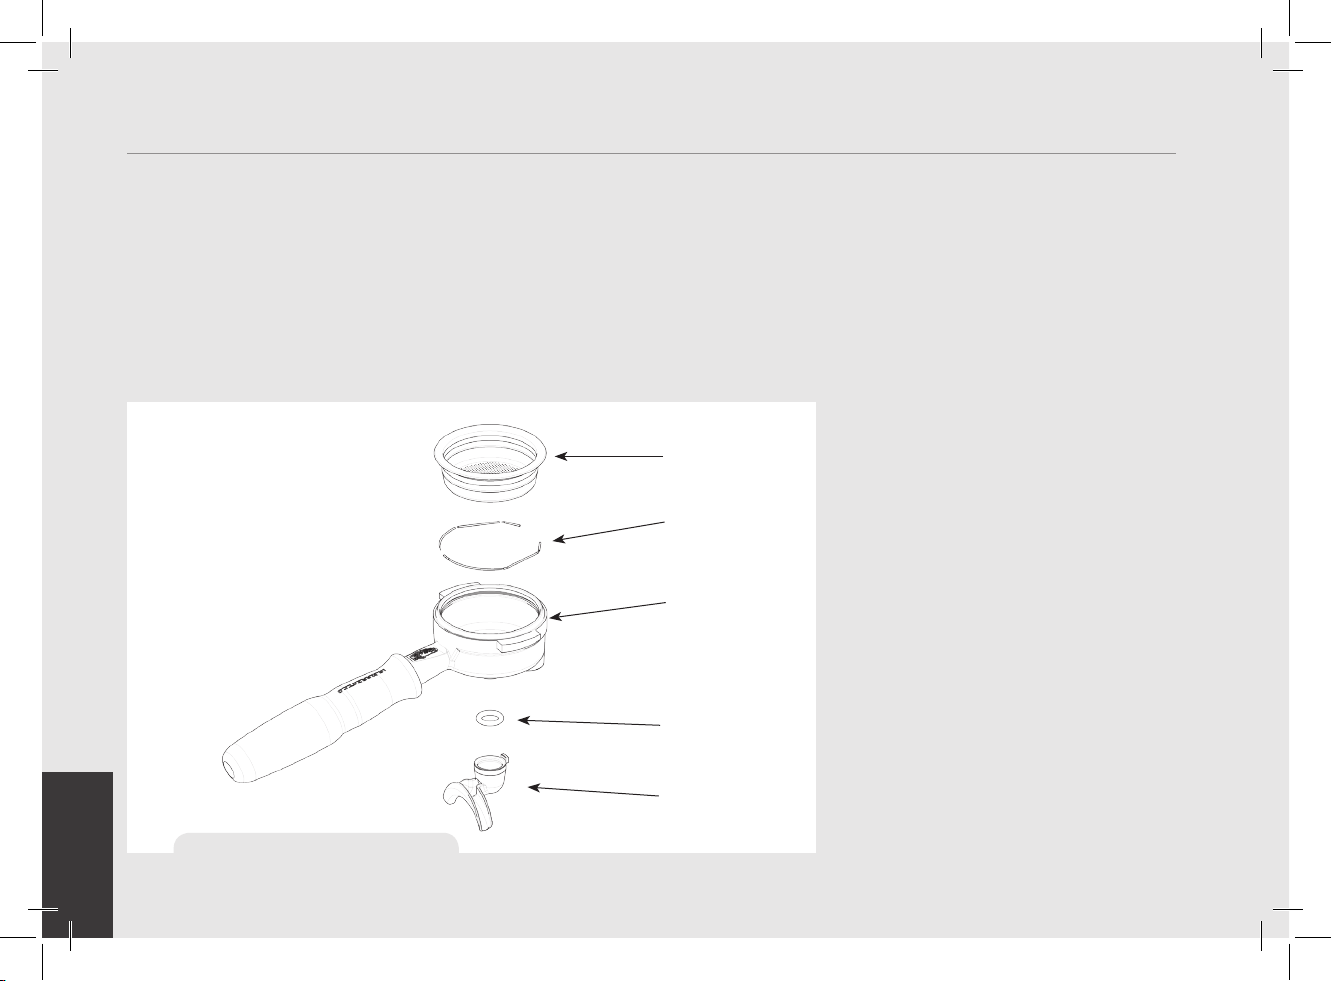
FILTER
BASKET
PORTAFILTER
DOUBLE
SNAP-ON
SPOUT
SPRING
O-RING
GASKET
Figure 8 – Portalter
Loading ...
Loading ...
Loading ...