
Loading ...
Loading ...
Loading ...
W415-2044 / C / 08.20.21
EN
46
maintenance
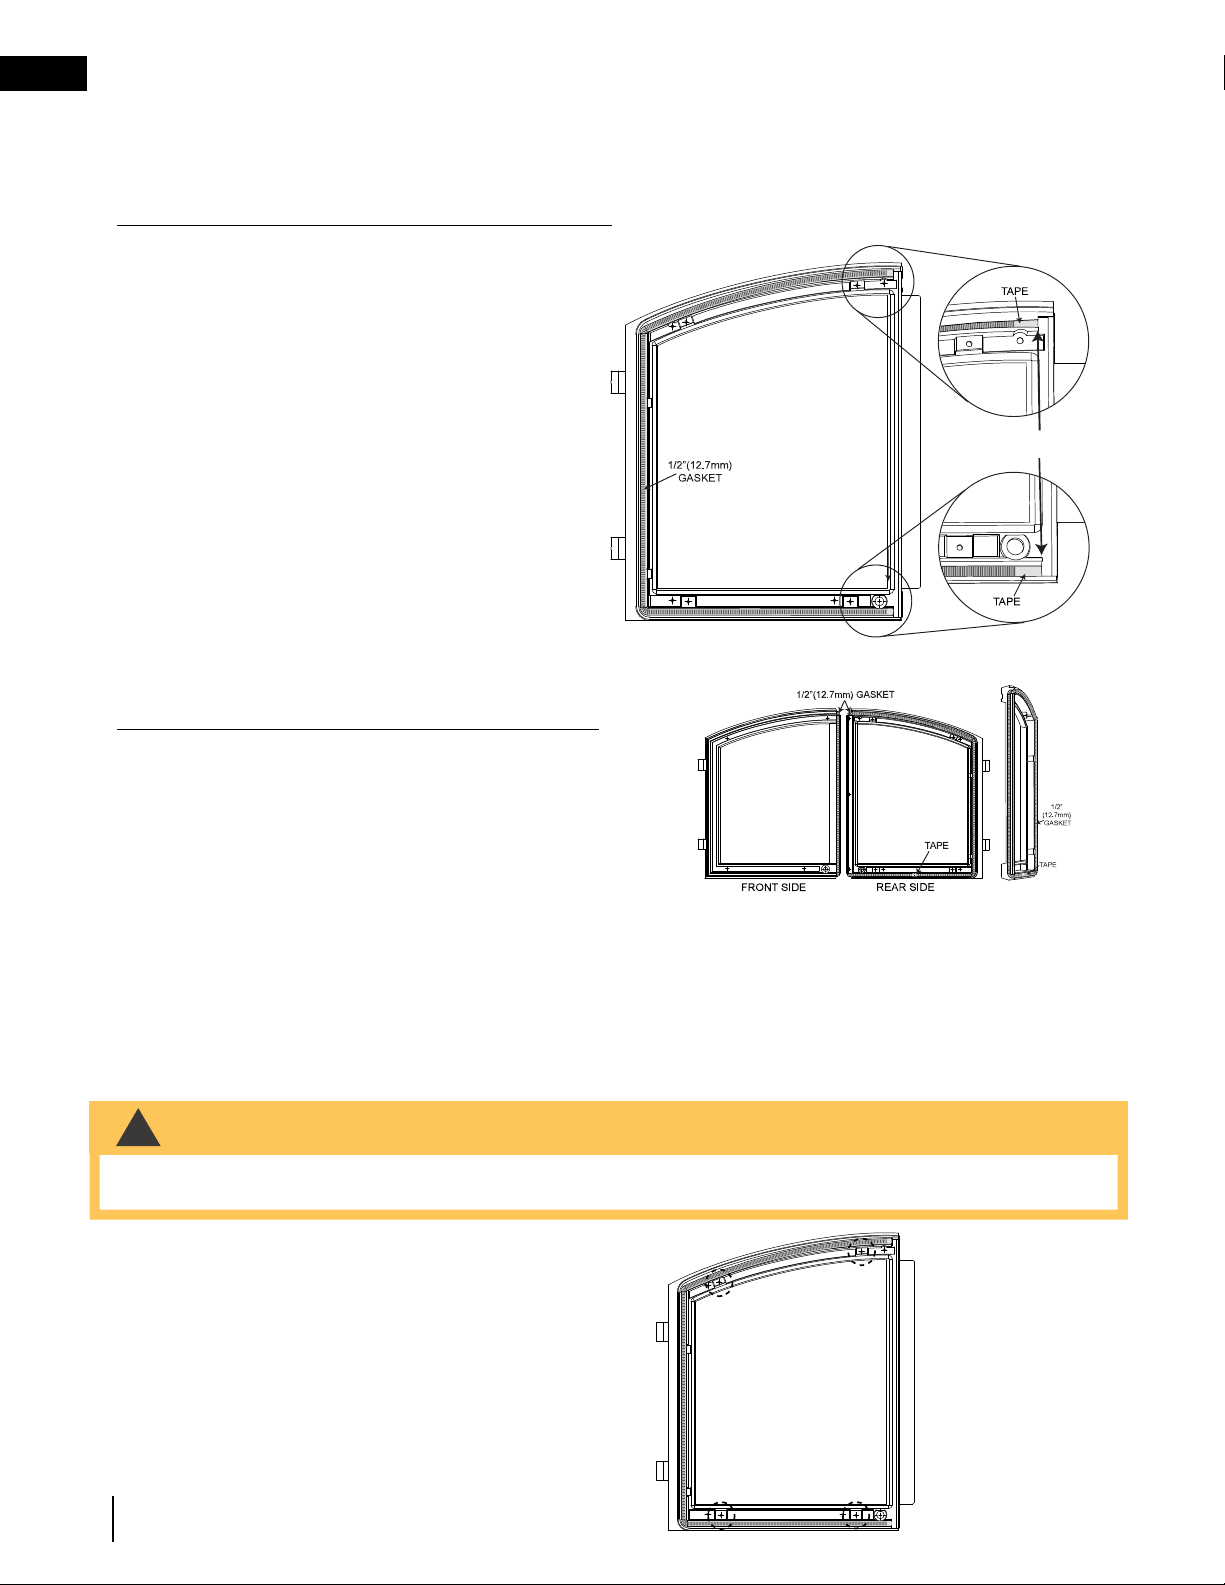
9.6 cast iron door glass and gasket replacement
Remove the doors from the appliance (if necessary, refer to your door installation instructions). Place the doors
face down on a protected surface to avoid any damages.
INSTALLATION INSTRUCTIONS FOR THE RIGHT DOOR:
A. Remove the damaged gasket.
B. Apply a thin bead of adhesive (red high temperature
silicone [RTV] or wood stove gasket cement) in the
top, side and bottom gasket grooves. The adhesive
should follow the same path as the gasket, as
shown.
C. Wrap a piece of tape around one end of the 1/2”
(13mm) gasket and cut through the center. This will
stop the gasket from fraying.
D. Place the taped end of the gasket into the groove,
ensure it remains fl ush with the side of the door
(recessed point). Without stretching or compressing
the gasket, place it naturally along the top, side and
bottom gasket grooves and into the adhesive, as
shown.
E. When you reach the end point, wrap a piece of
tape around the gasket and cut through the center,
ensuring the gasket is fl ush wtih recessed point, as
shown above.
INSTALLATION INSTRUCTIONS FOR THE LEFT DOOR:
A. Remove the damaged gasket.
B. Apply a thin bead of adhesive (red high temperature silicone
[RTV] or wood stove gasket cement) in the top, sides and
bottom gasket grooves. The adhesive should follow the same
path as the gasket illustrated.
C. Wrap a piece of tape around one end of the 1/2” (13mm)
gasket and cut through the center. This will stop the gasket
from fraying.
D. Place the taped end of the gasket centered in the groove at the bottom of the door. Without stretching or
compressing the gasket, lay it naturally into the groove, on top of the adhesive as a continuous loop, as
shown.
When you return to the other end of the gasket wrap a piece of tape around the other end of the gasket and cut
through the center.
• Care must be taken when removing and disposing of any broken glass or damaged components as they may
be sharp. Be sure to vacuum up any broken glass from inside the appliance before operation.
!
WARNING
9.7 glass replacement
A. Remove the 4 screws securing the glass in place, as
shown.
B. Remove any broken glass.
C. Replace with new glass and gasket (not supplied) (see
“replacement parts” for details).
D. Reinstall the 4 screws to hold the glass in place.
Loading ...
Loading ...
Loading ...