Loading ...
Loading ...
Loading ...
17
SERVICE AND MAINTENANCE
Front Axles (If Equipped)
Each end of the tractor’s front pivot bar may
be equipped with a grease fitting. Lubricate
with a No. 2 multi-purpose grease applied
with a grease gun per the Maintenance
Schedule. See Figure 27.
Spark Arrestor Maintenance
(If Equipped)
Spark arrestor assemblies must be inspected
and cleaned periodically (see the service
interval chart in this manual). Visually inspect the screen for tears, broken wires or loose
welds. Replace the spark arrestor assembly if any of these conditions exist. If the screen
is in good condition, clean the screen by brushing away loose dirt or carbon particles.
Tires
Keep the tires inflated to the recommended pressures. Improper inflation will shorten
the tire service life. See the tire side wall for proper inflation pressures. Refer to
maintenance schedule chart located in this manual for proper service intervals.
Observe the following guidelines:
• Do not inflate a tire above the maximum pressure shown on the sidewall of the
tire.
• Do not reinflate a tire that has been run flat or seriously under inflated. Have it
inspected and serviced by a qualified tire mechanic.
Off-Season Storage
If your lawn tractor is not going to be operated for an extended period of time (thirty
days to approximately six months), the lawn tractor should be prepared for storage.
Store the lawn tractor in a dry and protected location. If stored outside, cover the lawn
tractor (including the tires) to protect it from the elements. The procedures outlined
below should be performed whenever the lawn tractor is placed in storage.
1. Change the engine oil and filter following the instructions provided in this
manual as well as the engine manual provided with this tractor.
WARNING
Never store the tractor with fuel in the tank indoors or in poorly ventilated
enclosures, where fuel fumes may reach an open flame, spark or pilot light as
on a furnace, water heater, clothes dryer, etc.
2. If storing the tractor for 30 days or more:
a. To prevent gum deposits from forming inside the engine’s carburetor
and causing possible malfunction of the engine, the fuel system must
be either completely emptied, or the gasoline must be treated with a
stabilizer to prevent deterioration.
b. Using a fuel stabilizer for storage between 30 and 90 days:
• Read the product manufacturer’s instructions and
recommendations.
• Add to clean, fresh gasoline the correct amount of stabilizer for
the capacity of the fuel system.
• Fill the fuel tank with treated fuel and run the engine for 2-3
minutes to get stabilized fuel into the carburetor.
• Fuel left in the fuel tank deteriorates and will cause serious
starting problems.
c. Emptying the fuel system for storage of more than 90 days:
• Prior to putting the tractor in storage, monitor fuel consumption
with the goal of running the fuel tank empty.
• Run the engine until it begins to stall. Use the choke to keep
the engine running until all fuel in the carburetor has been
exhausted.
• Referring to the engine manual, drain the fuel from the
carburetor bowl.
3. Clean the engine and the entire tractor thoroughly.
Note: Using a pressure washer or garden hose is not recommended for cleaning your
tractor other than to clean the underside of the deck. It may cause damage to electrical
components, spindles, pulleys, bearings or the engine. The use of water will result in
shortened life and reduce serviceability.
4. Fully charge the battery, then disconnect the negative cable at the battery to
prevent possible discharge. Recharge the battery periodically when in storage.
Note: Remove the battery if exposed to prolonged periods of sub-freezing
temperatures. Store in a cool, dry location where temperatures are above freezing.
5. Lubricate all lubrication points.
Removing the Lawn Tractor from Storage
1. Check the engine oil.
2. Fully charge the battery and inflate the tires to the recommended pressure. See
tire side wall for proper tire inflation pressure.
3. Fill the fuel tank with clean, fresh gasoline.
4. Start the engine and allow to idle for a few minutes to ensure engine is operating
properly.
5. Drive the tractor without a load to make certain all the tractor systems are
functioning properly.
Leveling the Deck (Side-to-Side)
1. With the tractor parked on a firm, level surface, place the deck lift lever in the
second notch from the top (second highest position) and rotate both blades so
that they are perpendicular with the tractor.
2. Measure the distance from the outside of the left blade tip to the ground and the
distance from the outside of the right blade tip to the ground. Both measurements
taken should be equal. If they’re not, proceed to the next step.
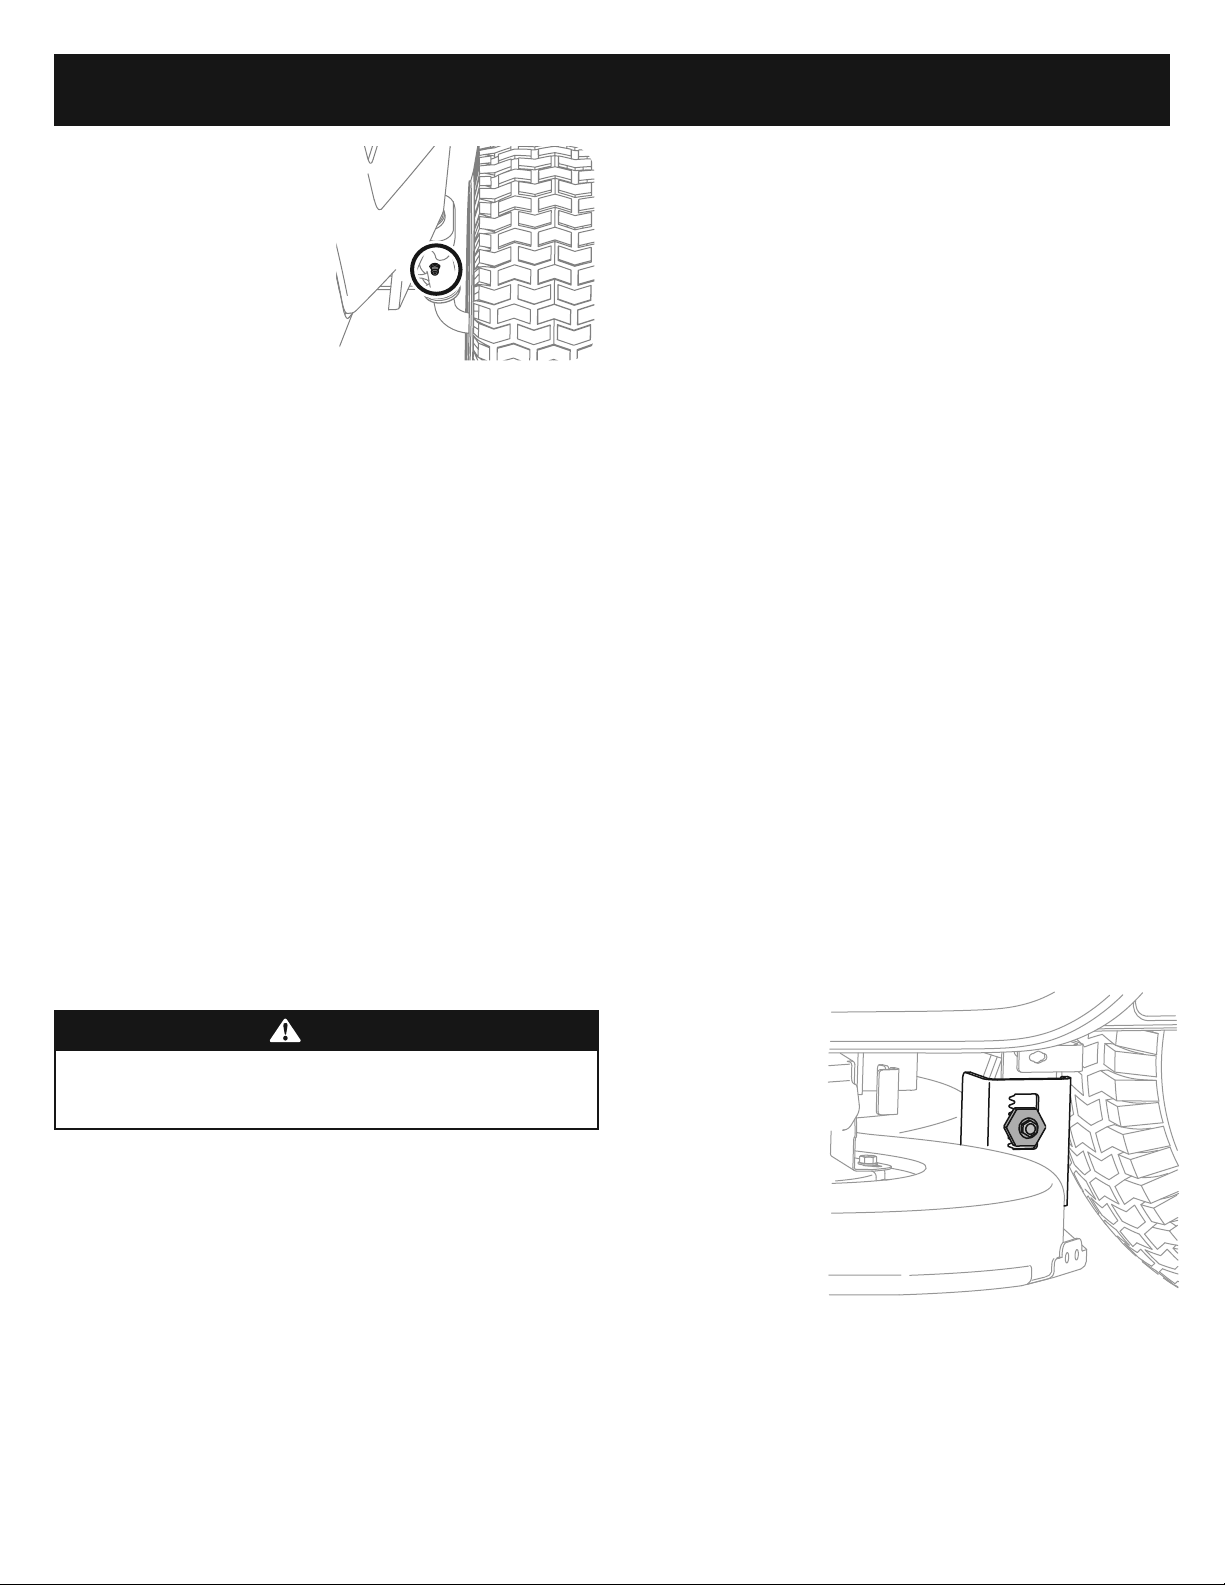
3. Under the rear fenders inside the wheels there is a lift adjustment hex cap screw
and gear for each side of
the deck. See Figure 28.
4. Loosen, but do NOT
remove, the hex cap
screw (a) on the left deck
hanger bracket.
5. Minor adjustments
should be made to
the adjustment gear
immediately behind the
hex cap screw loosened
in the previous step
(clockwise/up or counter-
clockwise/down).
6. When the proper adjustment is achieved, tighten the hex cap screw (a) on the
left deck hanger bracket.
7. The deck is properly balanced when both blade tip measurements taken earlier
are equal.
Figure 27
(a)
Figure 28
Loading ...
Loading ...
Loading ...