Loading ...
Loading ...
Loading ...

Recording a source
REC OUT
1. Press the CD input source button.
2. Set 'WIDEO 5" for the Video setting in the Video Setup sub-
menu of the Setup menu: Input Setup -_ Video Setup -_
Video.
3. Insert a CD in the CD player and insert a tape in the video
camera connected to the VIDEO 5 IN.
4. Insert a video tape for recording in the video cassette
recorder connected to VIDEO 1 OUT.
5. From this step on, follow the same procedure as described in
2 and 3 above.
k__J L__J Notes:
Notes:
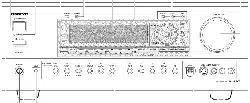
Input source buttons
• You cannot record the surround effects.
• Digital signals input to the DIGITAL INPUT (COAX) and
DIGITAL INPUT (OlYl ") inputs will be oulput to the DIGITAL
OUTPUT (OPT) output.
• There are some restrictions on recording digital signals. When
making digital recordings, consult the instruction manual that
came with your digital recording equipment (e.g., MD recorder
or DAT deck) to know what reslrictions are imposed.
• You cannot record the source connected to the MULTI
CHANNEL INPUT connector.
To record the input source signal you are
currently watching or listening to
This method outputs Io the audio and video outputs the currently
selected input source signal. This method allows you to a signal
while you are actually listening Io or watching it.
1. Select the input source to record by pressing the
corresponding input source button.
The input source is now selected and you may watch or lislen to
it as desired.
2. Press the REC OUT button repeatedly until "Rec
SehSOURCE" appears in the front display.
The currently selected input source signal to the TAPE OUT,
t--: ..... :-- .. ? = =--:%':" t."-::"'i--
/_ p.,t , ._-fz:_ J. = _D L.I t_l/_ L.,/Z
VIDEO 1 OUT, VIDEO 2 OUT oulputs for recording.
3. Start recording at the recording component as
desired.
To confirm the settings, press the Rec Out button. The current
settings will appear for 3 seconds in the front display.
Recording the video from one source and the audio from
another:
You can add the sound from one source to the video of another
source to make your own video recordings.
Below is an example of recording the sound from a compact disc
player connected to CD IN and the video from a video camera
connected to VIDEO 5 IN to video cassette tape in a video cassette
recorder connected to the VIDEO 1 OUT jack.
• If you change the input source dining recording, you will record
the signals from the newly selected input source.
• Digital input signals are only output to the digital oulputs and
analog input signals are only output from the analog outputs,
There is no conversion from digital to analog or vice versa.
When connecting CD players and other digital components, do
no1 connect only the digital terminals, but the analog ones as
well.
To record an input source signal different from
that you are currently watching or listening to
This method outputs to the audio and video outputs the signal from
the input source that you select here. This allows you to record an
input source signal different from that which you m'e listening to or
watching at the time of recording.
1. Press the Rec Out button.
2. Within 5 seconds, press the input source selector
button of the input source signal that you wish to
record.
The signal from the selected input source will now be output to
the TAPE OUT, VIDEO 1 OUT, and VIDEO 2 OUT outputs for
recording.
I --:.-...... :---..-. " = i " T 1"=_'t" "-i %:22_,,, _: _ d, = ",." ,L _.-"/.,,, :.,,:"..:
3. Start recording at the recording component as
desired.
To confirm the settings, press the Rec Out bulton. The current
settings will appem" for 5 seconds in the front display.
Notes:
• Be aware that the remote (Zone 2) and recording (REC OUT)
outputs use the same circuit and therefore can be used at the
same time.
• If you select FM (or AM) with the input source bultons when the
recording source is set to AM (or FM), the output for the
recording source also changes to AM (or FM).
55
Loading ...
Loading ...
Loading ...