Loading ...
Loading ...
Loading ...
49
Basic Setup
05
Initial settings of this receiver
There are three ways to initialize this receiver.
! Setting with a special application (Start-up Navi) on page 49
! Perform settings using the AVNavigator built into this receiver on page 49
! Setting by referring to the operating instructions on page 51
Important
! After unpacking, turning on the power, and returning to initial factory settings (page 91 ), the WIRELESS
indicator slowly flashes. This is not a malfunction.
! This receiver is designed to automatically enter WAC mode when turning on the power of this receiver in the
initial factory settings state. For details about WAC mode, please refer to page 53 . After the network settings
(page 51 ) have been completed, the WIRELESS indicator flashing disappears.
! When the network is not connected, even though the WIRELESS indicator is blinking, there is no problem
using it in this state.
Setting with a special application (Start-up Navi)
If you have a smart phone or tablet, once you download and start the special application, the settings can be done
according to the instructions by the application.
! If you have an iPhone or iPod touch
! If you have an Android device
Perform settings using the AVNavigator built into this receiver
If you have a Windows PC or Mac, the settings can be performed using the AVNavigator built into this receiver.
How to use the built-in AVNavigator
The built-in AVNavigator is equipped with Wiring Navi, which allows you to perform connection of this receiver
and initial settings in interactive mode. By simply following the screen prompts to connect and set the unit, highly
accurate initial settings can be performed easily.
Additionally, in order to use various functions easily, contents linked to the receiver can be used.
Operating Environment
! AVNavigator can be used in the following environments.
— Windows PC: Microsoft
®
Windows Vista
®
/Windows
®
7/Windows
®
8/Windows
®
8.1
— Mac: OS X v 10.9 or 10.8
— iPad/iPhone/iPod touch: iOS 6.1 or later
— Android operation confirmation device:
SONY XPERIA Z1 (OS 4.2.2)
SAMSUNG GALAXY S5 (OS 4.4.2)
HTC One S (OS 4.1.1)
Google Nexus 5 (OS 4.4.4)
! AVNavigator uses an Internet browser. The following browsers are supported:
— Windows PC: Internet Explorer
®
8, 9, 10, 11
— Mac/iPad/iPhone/iPod touch: Safari 6.0, 7.0
— Android device: Android browser
! Depending on the computer network setting or security setting, AVNavigator may not operate.
Using AVNavigator
Important
! Connect the LAN terminal to the network (pages 33 , 46 ).
1 Press u STANDBY/ON to switch on the receiver and your computer.
2 Launch AVNavigator.
Operate AVNavigator by following the screen prompts of your computer, etc.
! If using a Windows PC, complete the below steps to start up.
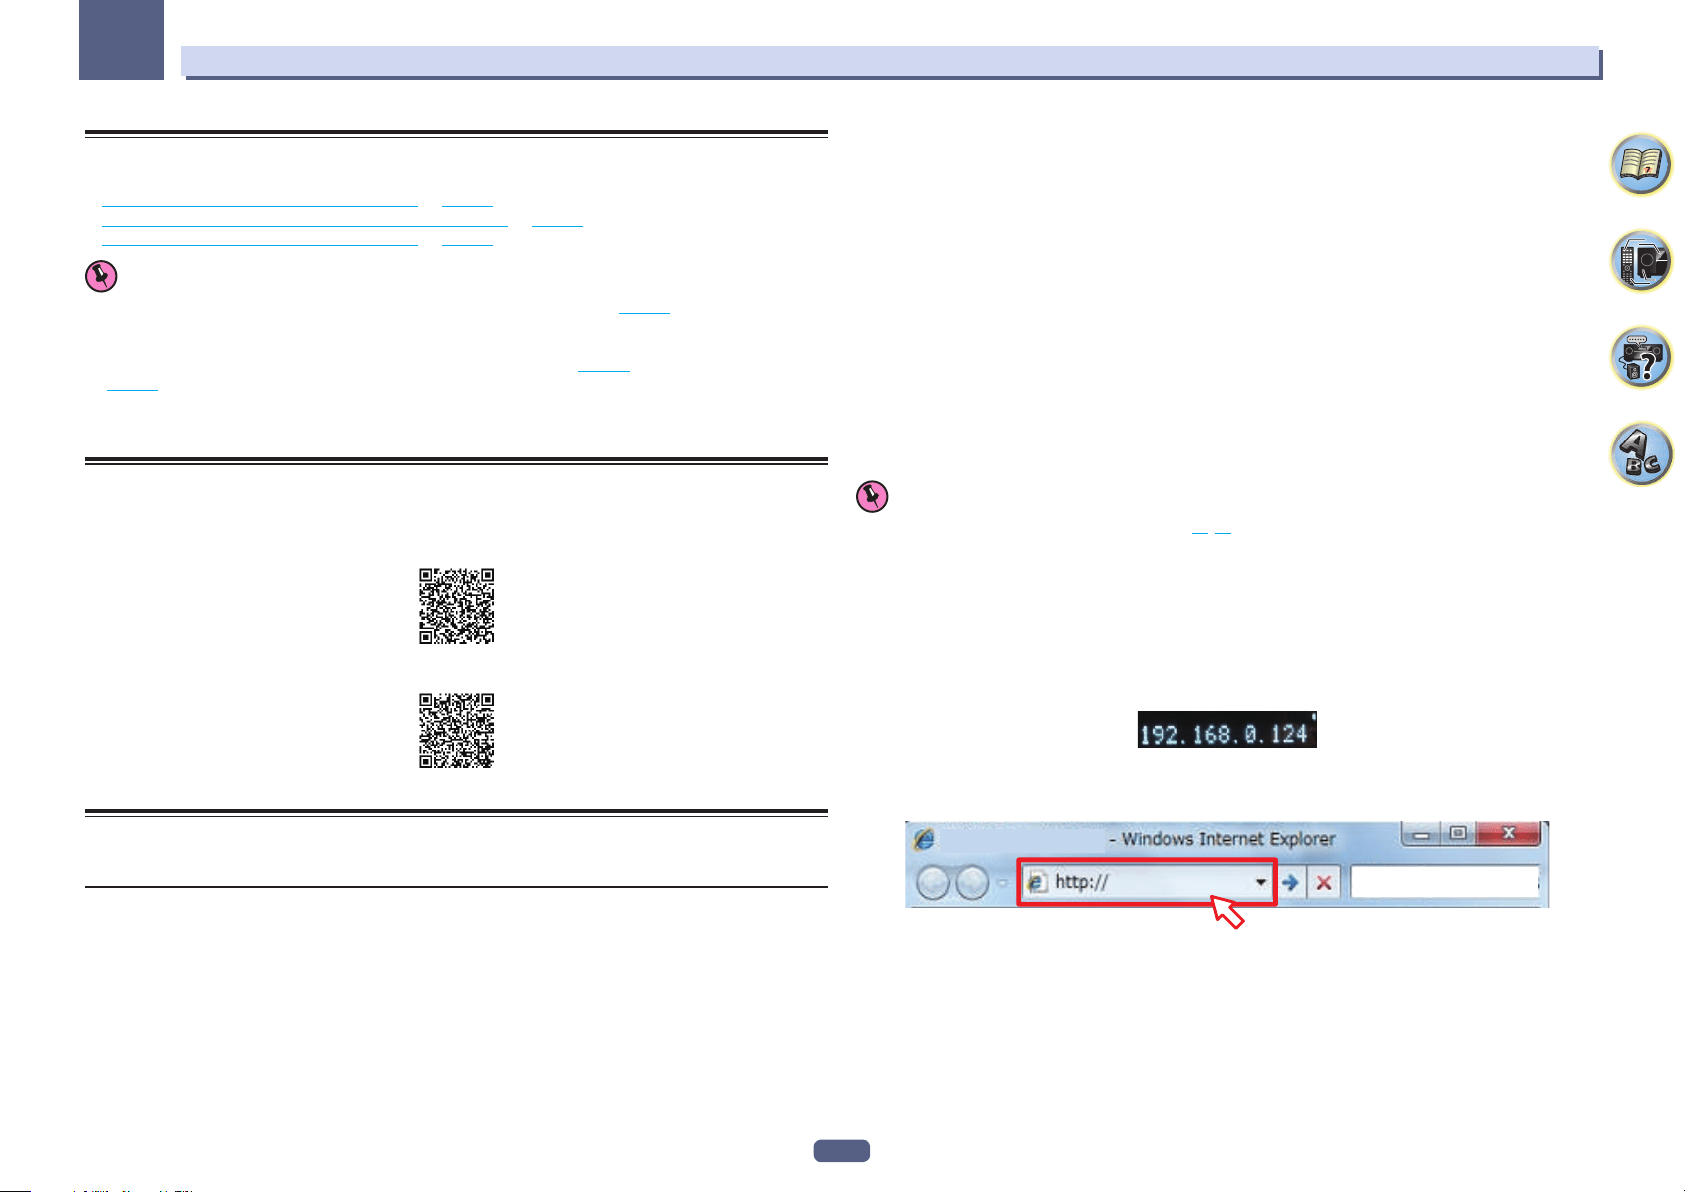
1 Start up Internet Explorer on your PC (open any random Internet page).
2 Press STATUS on the remote control and check the front panel display on the receiver (the IP address of
the receiver will appear).
(Example Text Display)
If 0.0.0.0 or 169.254.112.202 appears in the address, it indicates that the receiver is not connected to the
network. Check to make sure that the receiver and router are properly connected.
3 Enter number in 2 above in the field in Internet Explorer shown below and then press the ENTER key.
(Example Input Format) 192.168.0.124
Loading ...
Loading ...
Loading ...