Loading ...
Loading ...
Loading ...
12
Controls and displays
02
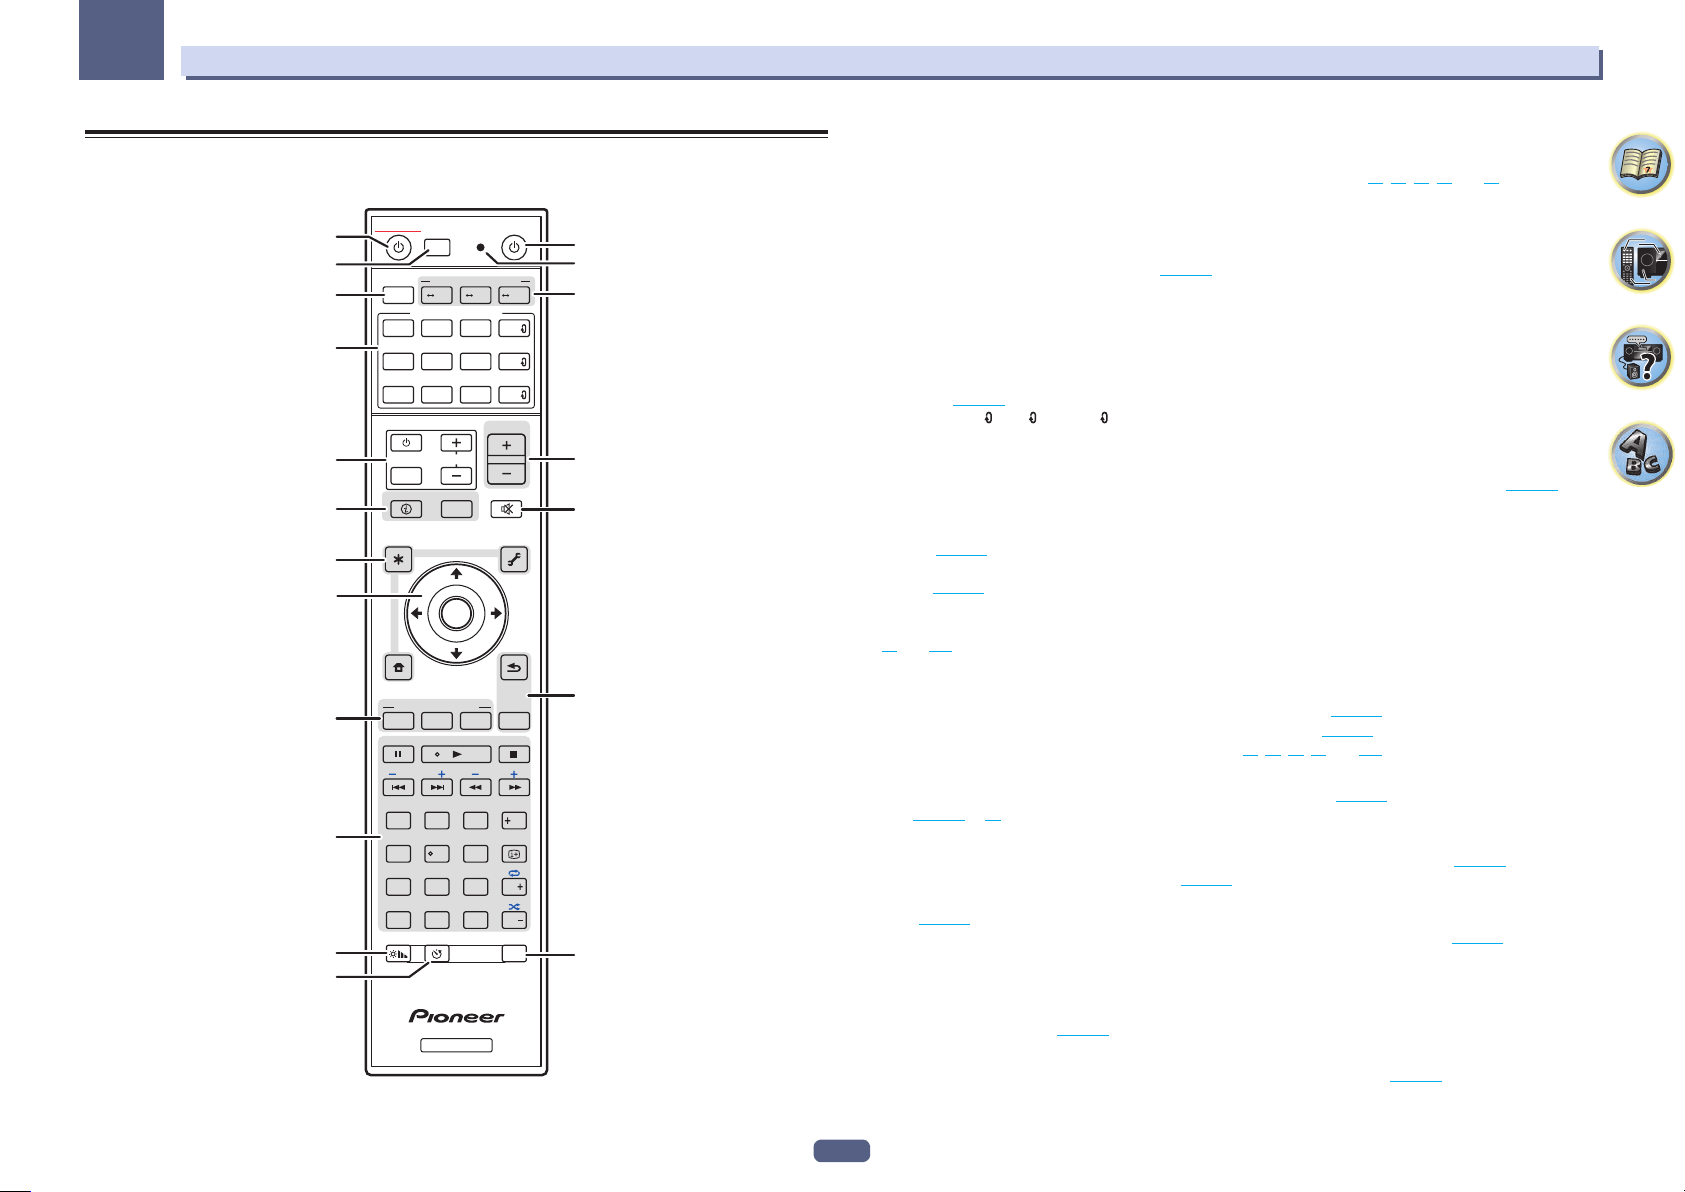
Remote control (In case of VSX-1130/VSX-930)
This section explains how to operate the remote control for the receiver.
RECEIVER
D.ACCESS
DIMMER SLEEP
RCU SETUP
MPX
PRESET TUNE
BAND PTY
iPod
TUNER
INPUT
USB ADPTROKU
BT
TV
TV
MHL
CD
OUT P.
DVDBD
ALL ZONE STBY
SOURCE
STANDBY/ON
MAIN
SAT
SUB ZONE CONTROL
SOURCE CONTROL
MUTE
VOLUME
VOL
TOP
MENU
HOME
MENU
TOOLS
MENU
ENTER
RETURN
CLASS
ENTER
CLR
CH
CH
2
546
8
0
79
13
AUDIO
DISP
SURRAUTO
CH LV.
ADV
STATUS
AUDIO P. VIDEO P.
Z2 Z3 HDZ
LISTENING MODE
HDMI
NET
ALL
Fav
RECEIVER
1
2
4
3
9
10
11
12
5
6
7
8
13
14
17
18
15
16
6
The remote has been conveniently color-coded according to component control using the following system:
! White – Receiver control, TV control
! Blue – Operation of other devices and each input (TUNER, etc.) (See pages 63 , 64 , 66 , 67 and 96 .)
1 u STANDBY/ON
This switches between standby and on for this receiver.
2 ALL ZONE STBY
Use this button to perform unique operations (page 95 ).
3 MAIN RECEIVER
Switches the remote to control the receiver (used to select the white commands).
Switch to perform operations in the main zone.
4 SOURCE CONTROL buttons
Switches the input. Also, switches remote control operation mode for operating other devices or each input
(TUNER, etc.) (page 93 ).
The input for HDMI , NET and ALL switches each time these buttons are pressed.
5 TV control buttons
These buttons can be used to perform operations on the TV to which the TV INPUT button is assigned. The TV can
be operated with these buttons regardless of the input set for the remote control’s operation mode (page 93 ).
6 Receiver Control buttons
! STATUS – Displays the IP address and information such as selected/set functions and input signals on the
display (page 90 ).
! OUT P. (OUTPUT PARAMETER) – Switches the output terminal of the HDMI signal or speaker terminal to be
played (page 88 ).
! RETURN – Press to confirm and exit the current menu screen.
! CH LV. (CHANNEL LEVEL) – Press repeatedly to select a channel, then use k/l to adjust the level (pages
89 and 108 ).
7 Receiver setting buttons
Press MAIN RECEIVER first to access:
! AUDIO P. (AUDIO PARAMETER) – Use to access the Audio options (page 85 ).
! VIDEO P. (VIDEO PARAMETER) – Use to access the Video options (page 87 ).
! HOME MENU – Use to access the Home Menu (pages 59 , 60 , 82 , 99 and 106 ).
8 i/j/k/l/ENTER
Use the arrow buttons when setting up your surround sound system (see page 99 ) and the Audio or Video
options (page 85 or 87 ).
9 LISTENING MODE buttons
! AUTO (AUTO SURROUND/ALC/STREAM DIRECT) – Switches between Auto Surround (page 71 ), Auto
Level Control mode and Stream Direct mode (page 72 ).
! SURR (STANDARD SURROUND) – Press for Standard decoding and to switch various modes (Dolby, DTS,
etc.) (page 71 ).
! ADV (ADVANCED SURROUND) – Use to switch between the various surround modes (page 72 ).
10 Source device operation button
Operates other devices or each input (TUNER, etc.).
11 DIMMER
Dims or brightens the display (page 90 ).
12 SLEEP
Use to put the receiver in sleep mode and select the amount of time before sleep (page 90 ).
Loading ...
Loading ...
Loading ...