Loading ...
Loading ...
Loading ...
CP4 STAGE/CP40 STAGE Owner’s Manual 35
Quick Start Guide
Recording Your Playing as
Audio
Using the stage piano’s recording function as described
below, you can record what you play on the keyboard as
an audio (Wave) file on the connected USB flash-memory
device. Audio files saved in this way will have a .WAV file
extension.
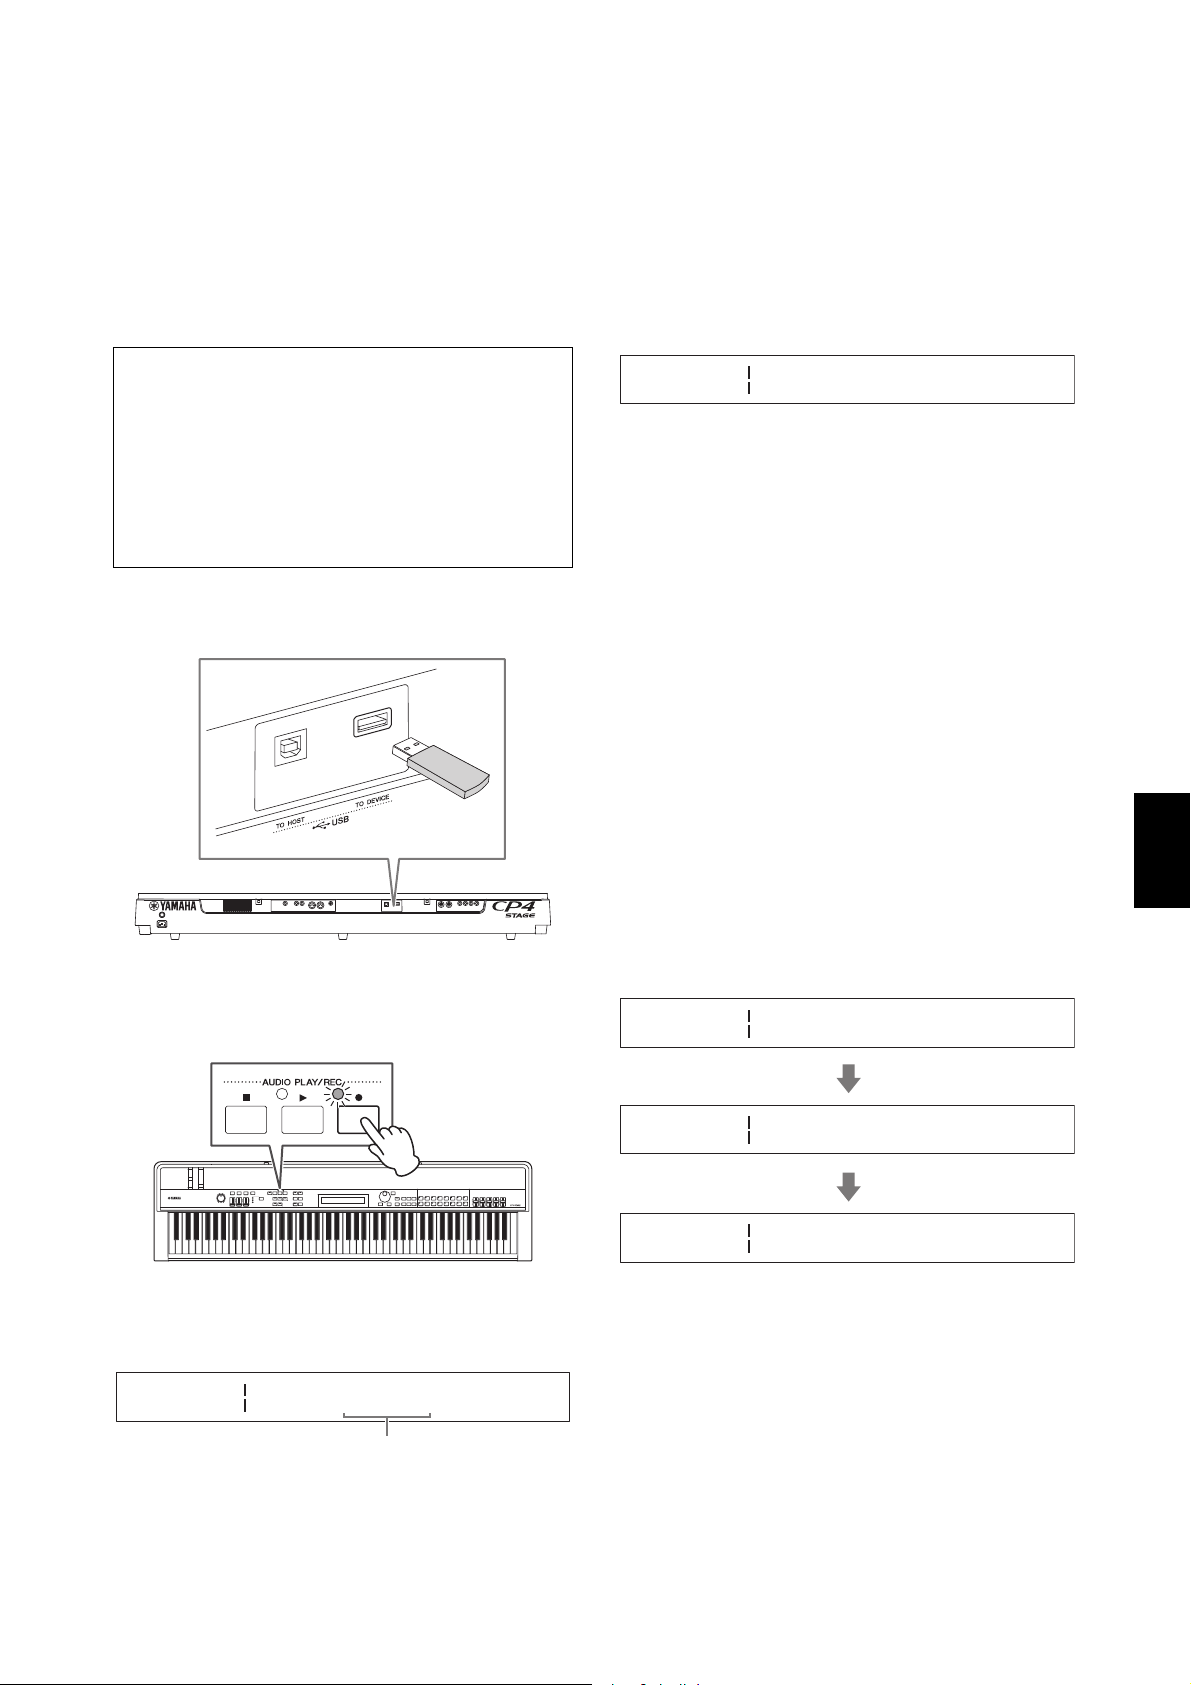
1 Plug a USB flash-memory device into the
[TO DEVICE] USB terminal on the rear panel.
2 Press the [I] (Record) button.
The light above the button will start to flash, indicating
that the stage piano is in Recording Standby mode.
The first pane of the Audio Recording screen will be
displayed, and a file name will be automatically
assigned.
NOTE
• Recording Standby mode can be cancelled by pressing the
[J] (Stop) button.
• Screen operations and parameter editing are possible while in
Recording Standby mode.
3 If necessary, change the file name. Ensure
that the cursor (R) is located at the Name
parameter, and then press the [ENTER]
button.
4 When you have set the required name, press
the [ENTER] button to proceed.
The first pane of the Audio Recording screen will
again be displayed.
For details on how to set a name, refer to Entering text
(page 20) from the Basic Operations & Display
Content section.
IMPORTANT
Audio files created by your stage piano will have “}{” as
their seventh and eight characters. Recorded audio is
quieter than that produced by the keyboard, and these
characters tell the instrument to increase the playback
volume in order to maintain a suitable balance.
Accordingly, these characters should not be removed.
5 If necessary, use the [d] button to move to
the screen’s other panes and set the tempo,
time signature, click sound, and other
metronome parameters for recording.
Move the cursor (R) to any parameter you wish to
modify using the [l] and [r] buttons, and then
change the setting using the [-1/NO] and [+1/YES]
buttons or the Data Dial.
NOTE
• Although the metronome will normally start to play
automatically at the beginning of recording, its sound will not
be recorded. If you do not need the metronome to start
automatically in this way, set the AutoClk parameter to “off”. In
addition, you can also toggle the metronome on and off while
recording using the [METRONOME] button.
• The Te mpo , Beat (time signature), and ClickVol parameters
can also be set on the General screen from the Performance
Common Edit area; the PreCount and AutoClk parameters can
also be set on the General screen from the Utility area. For
more details on these parameters, refer to the Reference
Manual (pdf).
Tip
Audio files
Recording the actual sound of what you play, audio
files store audio data in much the same way as a
cassette tape or digital voice recorder. They can be
played back on portable audio players and many
other types of device, making it easy for you to let
others hear what you have played.
AUDIO
REC [
File Name
WAV001}{] R[ENTER]D
File name
AUDIO
REC
Name
[WAV001}{]
AUDIO Metronome
REC
Tempo Beat
R 90 4/ 4W
AUDIO
REC
PreCount AutoClk
R1meas onU
AUDIO Metronome
REC
ClickVol
R100W
Press the [d] button.
Press the [d] button.
Loading ...
Loading ...
Loading ...