Loading ...
Loading ...
Loading ...
66
Servicing Your Honda
Piston/Piston Rings/Piston Pin
1. Place clean shop towels over the crankcase
opening to keep the piston pin clips from
falling into the crankcase.
2. Apply molybdenum disulfide oil (a mixture of
1/2 engine oil and 1/2 molybdenum disulfide
grease containing more than 3% molybdenum
disulfide additive) to the inner surface of the
connecting rod small end.
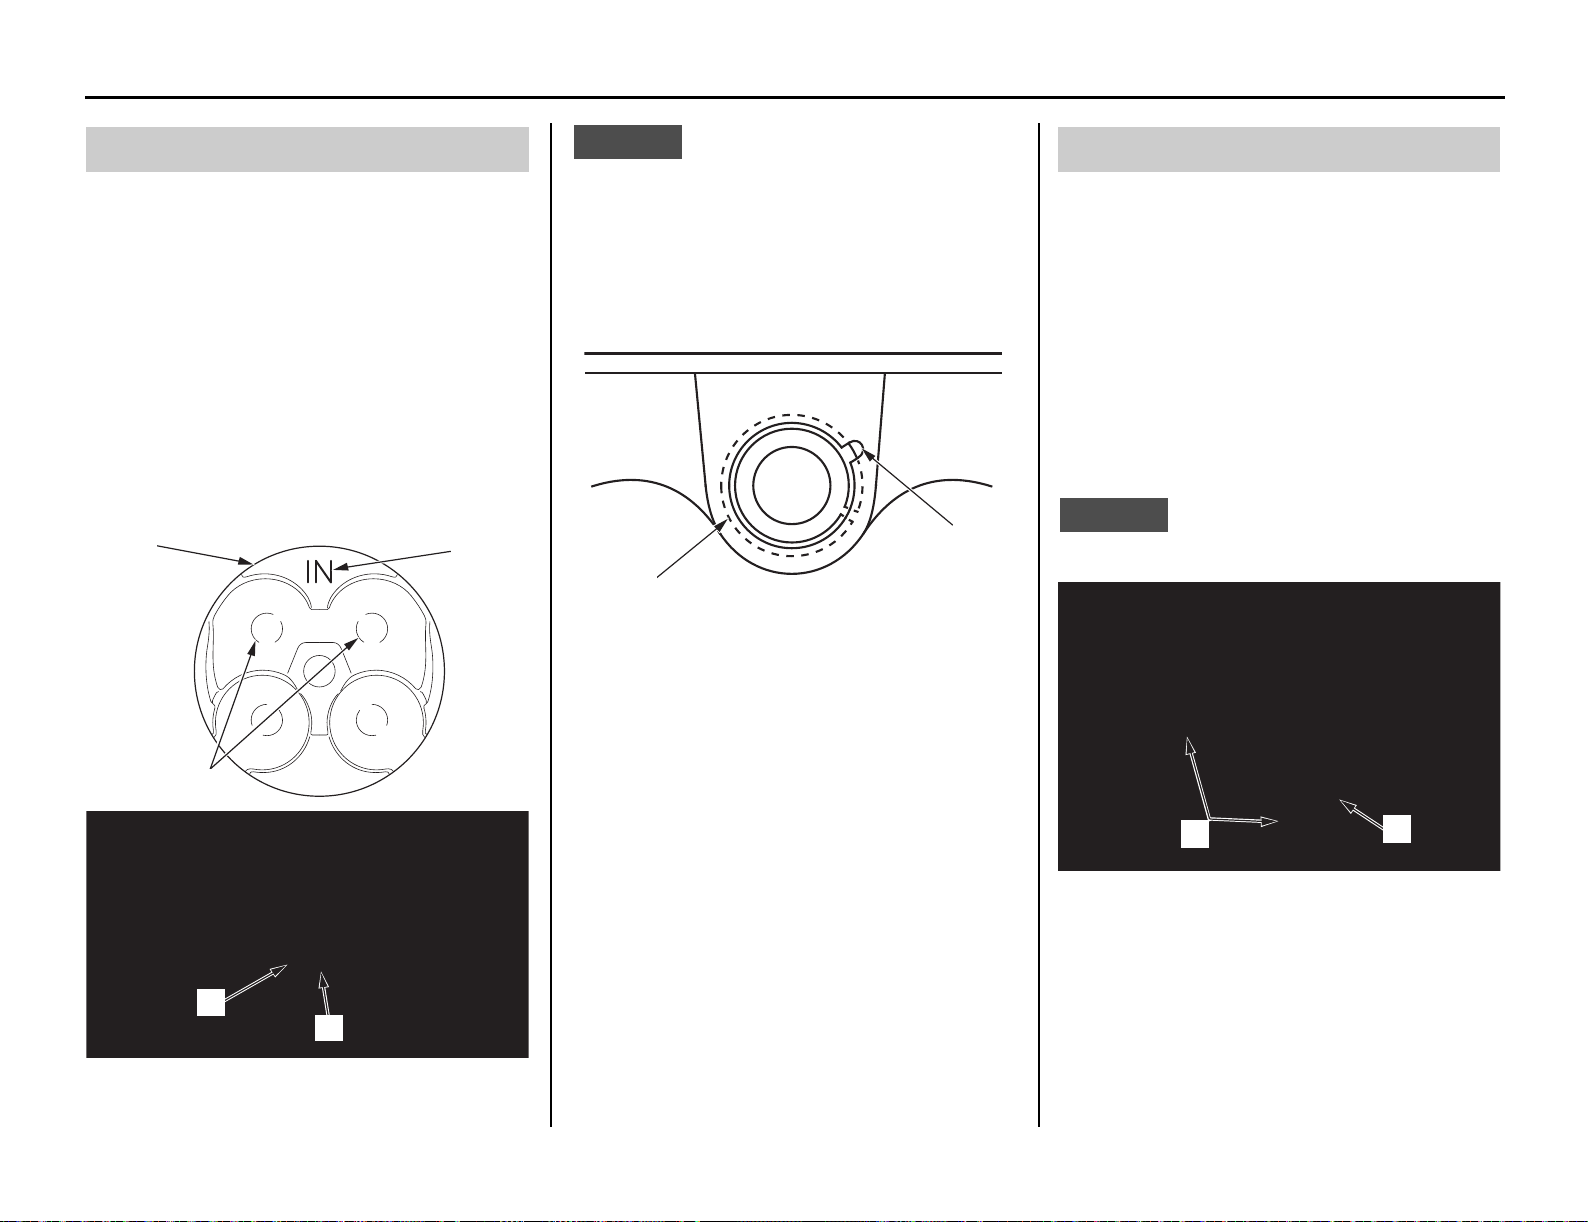
3. Place the piston (1) with the “IN” mark (2) and/
or the large valve recesses (3) facing the intake
side of the engine.
4. Apply engine oil to the piston pin (4) and inner
surface of the piston pin hole.
Install the piston pin and new piston pin clips (5).
NOTICE
Use new piston pin clips. Never reuse old piston
pin clips.
Do not let the piston pin clips fall into the
crankcase.
Do not align the piston pin clip end gap with the
piston cut-out (6).
1. Clean off any gasket material from the gasket
surface of the crankcase, being careful not to
let any material fall into the crankcase. Be
careful not to remove any metal from the
gasket surface.
2. Remove the shop towel. Do not let any gasket
debris fall into the crankcase, being careful not
to let any material fall into the crankcase.
Be careful not to remove any metal from the
gasket surface.
3. Install the dowel pins (1) and a new cylinder
gasket (2).
NOTICE
Do not let the dowel pins fall into the crankcase.
4. Clean any gasket material off the cylinder.
Piston Installation
(1) piston (4) piston pin
(2) “IN” mark (5) piston pin clip
(3) large valve recesses
(1)
(2)
(3)
(4)
(5)
(5) piston pin clip (6) piston cut-out
(6)
(5)
Cylinder Installation
(1) dowel pins
(2) cylinder gasket
(2)
(1)
31KSE7100_NA.book 66 ページ 2019年4月9日 火曜日 午後1時13分
Loading ...
Loading ...
Loading ...