Loading ...
Loading ...
Loading ...
Servicing Your Honda
61
Valve Clearance
18. Rotate the carburetor and align the tabs (29) on
the carburetor with the grooves (30) on the
insulator and connecting tube.
19. Tighten the connecting tube clamp screw (31)
so the gap between the tabs of the clamp is
0.1 ± 0.04 in (3 ± 1 mm).
20. Tighten the insulator band screw (32) so the
gap between the tabs of the clamp is 0.3 ± 0.04
in (7 ± 1 mm).
1. Check the spark plug hole packing (1) is in
good condition, replace it if necessary.
Apply oil to the spark plug hole packing.
Install the spark plug hole packing to the
cylinder head cover.
2. Inspect the cylinder head cover packing (2) for
damage or deterioration, replace it if
necessary.
Install the cylinder head cover packing into the
groove of the cylinder head cover (3).
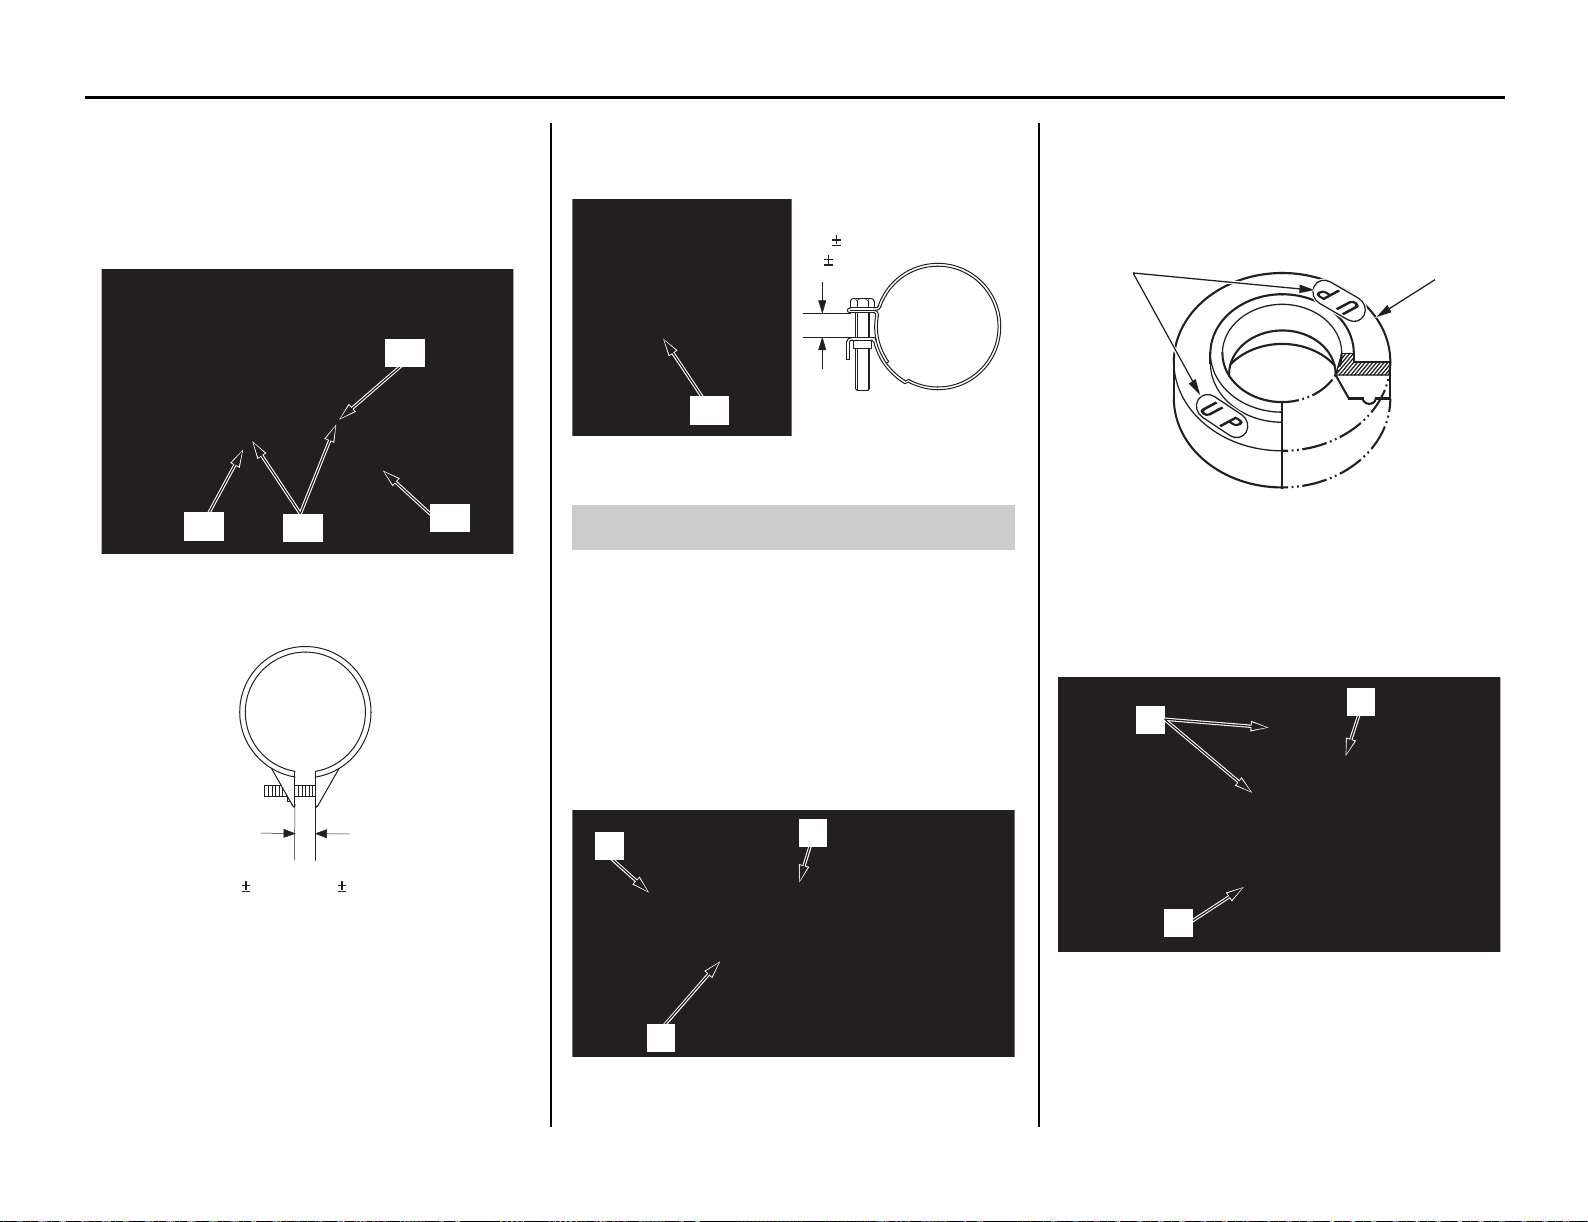
3. Check the rubber seal (4) is in good condition,
replace them if necessary.
Install the rubber seals onto the cylinder head
cover with their “UP” marks (5) facing up.
4. Install the cylinder head cover (3) and tighten
the cylinder head cover bolts (6) to the
specified torque:
7 lbf·ft (10 N·m, 1.0 kgf·m)
5. Connect the breather tube (7).
6. Install the spark plug and direct ignition coil
(page 52).
7. Install the fuel tank and the seat (pages 31, 29).
(29) tabs (31) connecting tube clamp screw
(30) grooves
(30)
(30)
(31)
(29)
0.1 0.04 in (3 1 mm)
(32) insulator band screw
Cylinder Head Cover Installation
(1) spark plug hole packing
(2) cylinder head cover packing
(3) cylinder head cover
(32)
0.3 0.04 in
(7 1 mm)
(3)
(1)
(2)
(4) rubber seal (5) “UP” marks
(3) cylinder head cover
(6) cylinder head cover bolts
(7) breather tube
(4)
(5)
(7)
(3)
(6)
31KSE7100_NA.book 61 ページ 2019年4月9日 火曜日 午後1時13分
Loading ...
Loading ...
Loading ...