Loading ...
Loading ...
Loading ...
Carburetor Adjustments & Tuning Tips
116
Adjustments for Competition
To assemble, reverse the disassembly procedures.
To install the carburetor, reverse the removal
procedures.
Tighten the following parts to the specified torque.
float bowl screws:
1.5 lbf·ft (2.1 N·m, 0.2 kgf·m)
float bowl plug:
3.6 lbf·ft (4.9 N·m, 0.5 kgf·m)
accelerator pump cover screws:
1.5 lbf·ft (2.1 N·m, 0.2 kgf·m)
carburetor top screws:
1.5 lbf·ft (2.1 N·m, 0.2 kgf·m)
jet needle/holder assembly:
1.3 lbf·ft (1.8 N·m, 0.18 kgf·m)
link arm torx screw:
1.5 lbf·ft (2.1 N·m, 0.2 kgf·m)
throttle drum cover bolt:
2.5 lbf·ft (3.4 N·m, 0.3 kgf·m)
hot start cable nut:
1.5 lbf·ft (2.1 N·m, 0.2 kgf·m)
throttle cable lock nut:
3.0 lbf·ft (4.0 N·m, 0.4 kgf·m)
leak jet:
0.2 lbf·ft (0.3 N·m, 0.03 kgf·m)
main jet:
1.1 lbf·ft (1.5 N·m, 0.2 kgf·m)
slow jet:
1.1 lbf·ft (1.5 N·m, 0.2 kgf·m)
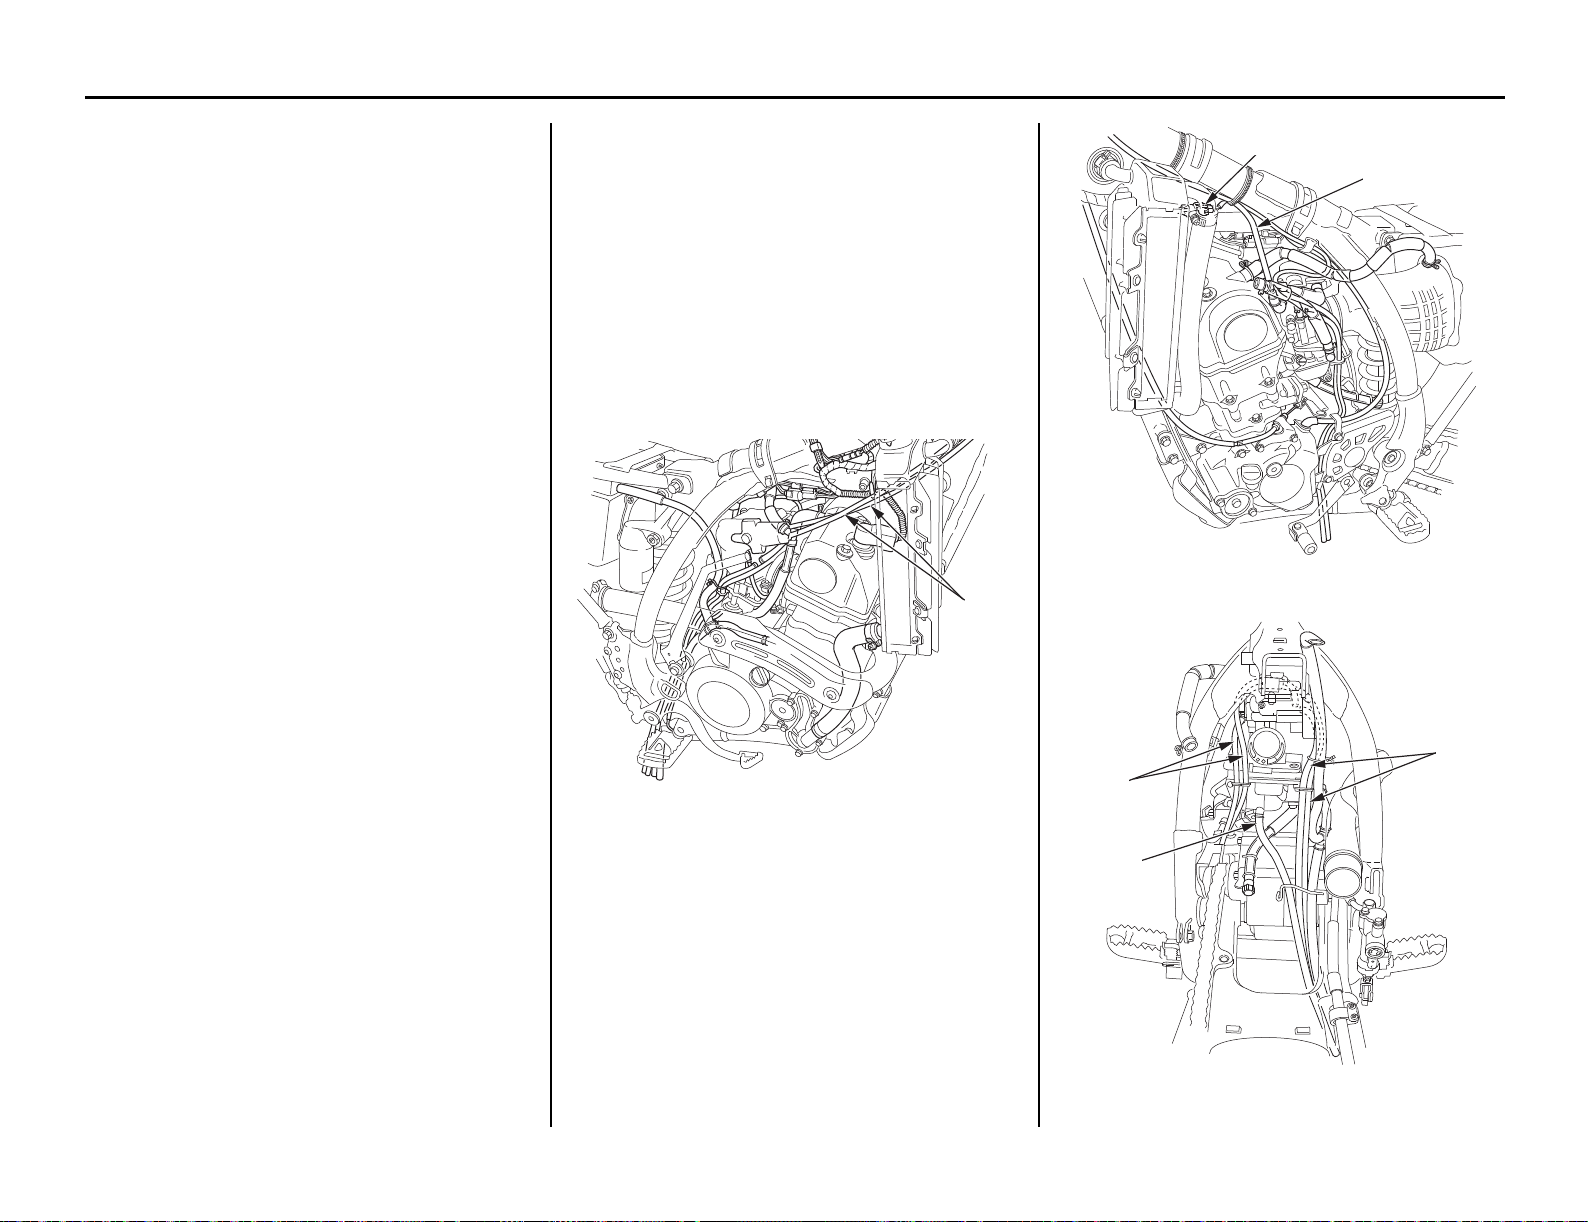
• Route the throttle cables (1), hot start cable (2)
and throttle position sensor wire correctly.
• After installing the carburetor, adjust the
throttle grip freeplay and hot start lever
freeplay.
• After installing the carburetor, check the
throttle position sensor connector (3) for
correct routing.
• After installing the carburetor, check the air
vent hoses (4) and overflow hose (5) for
kinking or pinching and correct routing.
• Check that the U-ring and O-ring are in good
condition. Replace them if necessary.
(1) throttle cables
(1)
(2) hot start cable
(3) throttle position sensor connector
(4) air vent hoses
(5) overflow hose
(3)
(2)
(5)
(4)
(4)
31KSE7100_NA.book 116 ページ 2019年4月9日 火曜日 午後1時13分
Loading ...
Loading ...
Loading ...