Loading ...
Loading ...
Loading ...
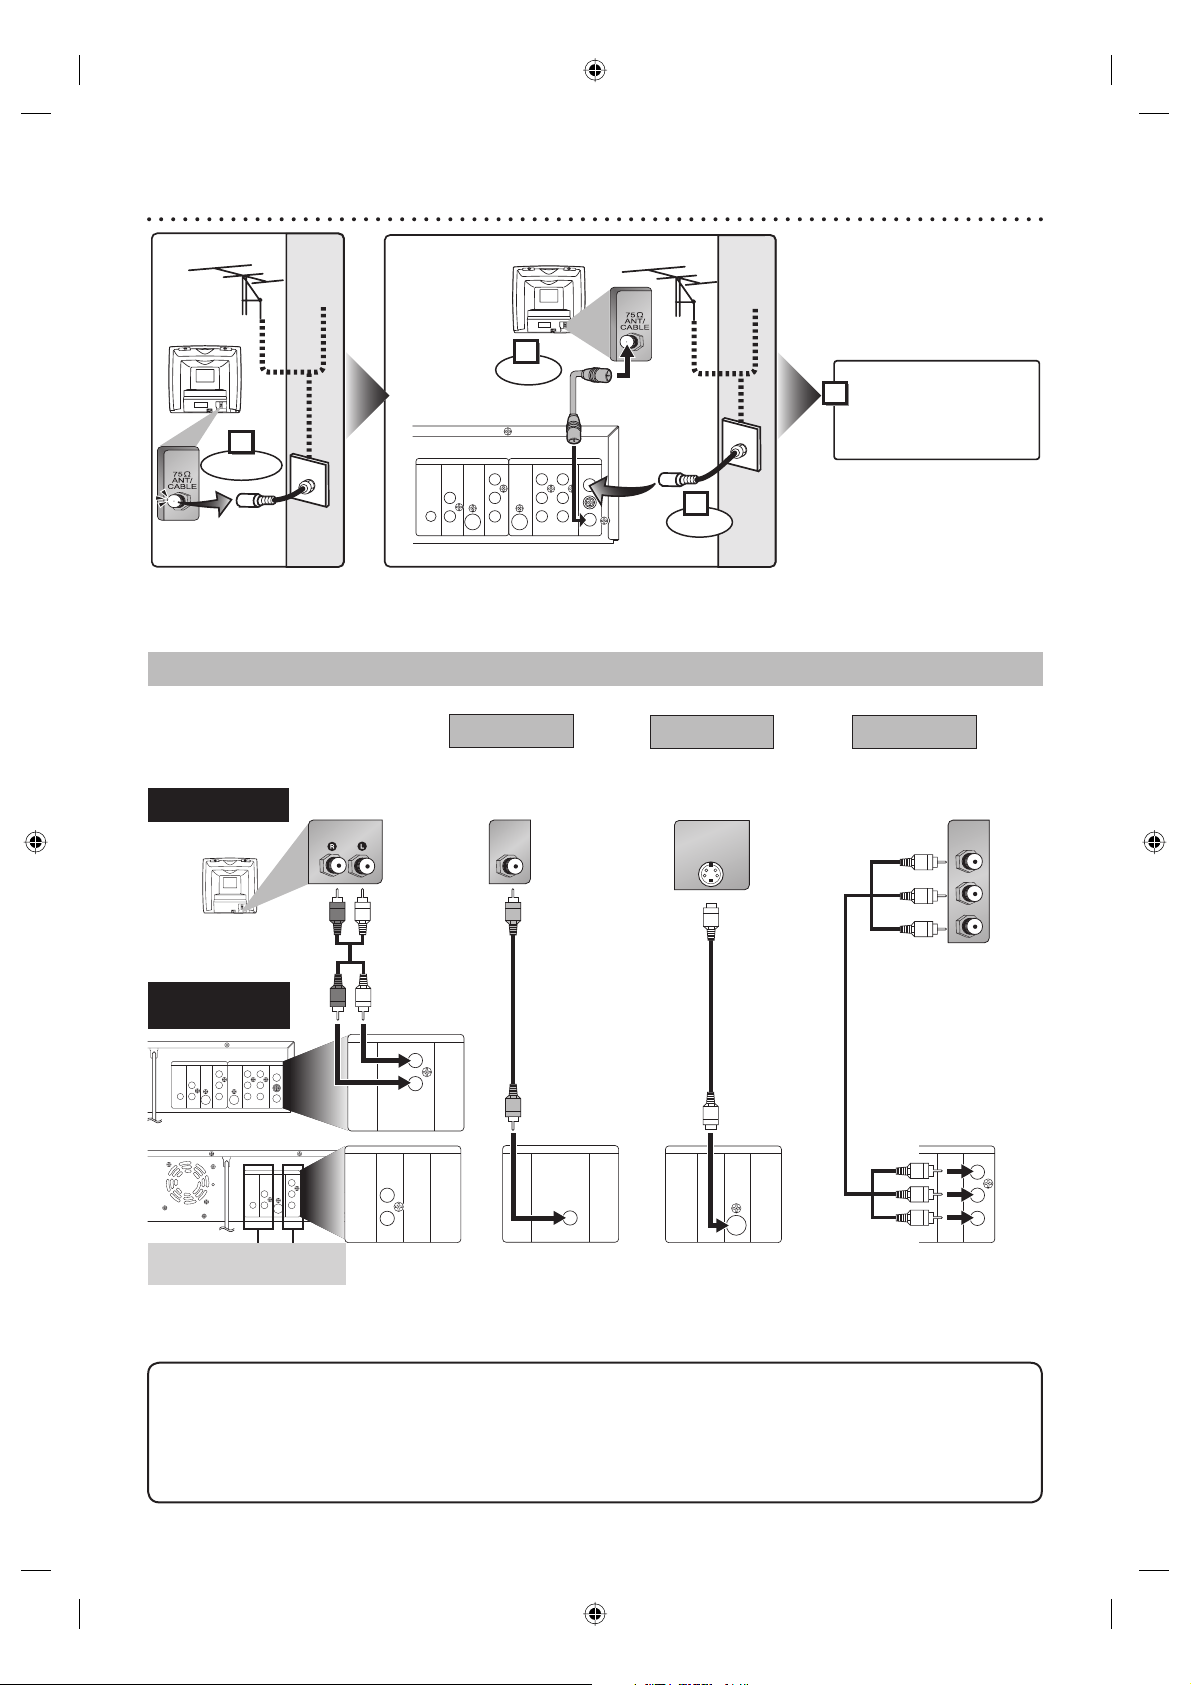
14 Connection to a TV
Choose one of the following connections, depending on the capabilities of the equipment you possess.
Helpful Hints
• Connect this unit directly to the TV. If the A/V cables are connected to a VCR, pictures may be distorted
due to the copy protection system.
• Method 2 and method 3 are only useful in DVD mode.
• Although you can view images when using the connection Method 1 and 2 while Progressive Scan is activated, they
are in Interlace mode.
COAXIAL
L
R
PB
PR
L
R
L
R
DVD
DIGITAL
AUDIO OUT
AUDIO
OUT
S-VIDEO
OUT
Y
COMPONENT
VIDEO OUT
DVD/VCR
S-VIDEO
IN AUDIO IN AUDIO OUT
VIDEO IN VIDEO OUT
ANT-IN
ANT-OUT
COAXIAL
L
R
PB
PR
L
R
L
R
DVD
DIGITAL
AUDIO OUT
AUDIO
OUT
S-VIDEO
OUT
Y
COMPONENT
VIDEO OUT
DVD/VCR
S-VIDEO
IN
AUDIO IN AUDIO OUT
VIDEO IN VIDEO OUT
ANT-IN
ANT-OUT
L
R
DVD
AUDIO
OUT
DVD
Y
COMPONENT
VIDEO OUT
PB
PR
L
R
DVD/VCR
AUDIO OUT
DVD
S-VIDEO
OUT
DVD/VCR
VIDEO OUT
AUDIO IN
S-VIDEO IN
PB/CB
Y
P
R/CR
COMPONENT
VIDEO IN
VIDEO IN
AUDIO OUT
TV
Basic Audio
Method 2
Method 3
Better picture Best picture
S-VIDEO OUT
COMPONENT VIDEO OUT
Audio cable
(supplied)
Component video cable
(commercially available)
This unit
<REAR PANEL>
Method 1
Good picture
VIDEO OUT
Video cable
(supplied)
S-Video cable
(commercially
available)
• These jacks are useful
only in DVD mode.
COAXIAL
L
R
PB
PR
L
R
L
R
DVD
DIGITAL
AUDIO OUT
AUDIO
OUT
S-VIDEO
OUT
Y
COMPONENT
VIDEO OUT
DVD/VCR
S-VIDEO
IN
AUDIO IN AUDIO OUT
VIDEO IN VIDEO OUT
ANT-IN
ANT-OUT
3
2
1
4
Plug in the AC power
cord of this unit.
(Back of TV) Antenna
Cable TV
signal
RF cable
(supplied)
Connect
(Back of this unit)
Connect
or
(Back of TV)
Antenna
Cable TV
signal
or
Disconnect
or
E9A90UD_EN.indb 14E9A90UD_EN.indb 14 6/12/2006 4:21:07 PM6/12/2006 4:21:07 PM
Loading ...
Loading ...
Loading ...