Loading ...
Loading ...
Loading ...
MY DESIGN CENTER
149
4
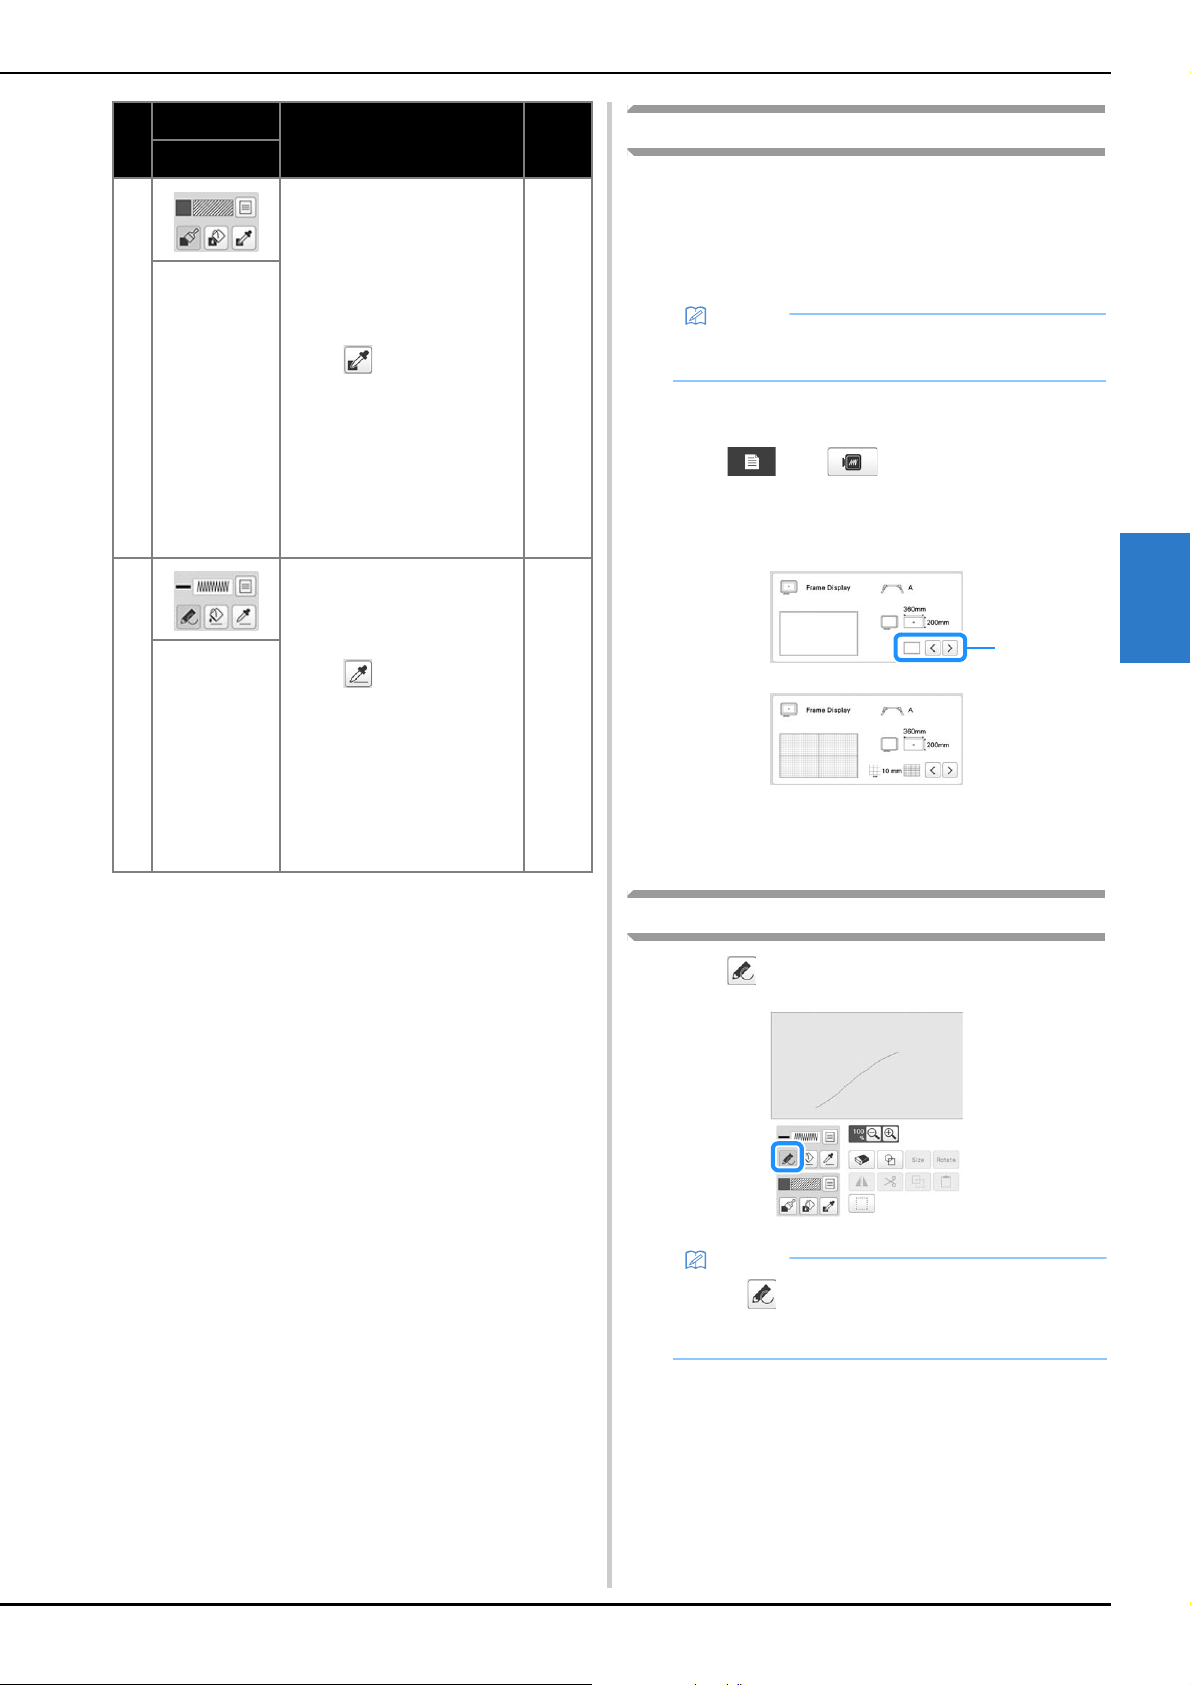
Before creating designs
Select the center point marker or grid lines setting for [Frame
Display] to apply the frame display to the pattern drawing
area of My Design Center.
For details on the types of embroidery frames and grids
available, refer to “Changing the display guides” on page 123.
a
Attach the frame to be used.
b
Touch , then .
The embroidery settings screen appears.
c
Select the grid line of the [Frame Display].
1 Grid types
* Select the grid size 10 mm (3/8 inch) or 25 mm (1
inch).
Drawing lines
a
Touch and draw lines.
9 Paint with brush and set the
color. You can select the
brush type, fill type and color
as you need. Painted lines
and areas will be converted
to the pattern embroidered
with fill stitch.
Touch to pick up the
color and fill type from a
region in the pattern within
the pattern drawing area. The
picked up color is shown as
the currently selected region
color beside the button and
as the selected color in the
Region Property screen.
151
Brush tool key
0 Draw lines and set the color.
You can select the line type,
stitch type and color as you
need.
Touch to pick up the
color and stitch type from a
line in the pattern within the
pattern drawing area. The
picked up color is shown as
the currently selected line
color beside the button and
as the selected color in the
Line Property screen.
149
Line tool key
No.
Display
Explanation Page
Key Name
Memo
• The frame type cannot be changed in the settings
screen.
Memo
• When is touched, all regions will be displayed
in the background to clarify the drawing lines on
the screen.
1
Loading ...
Loading ...
Loading ...