Loading ...
Loading ...
Loading ...
124
b
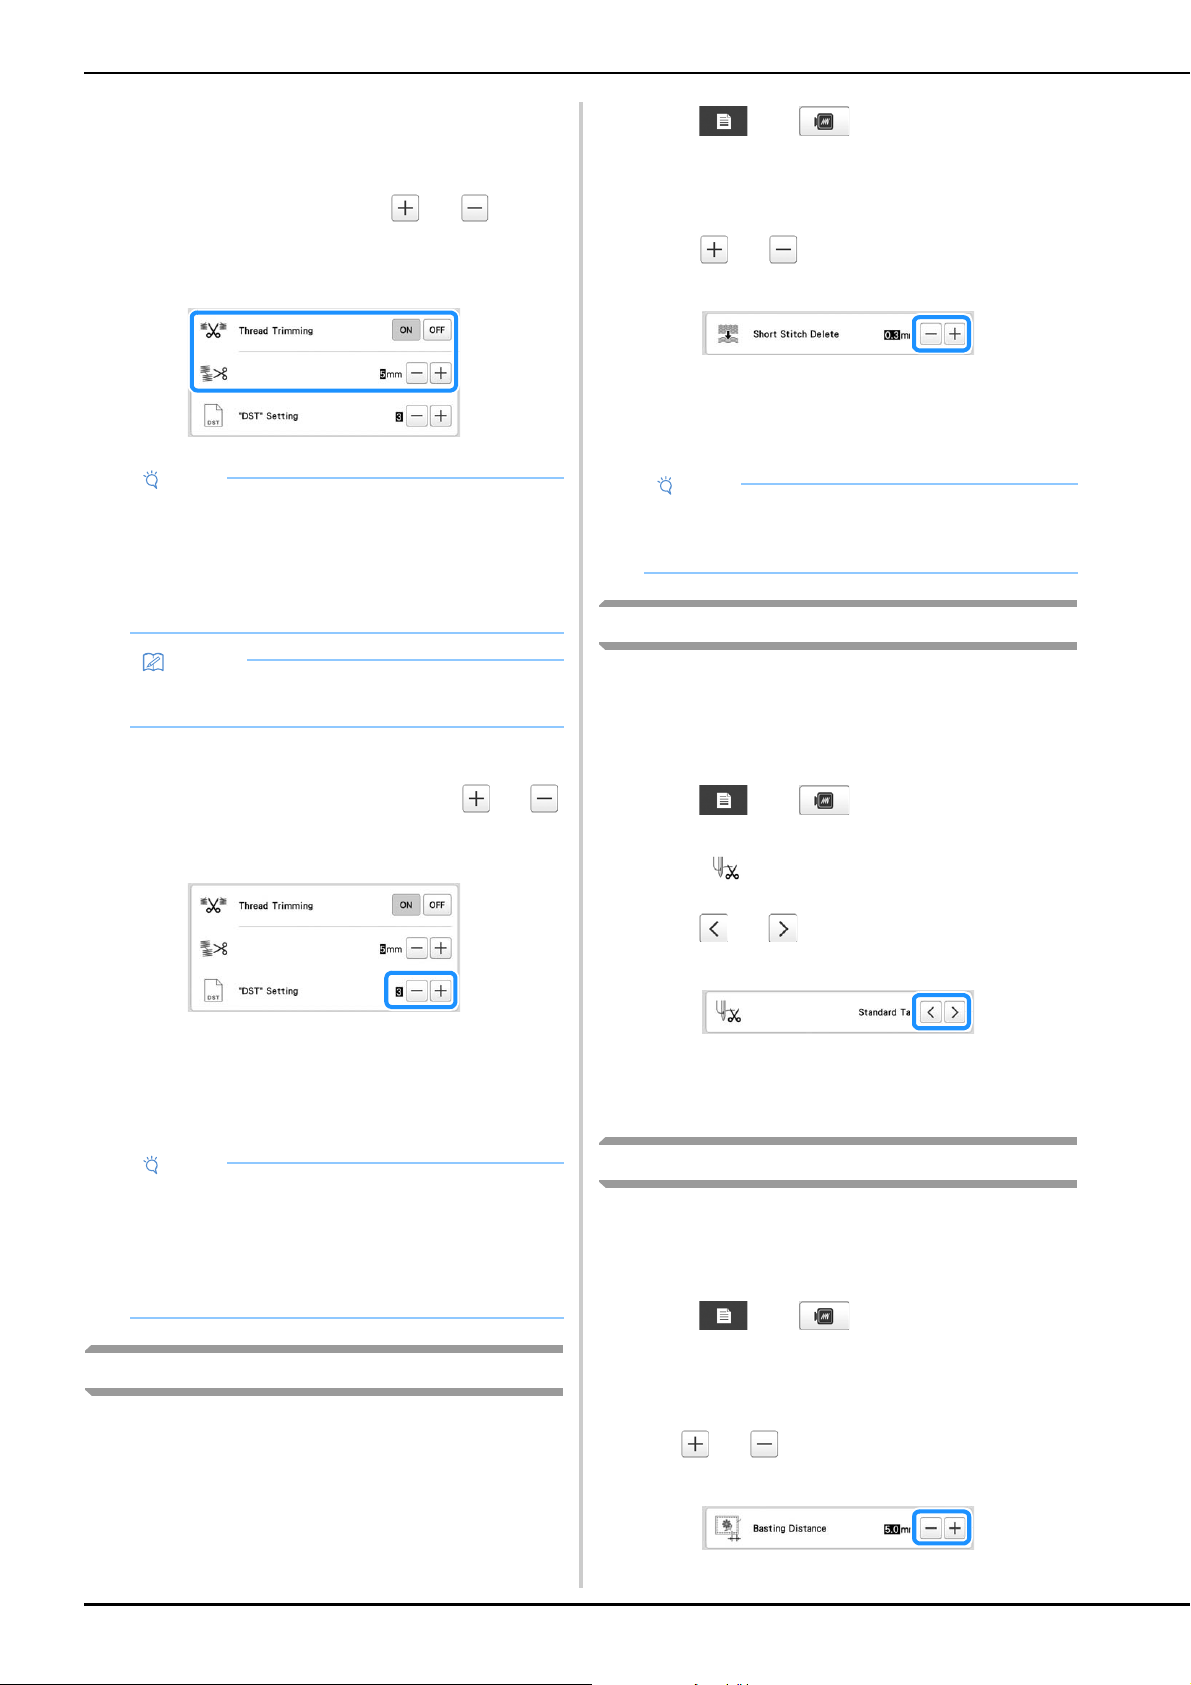
Locate [Thread Trimming].
c
Touch [ON] or [OFF] to select the desired setting.
When [ON] is selected, touch and to
specify the jump stitch length. For example, when
the value is set to [5 mm], jump stitches will be cut at
5 mm (13/64 inch), but not at 4 mm (5/32 inch).
■ When using Tajima embroidery data (.dst)
d
If [Thread Trimming] is set to [ON], touch and
to select the number of feed codes.
The desired setting is displayed.
• A value between [1] and [8] can be specified. For
example, if [3] is specified, sequential 3 jump codes
will be converted to the trim code. But sequential 2
jump codes will not be converted to the trim code, it
will be embroidered as the feed (jump) stitch.
Deleting short stitches
If embroidery data other than our original patterns are used,
the stitch length may be too short, possibly resulting in the
thread or the needle breaking. In order to prevent this
problem from occurring, the machine can be set to delete
stitches with a short stitch length. Stitches with a length less
than that specified in this function, can be deleted.
When the machine is purchased, [0.3] was selected.
a
Touch , then .
The embroidery settings screen appears.
b
Locate [Short Stitch Delete].
c
Touch and to select the stitch length.
The desired size is displayed.
• A value between 0 and 1 millimeters if the units of
measurements is set to [mm] (or a value between 0
and 0.04 inch if the units of measurements is set to
[inch]) can be specified.
Specifying the remaining length of thread
This setting specifies whether the length of upper thread that
remains threaded through the needle after the thread is
trimmed (length of thread passed through the eye of the
needle) has a standard tail or long tail.
When the machine is purchased, [Standard Tail] is selected.
a
Touch , then .
The embroidery settings screen appears.
b
Display .
c
Touch and to select the setting.
The desired length is displayed.
• If the machine misses stitches with a standard length
of thread after it is trimmed, select [Long Tail].
• When using metallic thread, select [Long Tail].
Changing the embroidery basting distance
The distance from the pattern to the basting stitching can be
set to 0.0 mm (0 inch) to 12.0 mm (1/2 inch).
When the machine is purchased, [5.0 mm] is selected. Refer
to page 99 when using this setting.
a
Touch , then .
The embroidery settings screen appears.
b
Locate [Basting Distance].
c
Use and to specify the distance from the
pattern to the basting stitching.
Note
• Even if [Thread Trimming] is set to [ON], this setting
is not applied to the jump stitch trimming of
threads between character patterns. For details on
jump stitch trimming for character patterns, refer to
“Trimming the threads between characters” on
page 47.
Memo
• The length of jump stitch trimming cannot be
specified to Tajima embroidery data (.dst).
Note
• You need to set the jump number same as the
number that was used when the particular Tajima
data was created.
If the jump number is not matched, either
unexpected trim or no trimming at trim expected
point will happen.
Note
• If the setting is changed from the previous setting,
the new setting is applied to the subsequent
embroidery.
Loading ...
Loading ...
Loading ...