Loading ...
Loading ...
Loading ...
110
h
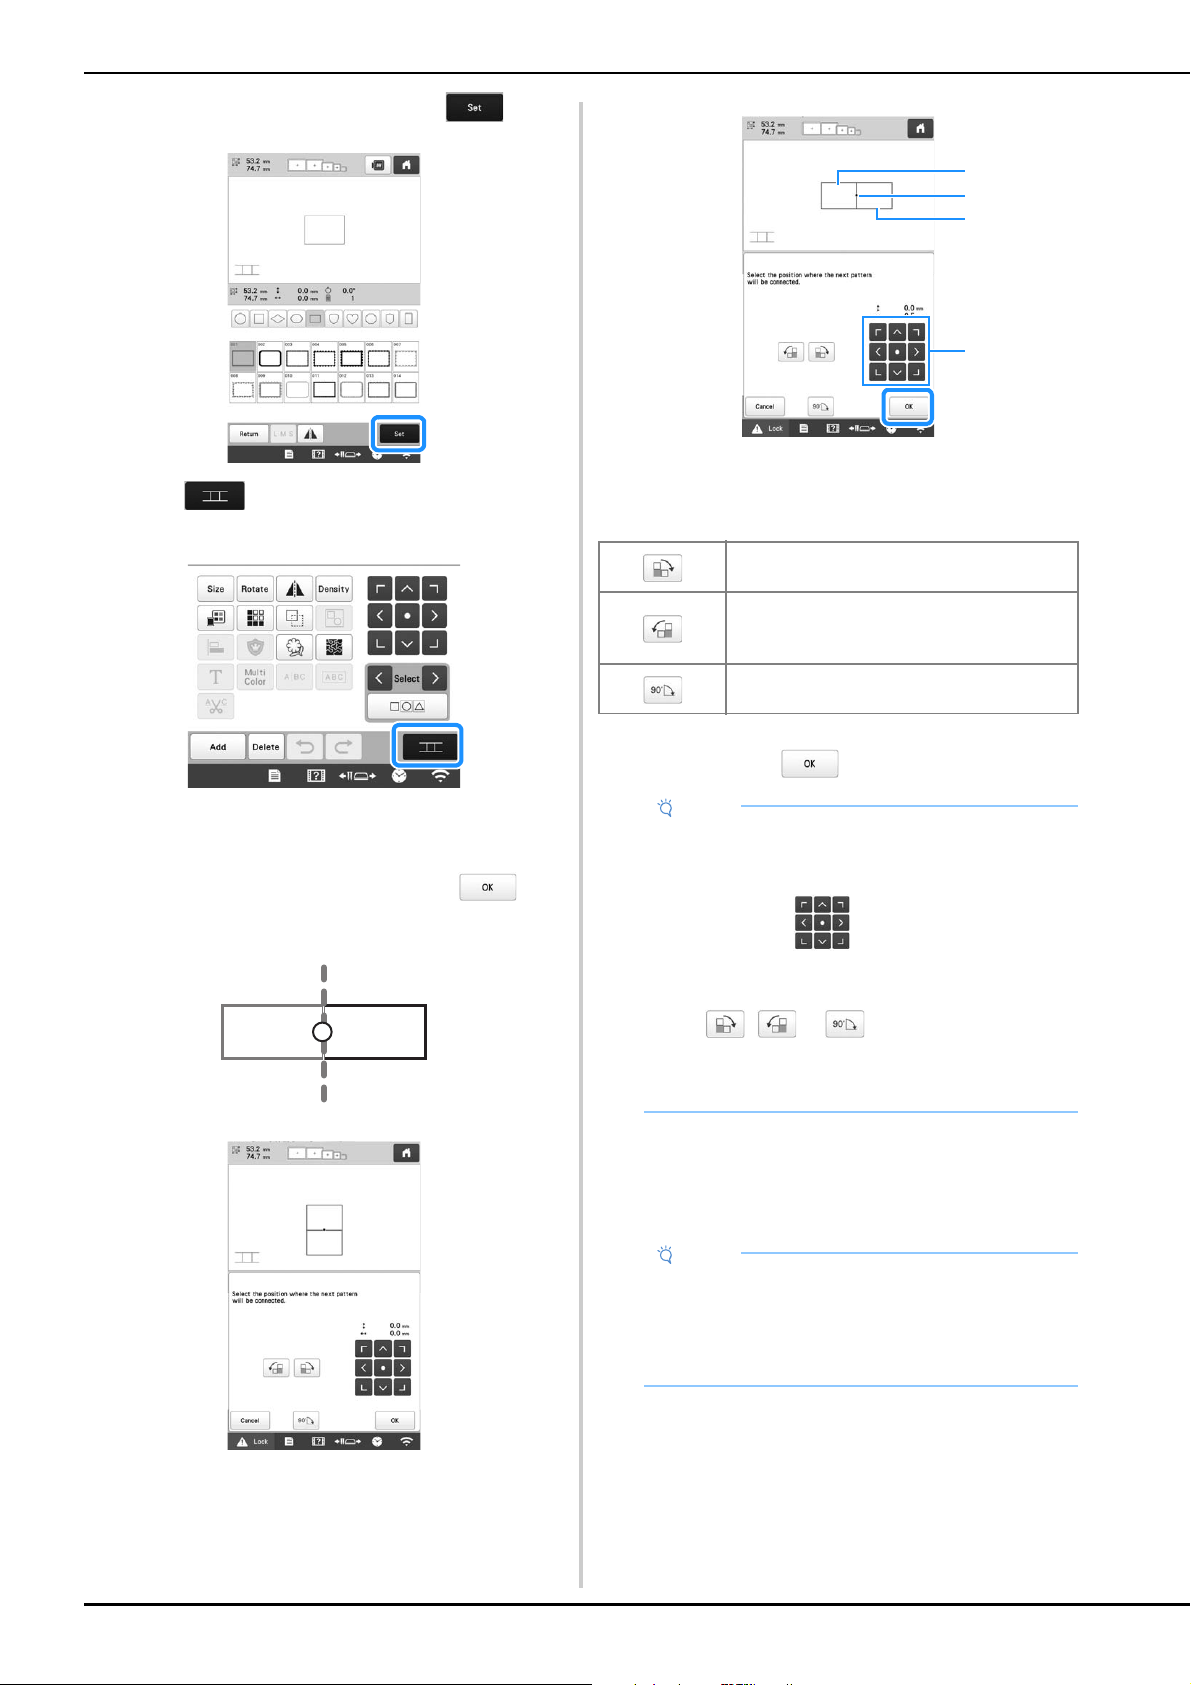
Select the second pattern B, then touch .
i
Touch , and then select how the pattern will be
connected.
The pattern connection setting screen appears.
j
Touch the position for the second pattern will be
connected on the screen, and then touch . In
this example, touch the right side of the first pattern.
• You can adjust the position of the second pattern,
using the keys described below.
1 Touch the connecting area
2 Second pattern B
3 First pattern A
4 Move the second pattern.
Message appears on screen and carriage will move
after touching .
k
Prepare two embroidery positioning stickers.
We will follow the on-screen instructions to affix these
two stickers to the fabric so that the positioning marks
can be detected by the camera.
Rotate the second pattern in a clockwise
arc referring the first pattern as a center.
Rotate the second pattern in a
counterclockwise arc referring the first
pattern as a center.
Rotate the second pattern 90 degrees in a
clockwise arc.
Note
• The second pattern will be automatically
connected to the first pattern without adjustment.
Change the position of the second pattern
manually using .
• The position of the second pattern can be moved
using your finger or the included touch pen.
• Use , or if you want to align the
pattern to the corner of the center of the first
pattern, when changing the pattern's connecting
position.
Note
• Use the positioning stickers included with this
product or purchase replacement stickers (refer to
“Optional accessories” on page 14) from your
Brother dealer. If any other sticker is used, the
camera may not recognize it.
3
2
1
4
Loading ...
Loading ...
Loading ...