Loading ...
Loading ...
Loading ...
ADVANCED EMBROIDERY
141
3
d
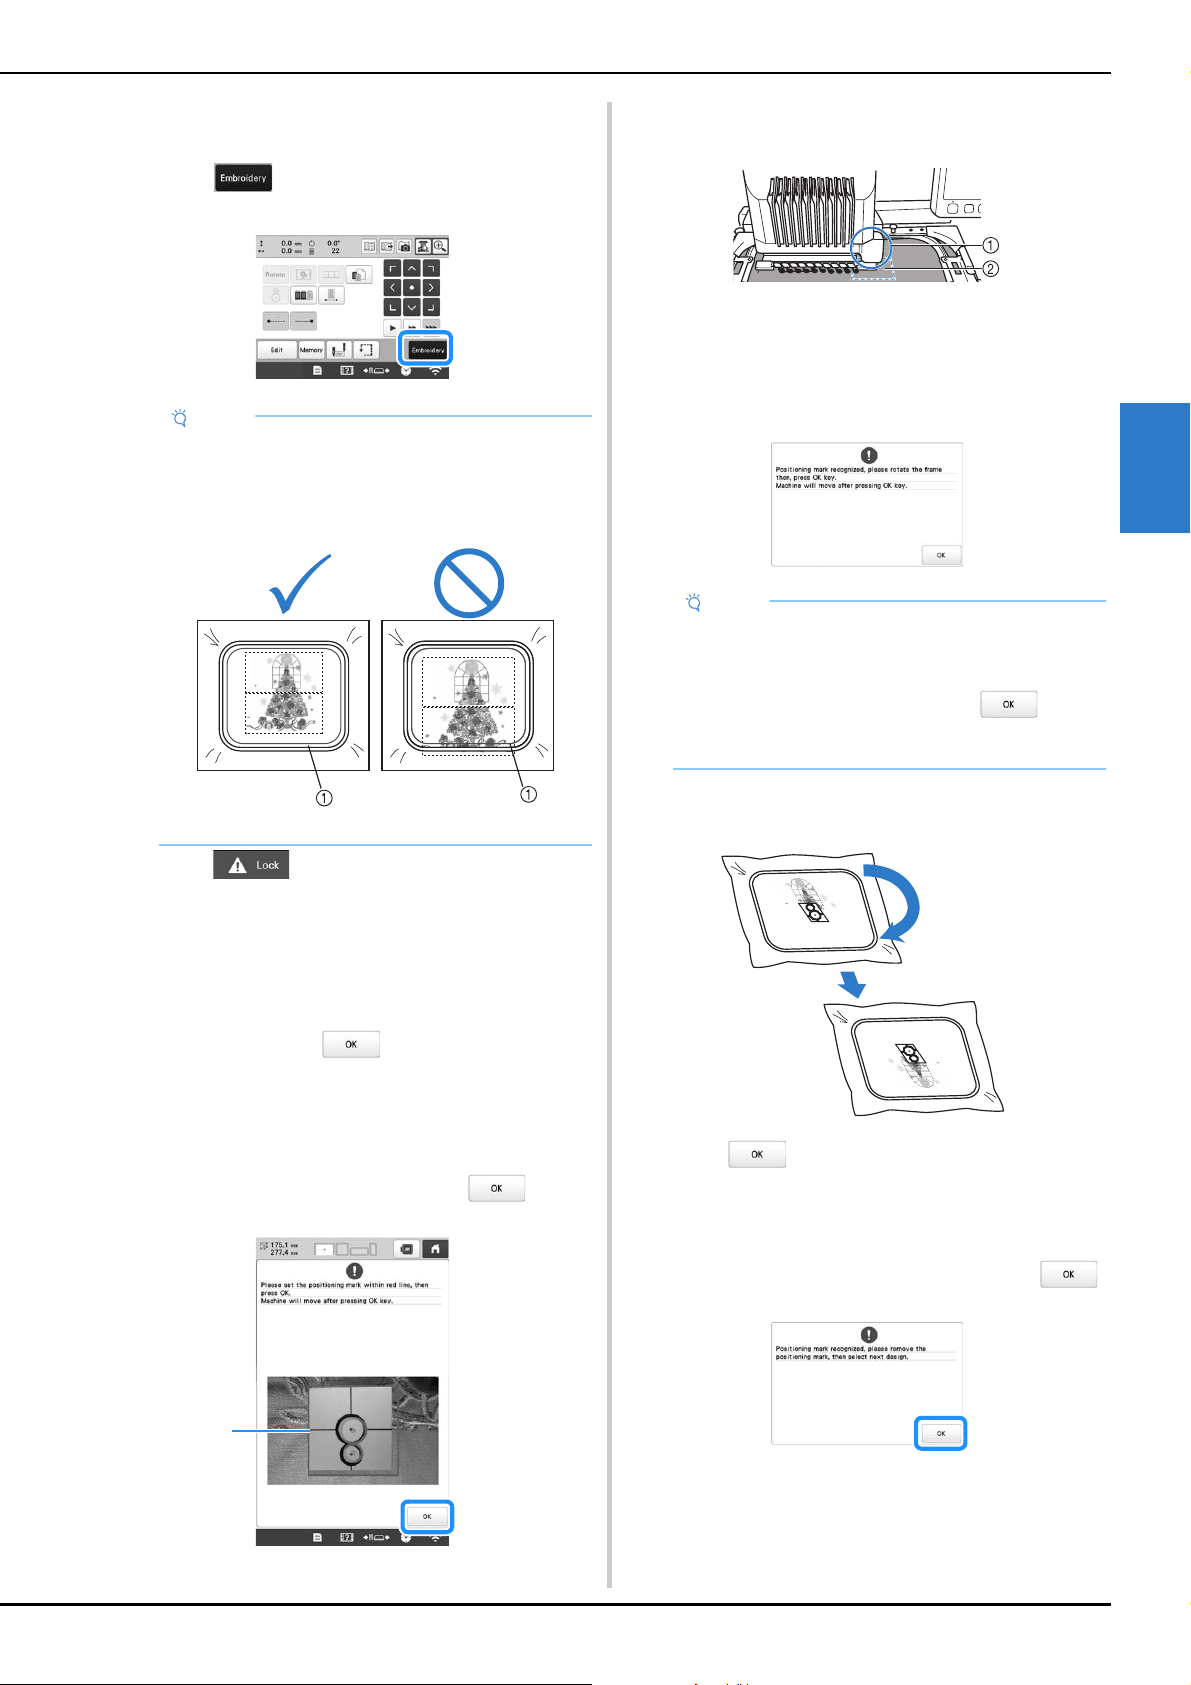
Attach the jumbo frame to the machine.
e
Touch .
f
Touch , and then press the “Start/Stop”
button to start embroidering the first section of the
pattern.
g
After embroidering of the first section of the pattern is
finished, the message to confirm to embroider the next
part appears. Touch .
h
An image of the needle location appears in the screen
with the positioning detection area framed by a red
line. Affix an embroidery positioning sticker so that it
fits within the red line, and then touch .
1 Red line
• The positioning detection area is under the built-in
camera.
1 Built-in camera is in this box.
2 Affix the sticker in this area.
i
When the machine's built-in camera has finished
detecting the location of the embroidery positioning
sticker, the following message appears.
j
Remove the jumbo frame from the machine, turn the
frame around, and then attach it to the machine.
k
Touch , then the machine starts to detect the
location of the embroidery positioning sticker.
l
When the machine's built-in camera has finished
detecting the location of the embroidery positioning
sticker, the following message appears. Touch .
Note
• When you change the embroidering position using
the jumbo frame, be sure to be aware of the size of
the combined pattern. You cannot change the
position exceeding the embroidery area.
1 Embroidery area
1
Note
• If the built-in camera cannot detect the location of
the embroidery positioning sticker, the message
that could not recognize the embroidery
positioning sticker appears. Touch , and
then perform the procedure again starting from
step h.
Loading ...
Loading ...
Loading ...