Loading ...
Loading ...
Loading ...
ADVANCED EMBROIDERY
123
3
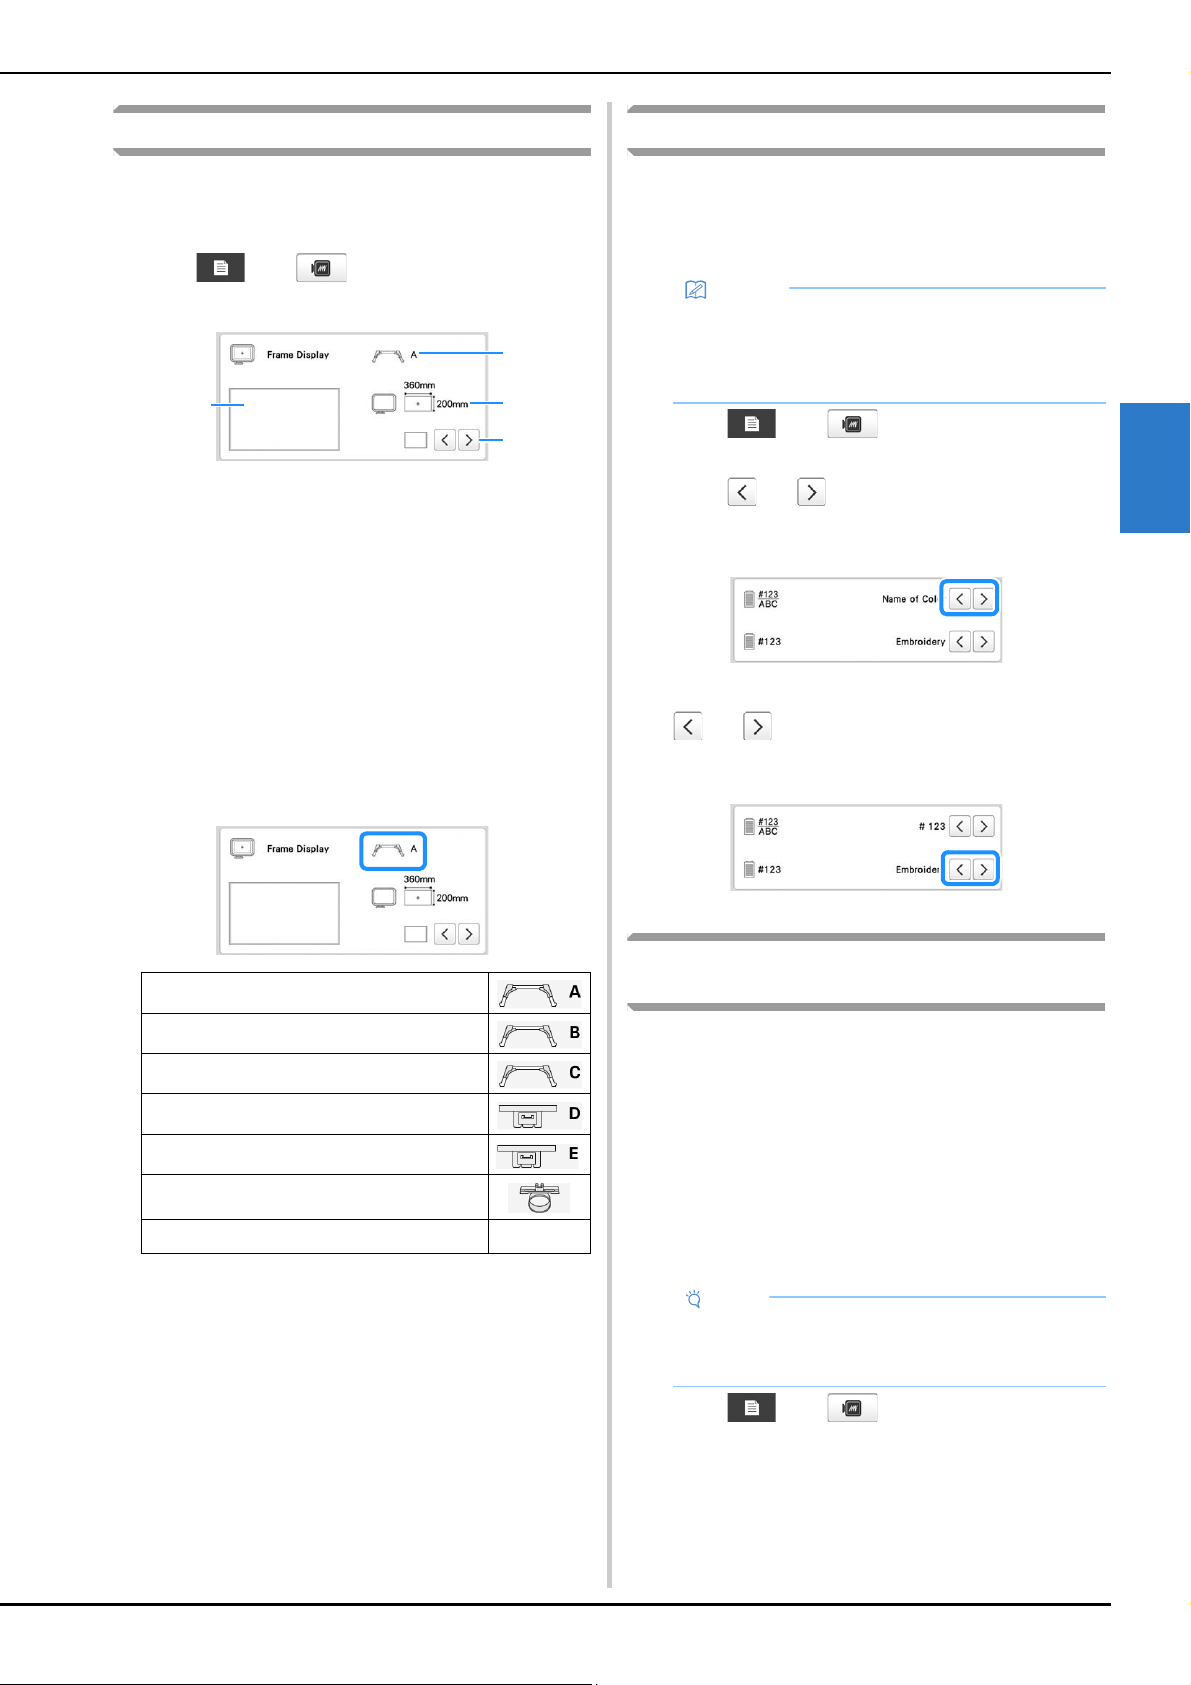
Changing the display guides
The guides in the pattern display area can be specified. The
machine automatically detects the type of embroidery frame
holder and embroidery frame that are installed and displays
them.
Touch , then .
The embroidery settings screen appears.
1 How the guides will appear with the specified settings
can be previewed here.
2 Type of embroidery frame holder
Displays the type of the embroidery frame holder.
3 Area
Displays the size of the embroidery frame that is actually
installed. (page 66)
4 Center point marker or grid lines
Select the type of the center point marker and the grid
lines, and whether or not to display them.
■ Type of embroidery frame holder
The machine automatically detects the type of embroidery
frame holder that is installed.
If no embroidery frame holder is installed, the setting for
“Cap frame/Cylinder frame” is displayed.
* No icon appears since this frame is installed without
an embroidery frame holder.
Changing the thread color information
You can display the name of the thread colors, embroidery
thread number or the embroidering time.
When the machine is purchased, the thread color number
[#123] is selected.
a
Touch , then .
The embroidery settings screen appears.
b
Touch and to display the name of the thread
colors, the embroidery thread number or the
embroidering time.
c
When the thread number [#123] is displayed, touch
and to select from the embroidery thread
brand.
Specifying jump stitch trimming / “DST”
jump codes for trimming
You can specify whether or not jump stitches are cut. In
addition, when using Tajima embroidery data (.dst), you can
specify whether or not the thread is cut according to the
specified number of jump codes.
[ON]: The machine converts the “jump” code to a trim code,
based on the number specified on the next line.
[OFF]: The machine does not convert the “jump” code to a
trim code.
When the machine is purchased, [ON] is selected and the
number of jumps is set to [3].
a
Touch , then .
The embroidery settings screen appears.
Embroidery frame holder A (included)
Embroidery frame holder B (included)
Embroidery frame holder C (Optional)
Embroidery frame holder D (Optional)
Embroidery frame holder E (Optional)
Cap frame/Cylinder frame (Optional)
Magnetic sash frame (Optional)
*
1
4
3
2
Memo
• Colors on the screen may vary slightly from actual
spool colors.
• [Original], imported data retains the brand thread
created with the software, is set as a default.
Note
• If the setting is changed from the previous setting,
the new setting is applied to the subsequent
embroidery.
Loading ...
Loading ...
Loading ...