Loading ...
Loading ...
Loading ...
©
2017 DJI All Rights Reserved.
49
MATRICE 600 PRO
User Manual
b. Insert the Micro SD card into your PC. Extract all the downloaded les into the root directory of the
Micro SD card. While the Matrice 600 Pro is powered off, remove the Micro SD card from your PC
and insert it into the Micro SD card slot on the gimbal.
Step 3- Upgrade the Firmware
a. Ensure the remote controller is powered off and then power on one of the Intelligent Flight Batteries.
The rmware upgrade will begin automatically once all the Intelligent Flight Batteries are triggered.
b. It will take approximately 25 minutes to complete the rmware upgrade. The gimbal will repeat a
beeping pattern of four fast beeps to indicate that the upgrade is in progress, and emit one slow
beep followed by two fast beeps to indicate that the upgrade has been completed successfully.
c. Check the upgrade status by opening the .txt le that is automatically generated after the upgrade.
You should see the text “result: successful” in the .txt le if the upgrade is successful. Otherwise,
try upgrading the rmware again if you see the text “result: failed” in the text le or the gimbal
sounds a long beeping sound.
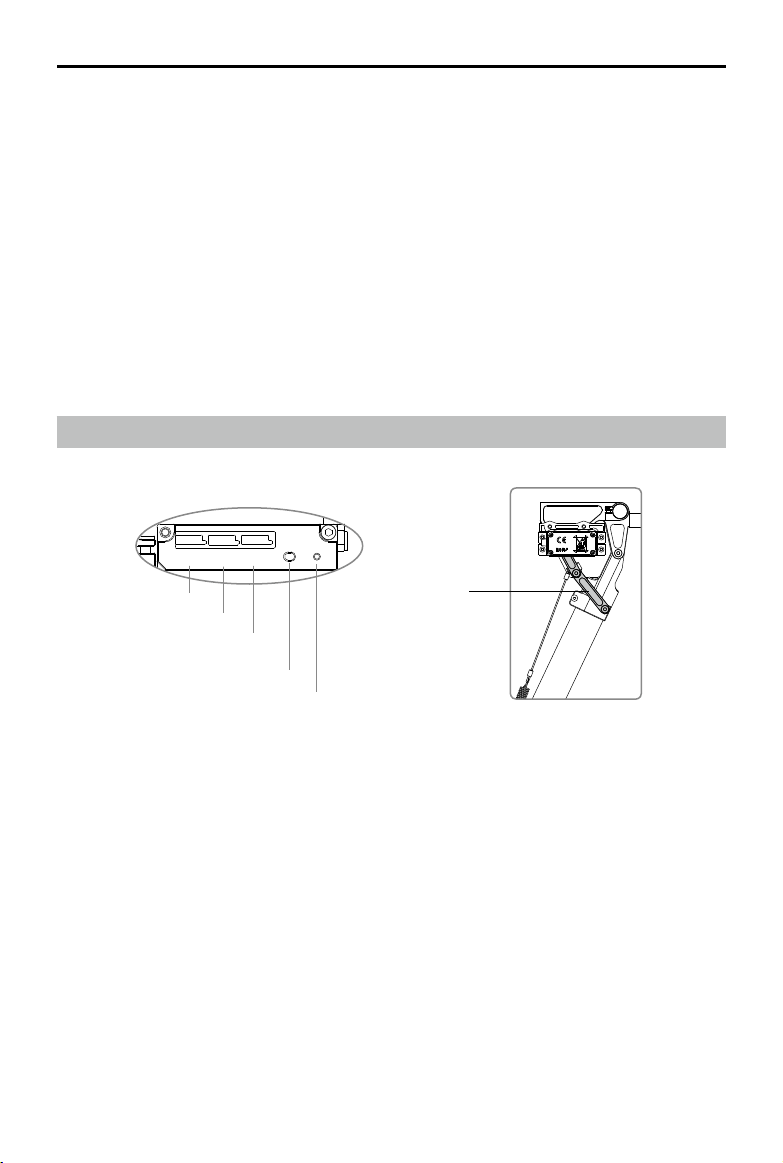
R
L
IN
To left servo
To the servo cable at the bottom of
the center frame
SET Button
LED
To right servo
Connecting Arm
Retractable Landing Gear
Recalibrating Servo Travel
Keep your hands away from all moving parts to avoid injuries.
Instructions:
1. Be sure to remove the two springs on the landing gear, or else calibration may fail.
2. Ensure that the “R”, “L” and “IN” connections are correct.
3. Keep the whole aircraft off of the ground during calibration, as landing gear will move.
4. Use a pin to press and hold the SET button while powering on one of the Intelligent Flight
Batteries, releasing the button when the battery powers on. The remaining batteries will power on
automatically (if the remaining batteries do not automatically power on, connect your mobile device
to the remote controller and follow the on-screen tips in the DJI GO app). The LED will blink yellow
quickly. Press the SET button again. Auto calibration will begin and the LED will blink yellow slowly.
DO NOT obstruct any moving parts during auto calibration.
5. During calibration, the left landing gear leg will raise and lower, followed by the right landing gear leg.
6. After calibration, both the left and right landing gear legs will be lowered and the LED will display a
solid green light. This indicates that the landing gear is working properly.
7. Connect both springs to the legs and the center frame.
Loading ...
Loading ...
Loading ...