
Loading ...
Loading ...
Loading ...
19
Cleaning
WARNING
• Clean only the parts of the appliance listed in this
manual. Clean them only in the manner specified. Do
not use any chemicals, abrasive materials or razor
blades to clean any part of the appliance.
• ELECTRIC SHOCK HAZARD - Before performing
any cleaning operations on the appliance, unplug the
power cord from the electrical outlet.
• Protect your countertop area! When moving the wine
dispensing system for cleaning, always lift and pull
the unit straight out. Do not wiggle or walk the unit,
because this may damage the countertop or the
product. Moving the wine dispensing system requires
a minimum of two people.
• Never immerse the wine dispensing system in water
or steam clean it. Damage caused by cleaning the
unit in this manner could result in electric shock, fire
or explosion.
The dispensing heads, including the spout tips must
be cleaned regularly. If the pickup tubes are not
replaced between bottle changes, they must be
cleaned before reuse.
Drip Tray
The drip tray is located on the bottom of the bottle
bay, behind the door. Remove and empty it regu-
larly to avoid overflow due to condensation build-
up. Condensation build-up will occur more rapidly
in humid environments. Wash the drip tray in warm
water and dishwashing detergent, as needed.
Cleaning the Spout Tips
Submerge the tips of the spouts in a glass of warm
water as needed, to clean any remaining drops that
may have accumulated at the tip of the spouts. Do
this regularly at the end of each day the wine dis-
pensing system is used.
Cleaning the Dispensing Heads
Dacor recommends cleaning the heads and pick up
tubes with each bottle change. To clean the dispens-
ing head follow these steps:
1. Remove the pick up tube and discard or wash it
out in a mild solution of warm water and dish-
washing soap, then rinse it out.
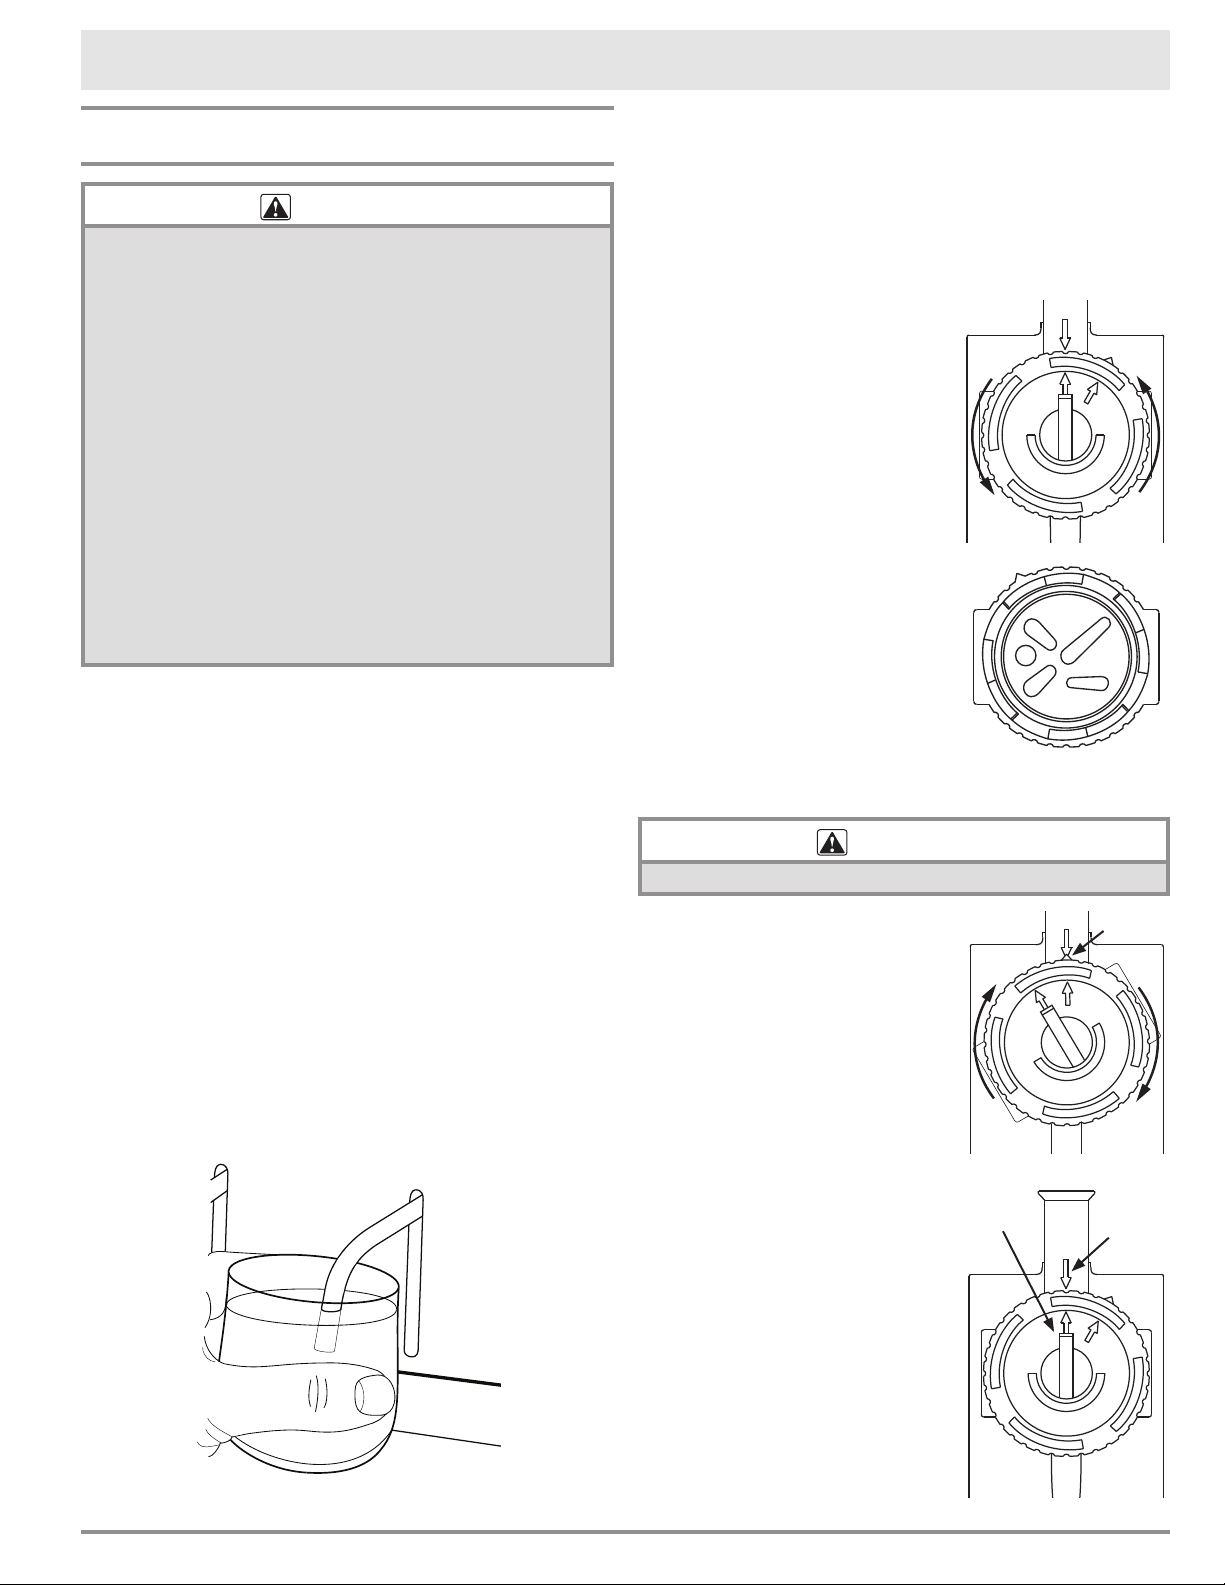
2. Remove the cap from the
head body by turning the
cap counterclockwise. The
cap will pop off.
3. Place both the cap and the
head body in a dishwasher
and set it for a normal wash
cycle.
4. After washing, place the
head cap on the counter
with the top down. Spray
a small amount of food-
grade silicone spray on the
vinyl cap gasket so that the
cap rotates properly when
it is reinstalled. A can of
food grade silicone spray is
included with the system.
See page 22 for reorder
information.
WARNING
Use only food grade silicone that is NSF approved.
6. Re-position the cap on the
head, with the triangular
pointer on the side of the
cap pointing towards the
arrow on the head body as
shown.
7. Push the cap down and turn
it clockwise.
8. Line up the rotor switch (at
the center of the cap) with
the arrow on the head body.
9. Attach a pickup tube to the
bottom of the head body.
IMPORTANT:
• Store the heads and tubes
in a clean, closed container
when not in use.
• When the head is not in
use, always make sure the
collar is fully un-tightened,
to minimize any unneces-
sary pressure on the
gasket.
Care and Cleaning
Bottom of Cap
Arrow
on head
body
Rotor
switch
Pointer
Loading ...
Loading ...
Loading ...