Loading ...
Loading ...
Loading ...
10
Attaching the Dispensing Heads
(cont.)
11. Inspect the dispensing head. If more than three
threads are visible between the top of the collar
and the bottom of the main body, either the
gasket is damaged or the gasket could be the
wrong size. Un-tighten the collar, remove the
head, check the gasket for damage, verify the
correct size, wipe the gasket and bottleneck dry,
and try again.
12. While holding the bottle over a table or
countertop for safety, lift the bottle up about 1
to 2”, holding it only by the head. Gently pull up
the head a bit higher and lower it down a few
times, to check if it holds the bottle properly.
The bottle should not slip out, and you should
not feel any looseness of the gasket inside the
bottleneck.
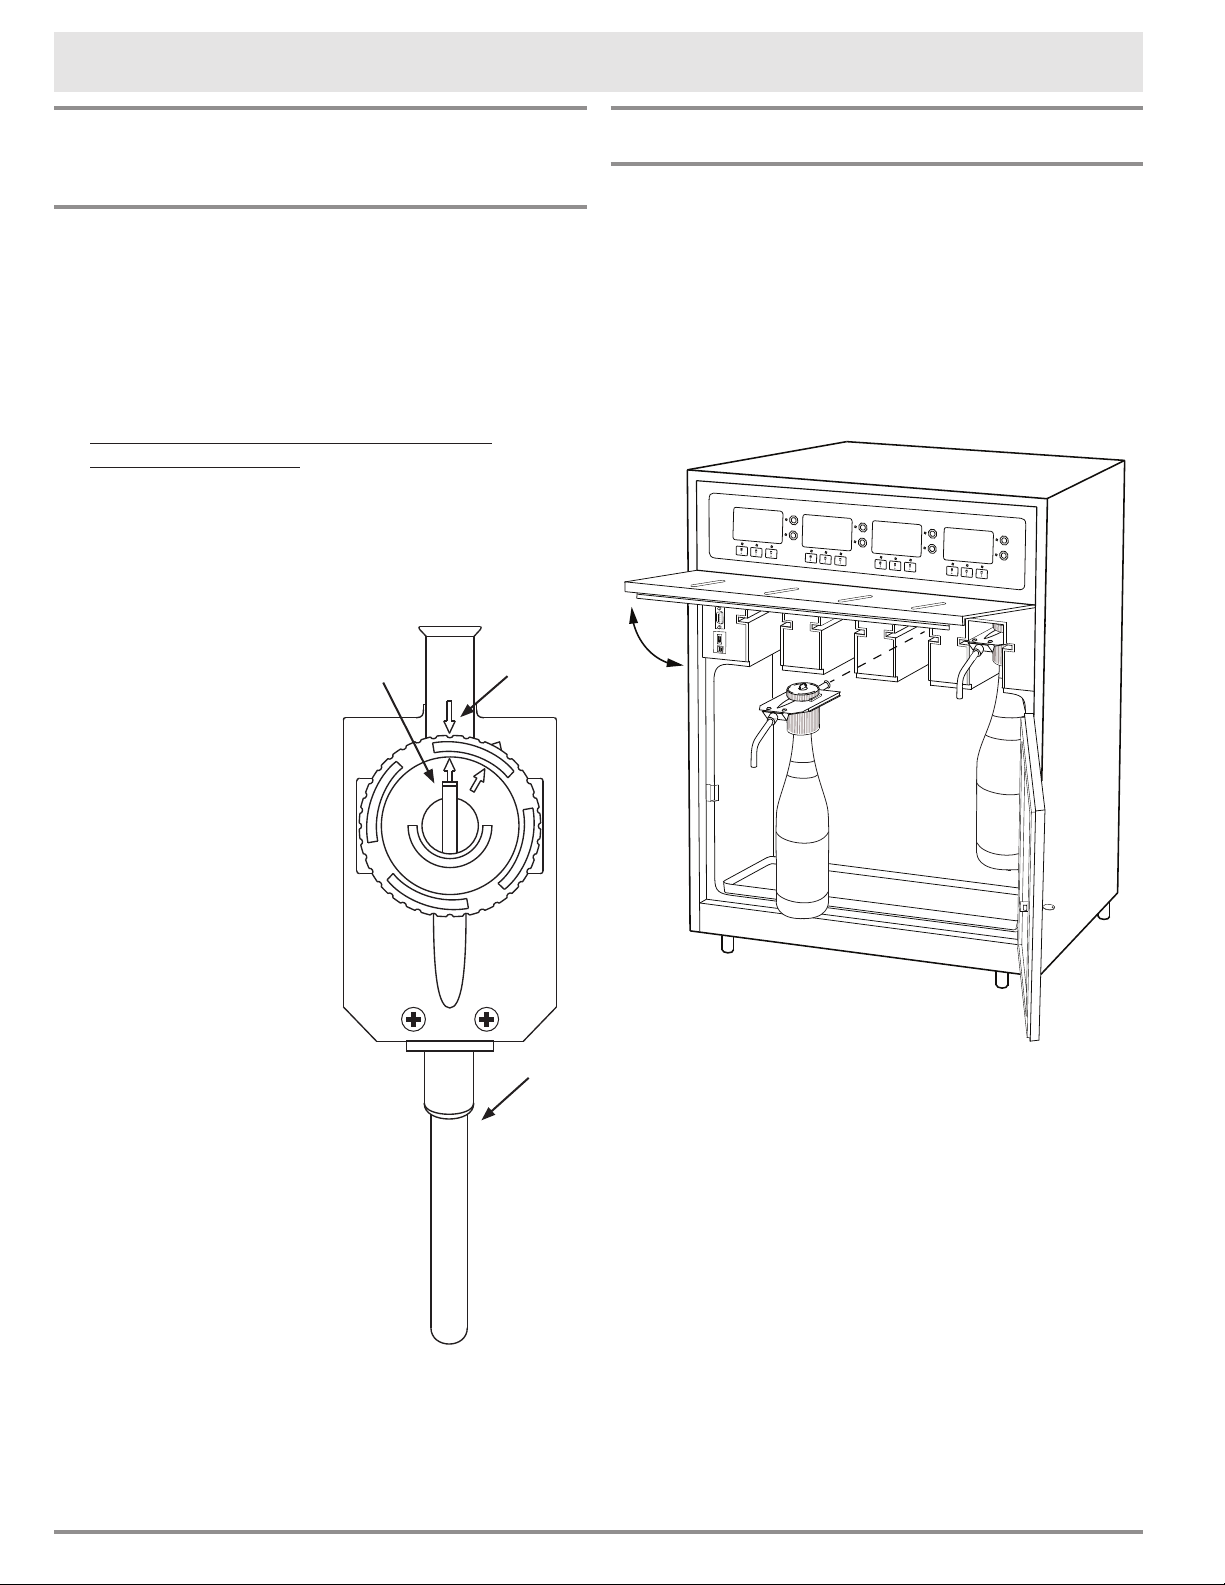
13. Turn the rotor switch
on the top of the head
so that it lines up
with the arrow on the
back of the head body
(opposite the spout).
You are now ready to
insert the bottle into the
wine dispensing system.
If the bottle begins
to slip, or the gasket
feels loose, put the
bottle down and do
the following:
• Hold the head in place
with one hand.
• With your other hand,
fully un-tighten the
collar (until it touches
the main body).
• Remove the dispensing
head from the bottle
and detach it from the
pickup tube.
• Check the gasket for
damage. If needed,
replace with an undam-
aged head.
• Check the correct
gasket size. If needed, switch to a wider gasket
size.
• Wipe the gasket and inner part of the bottleneck
dry, and try again.
Operating Your Wine Dispensing System
Basic Operation
NOTE: The control panel must be unlocked for the
unit to operate. If the control panel is locked, see
page 15 (Unlocking the Control Panel).
Installing Wine Bottles in the Bottle Bay
1. Open the bottle bay door by turning the key in
the lock.
2. With the door open, lift up on the spout cover
until it locks in the up position.
3. Insert the dispensing head (with wine bottle
attached) into the slot in the desired position in
the bottle bay. NOTE: When inserting the head
into the bottle bay, be sure to push in on the
head, not the bottle.
4. Lower the spout cover by pushing up and hold-
ing the lever on the bottom as you lower it
down. Once the spout cover is closed, close the
bottle bay door. Push in slightly just above the
lock until it snaps shut.
Arrow on
head body
Rotor
switch
Spout
Loading ...
Loading ...
Loading ...