Search
Home
Bookmarks
Brands
Articles
About us
Home
Thermador
Thermador MU30WSU User Manual
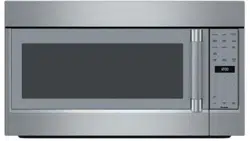
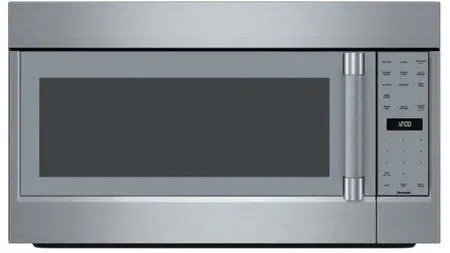
User Manual Thermador MU30WSU 30 Inch 2.1 cu. ft. Capacity Microwave Oven
Documents for Thermador MU30WSU
The following documents are available:
User Manual
User Manual - (English)
Read Online
|
Download pdf
Specification
Specification Sheet - (English)
Download
Installation Instruction
Installation Instructions - (English)
Download
Photos
Photos:
View Photos
User Manual
For MU30WSU. Series: Series 30
Page 1/56
Page 1
Page 2
Page 3
Page 4
Page 5
Page 6
Page 7
Page 8
Page 9
Page 10
Page 11
Page 12
Page 13
Page 14
Page 15
Page 16
Page 17
Page 18
Page 19
Page 20
Page 21
Page 22
Page 23
Page 24
Page 25
Page 26
Page 27
Page 28
Page 29
Page 30
Page 31
Page 32
Page 33
Page 34
Page 35
Page 36
Page 37
Page 38
Page 39
Page 40
Page 41
Page 42
Page 43
Page 44
Page 45
Page 46
Page 47
Page 48
Page 49
Page 50
Page 51
Page 52
Page 53
Page 54
Page 55
Page 56
Contents
Table of Contents
Search
Previous
Next
Troubleshooting
Bookmarks
Use and care
GUIDE
THERMADOR.COM
Professional Series Handle Microwave Oven
MU30WSU
Loading ...
Loading ...
Loading ...
1
2
3
4
5
6
>
Summary of Contents for Thermador MU30WSU:
Table of ContentsUse and care manual
3
9 Safety DefinitionsSafety Definitions
4
9 WARNING
4
9 CAUTION
4
NOTICE:
4
Note:
4
9 PRECAUTIONS TO AVOID POSSIBLE EXPOSURE TO EXCESSIVE MICROWAVE ENERGY
4
IMPORTANT SAFETY INSTRUCTIONS
5
READ ALL INSTRUCTIONS BEFORE USING THE APPLIANCE
5
WARNING
5
WARNING
5
WARNING
5
Risk of injury
5
WARNING
5
Risk of injury
5
Grounding Instructions
5
TV / Radio Interference
6
Intended Use
6
Child Safety
6
Cleaning Safety
6
CAUTION
6
WARNING
6
Cooking Safety
6
CAUTION
6
To avoid personal injury or property damage, observe the following:
6
WARNING
7
In Case of Fire
7
1. Keep door closed
7
2. Turn appliance off
7
3. Unplug the appliance or shut off at fuse or circuit breaker
7
Liquids
7
CAUTION
7
Cooking Items
7
CAUTION
7
Cooking Utensils
8
Glass Tray / Turntable Ring
8
Note:
8
Exhaust Mode Operation
8
WARNING
8
Thermometers
8
Pacemakers
8
CAUTION
8
State of California Proposition 65 Warnings:
9
WARNING
9
Fan Motor Operation
9
Room Venting with Carbon Filter
9
Note:
9
Causes of Damage
10
NOTICES:
10
Protecting the environment
10
Getting Started
11
Parts
11
Cooling Fan
11
Oven Vent
11
Oven light (LED)
11
Control Panel
11
Touch keys
11
Display elements
12
Accessories
12
How to fit the turntable
12
1. Place the roller rest a in the recess in the oven cavity.
12
2. Place the turntable b on the drive c in the center of the floor of the oven cavity.
12
Note:
12
Using the metal rack
12
1. Place rack securely in the four plastic supports.
12
Note:
12
2. Place equal amounts of food both above and below rack.
12
Note:
12
9 CAUTION
12
Microwave utensil guide
13
Suitable ovenware
13
Unsuitable ovenware
13
Ovenware test
13
1. Heat the empty ovenware at maximum power for ½ to 1 minute.
13
2. Check the temperature occasionally during that time.
13
Before Using the Appliance for the First Time
13
Cleaning accessories
13
Applying the program label
13
Operation
14
Setting the clock
14
1. Touch CLOCK once.
14
2. Enter the time using the number keys. Example: To set the clock to 12:41 type in 1 2 4 1.
14
3. Touch CLOCK to confirm.
14
Setting the Kitchen Timer
14
1. Touch KITCHEN TIMER.
14
2. Enter the desired time using the number keys.
14
3. Touch KITCHEN TIMER to confirm.
14
Operating the Ventilation Fan
14
Note:
14
Turning the Surface Light on/off
14
Turning the turntable on / off
14
9 CAUTION
14
Operating the microwave
14
1. Enter the desired cooking duration with the number keys. The timer display will fill in from right to left. Example: To set a microwave cooking time of 20 minutes and 30 seconds, enter the numbers 2 0 3 0. START is blinking.
14
2. You can start microwave operation with the default power level 10 by touching START/ENTER, or - you can adjust the power level. Touch POWER LEVEL. The default power level ˜–‚‹ is blinking. The segments in the bar underneath the number displ...
14
3. Enter the desired power level using the number keys. ˜–and the selected power level and START are blinking in the display.
14
4. Touch START/ENTER to start microwave operation.
14
Opening appliance door during operation
15
Cancel operation
15
Microwave power levels
15
Suggestions for best results
15
Adding cook time (ADD 30 SECONDS)
15
Auto Defrost
16
Setting Auto Defrost
16
1. Touch AUTO DEFROST once. š“”‚ and START are blinking and the à symbol lights up in the display.
16
2. Touch AUTO DEFROST repeatedly until the desired program number is shown in the display. Check the menu label at the bottom of the oven cavity or see program table below.
16
3. Touch START/ENTER. ‹.‹ lb is blinking in the display.
16
4. Enter the weight of the food using the number keys.
16
5. Touch START/ENTER to start the program.
16
Note:
16
Opening appliance door during operation
16
Cancel operation
16
Auto Defrost programs
16
Tips for defrosting
16
9 WARNING
16
Health Risk
16
Defrosting suggestions for meat
16
Sensor Reheat
17
Setting Sensor Reheat
17
1. Touch SENSOR REHEAT once. †§ -‚ and START are blinking in the display.
17
2. Touch SENSOR REHEAT repeatedly until the desired program number is shown in the display. Check the menu label at the bottom of the oven cavity or see program table below.
17
3. Touch START/ENTER to start sensor reheat mode. The appliance starts sensing, SENS. lights up in the display. The microwave is operating during sensing.
17
Note:
17
Notes
17
Cancel operation
17
Sensor Reheat programs
17
Reheat cooking suggestions
17
Sensor Cook
18
Setting Sensor Cook
18
1. Touch SENSOR COOK once. †™-‚ and START are blinking.
18
2. Touch SENSOR COOK repeatedly until the desired program number is shown in the display.
18
3. Touch START/ENTER to start sensor cook mode. SENS. lights up in the display and the appliance starts sensing.
18
Note:
18
Cancel operation
18
Sensor Cook programs
18
Panel Lock
19
Settings
19
Changing the settings
19
1. Touch SETTINGS twice.
19
2. Touch the number key 1 to turn the clock display on, touch 2 to turn the clock display off.
19
3. Touch START/ENTER.
19
4. Touch CLEAR/OFF to exit the settings menu.
19
Note:
19
Cooking Charts
19
The charts can be used as a guide. Follow package or recipe directions.
19
Cooking meat in your microwave
19
Cooking poultry in your microwave
20
Cooking eggs in your microwave
20
Cooking vegetables in your microwave
20
Cooking seafood in your microwave
21
Cleaning and Maintenance
21
9 WARNING
21
Cleaning
21
Cleaning Guide
21
Cleaning the oven vent filters
22
9 CAUTION
22
NOTICE:
22
1. To remove the ventilation filters, release the catch by pulling it down with your finger. The filter will drop down at the front. Then pull filter towards you to remove it. The filter will drop out. Repeat for the 2nd filter.
22
2. Soak the ventilation filters in hot water using a mild detergent. Rinse well and shake to dry. You can also wash the filters in a dishwasher.
22
3. To reinstall the ventilation filter, slide the two pins at the rear side of the filter into the slots at the rear of the filter opening, then push up filter at the front until the catch locks in place with a click. Reinstall the 2nd filter using t...
22
Maintenance
22
Charcoal filter replacement
22
1. Disconnect power to the microwave oven at the circuit breaker panel or by unplugging.
22
2. Remove the vent grill mounting screws.
22
3. Pull the vent grill away from the unit.
22
4. Change the charcoal filter.
23
5. Carefully push the vent grill back into place and replace the screws removed in Step 2.
23
Note:
23
Before Calling for Service
23
THERMADOR® Support
24
Before Calling Service
24
Data Plate
24
Service
24
Parts and Accessories
24
STATEMENT OF LIMITED PRODUCT WARRANTY
25
What this Warranty Covers & Who it Applies to
25
How Long the Warranty Lasts
25
Repair/Replace as Your Exclusive Remedy
25
Out of Warranty Product
25
Warranty Exclusions
25
ContenidoManual de instrucciones
27
9 Definiciones de seguridadDefiniciones de seguridad
28
9 ADVERTENCIA
28
9 ATENCION
28
AVISO:
28
Nota:
28
9 PRECAUCIONES PARA EVITAR UNA POSIBLE EXPOSICIÓN A UNA EXCESIVA CANTIDAD DE ENERGÍA DE MICROONDAS
28
INSTRUCCIONES DE SEGURIDAD IMPORTANTES
0
LEER TODAS LAS INSTRUCCIONES ANTES DE UTILIZAR EL APARATO
0
ADVERTENCIA
0
ADVERTENCIA
0
ADVERTENCIA
0
Riesgo de lesiones
0
ADVERTENCIA
0
Riesgo de lesiones
0
Instrucciones para la conexión a tierra
0
Interferencia con la TV/radio
0
Uso previsto
0
Seguridad de los niños
0
Seguridad en la limpieza
0
ATENCION
0
ADVERTENCIA
0
Seguridad al cocinar
0
ATENCION
0
Para evitar lesiones personales o daños materiales, debe tenerse en cuenta lo siguiente:
0
ADVERTENCIA
0
En caso de incendio
0
1. Mantenga la puerta cerrada
0
2. Apague el electrodoméstico
0
3. Desenchufe el electrodoméstico o corte la alimentación eléctrica desde el panel de fusibles o el disyuntor.
0
Liquidos
0
ATENCION
0
Artículos de cocina
0
ATENCION
0
Utensilios de cocina
0
Charola de vidrio/anillo de la bandeja giratoria
0
Nota:
0
Operación en modo de salida
0
ADVERTENCIA
0
Termómetros
0
Marcapasos
0
ATENCION
0
Advertencia en virtud de la Proposición 65 del estado de California:
0
ADVERTENCIA
0
Funcionamiento del motor del ventilador
0
Ventilación de ambiente con filtro de carbón
0
Nota:
0
Causas para los daños
34
AVISOS:
34
Protección del medio ambiente
34
Cómo comenzar
35
Componentes
35
Ventilador de refrigeración
35
Ventilación del horno
35
Luz del horno (LED)
35
Panel de control
35
Teclas digitales
36
Elementos del display
36
Accesorios
36
Para colocar la bandeja giratoria
36
1. Colocar el anillo de la bandeja giratoria a en la hendidura del compartimento de cocción.
36
2. Enclavar la bandeja giratoria b en el accionamiento c del centro de la base del compartimento de cocción.
36
Nota:
36
Utilización del rack de metal
37
1. Coloque el rack firmemente en los cuatro soportes de plástico.
37
Nota:
37
2. Coloque la misma cantidad de alimentos encima y debajo del rack.
37
Nota:
37
9 ATENCION
37
Guía de utensilios para microondas
37
Utensilios para horno adecuados
37
Utensilios no aptos horno
37
Prueba de la vajilla
38
1. Introducir el recipiente vacío en el aparato durante ½ a 1 minuto a la potencia máxima.
38
2. Comprobar la temperatura de vez en cuando.
38
Antes de usar el horno por primera vez
38
Limpieza de accesorios
38
Aplicación de la etiqueta de programas
38
Operación
38
Programación del reloj
38
1. Pulse CLOCK (Reloj) una vez.
38
2. Ingrese la hora utilizando las teclas numéricas. Ejemplo: para programar el reloj en 12:41, ingrese 1, 2, 4, 1.
38
3. Pulse CLOCK para confirmar.
38
Programación del temporizador de cocina
38
1. Pulse KITCHEN TIMER (Temporizador de cocina).
38
2. Ingrese el tiempo deseado utilizando las teclas numéricas.
38
3. Pulse KITCHEN TIMER para confirmar.
38
Manejo del ventilador de ventilación
38
Nota:
38
Encendido/Apagado de la luz de superficie
39
Encendido/Apagado del plato giratorio
39
9 ATENCION
39
Programación del microondas
39
1. Ingrese la duración de cocción deseada con las teclas numéricas. El display del temporizador se llenará de derecha a izquierda. Ejemplo: para programar un tiempo de microondas de 20 minutos y 30 segundos, ingrese los números 2, 0, 3, 0. Titil...
39
2. Puede comenzar la operación del microondas con el nivel de potencia predeterminado 10 pulsando START/ENTER (Comenzar/Intro) o bien Puede ajustar el nivel de potencia. Pulse la tecla POWER LEVEL (Nivel de potencia). Titila el nivel de potencia pre...
39
3. Ingrese el nivel de potencia deseado utilizando las teclas numéricas. Titilan ˜– y el nivel de potencia seleccionado, y START (Comenzar) en el display.
39
4. Pulse la tecla START/ENTER para iniciar el funcionamiento del microondas.
39
Abertura de la puerta del aparato durante el funcionamiento
39
Cancelación del funcionamiento
39
Niveles de potencia del microondas
39
Sugerencias para obtener los mejores resultados
40
Añadido de tiempo de cocción (ADD 30 SECONDS)
40
Auto Defrost (Descongelar automáticamente)
41
Programación de Auto Defrost (Descongelar automáticamente)
41
1. Presione una vez AUTO DEFROST (Descongelar automáticamente). Titilan š“”‚ y START (Comenzar) y se enciende el símbolo à en el display.
41
2. Pulse AUTO DEFROST repetidamente hasta que se muestre el número de programa deseado en el display. Verifique la etiqueta del menú en la parte inferior de la cavidad del horno o consulte la tabla de programas que figura a continuación.
41
3. Pulse START/ENTER (Comenzar/Intro). Titila ‹.‹ lb en el display.
41
4. Ingrese el peso del alimento con las teclas numéricas.
41
5. Pulse START/ENTER para iniciar el programa.
41
Nota:
41
Abertura de la puerta del aparato durante el funcionamiento
41
Cancelación del funcionamiento
41
Programas Auto Defrost (Descongelar automáticamente)
41
Consejos para descongelar
41
9 ADVERTENCIA
41
Riesgo para la salud
41
Sugerencias para descongelar carne
42
Sensor Reheat (Recalentar por sensor)
42
Programación de recalentamiento por sensor
42
1. Pulse una vez SENSOR REHEAT (Recalentamiento por sensor). Titilan †§ -‚ y START (Comenzar) en el display.
42
2. Pulse SENSOR REHEAT repetidamente hasta que se muestre el número de programa deseado en el display. Verifique la etiqueta del menú en la parte inferior de la cavidad del horno o consulte la tabla de programas que figura a continuación.
42
3. Pulse START/ENTER (Comenzar/Intro) para iniciar el modo de recalentamiento por sensor. Se activa el sensor del aparato, se enciende SENS. en el display. El aparato está funcionando mientras la detección.
42
Nota:
42
Notas
42
Cancelación del funcionamiento
42
Programas de Sensor Reheat (Recalentamiento por sensor)
43
Sugerencias para recalentar
43
Sensor Cook (Cocción por sensor)
43
Programación de la cocción por sensor
43
1. Pulse una vez SENSOR COOK (Cocción por sensor). Titilan †™-‚ y START (Comenzar).
43
2. Pulse SENSOR COOK repetidamente hasta que se muestre el número de programa deseado en el display.
43
3. Pulse START/ENTER (Comenzar/Intro) para iniciar el modo de cocción por sensor. Se enciende SENS. en el display y se activa el sensor del aparato.
43
Nota:
43
Cancelación del funcionamiento
44
Programas de Sensor Cook (Cocción por sensor)
44
Bloqueo de Panel
44
Valores
44
Cambio de los valores
44
1. Pulse dos veces SETTINGS (Valores).
44
2. Pulse la tecla numérica 1 para encender el display del reloj, pulse 2 para apagar el display del reloj.
44
3. Pulse START/ENTER (Comenzar/Intro).
44
4. Pulse CLEAR/OFF (Borrar/Apagar) para salir del menú de valores.
44
Nota:
44
Cuadros de cocción
45
Los cuadros pueden usarse como guía. Siga las instrucciones del envase o la receta.
45
Cocinar carne de res en su horno de microondas
45
Cocción de carne de ave en su horno de microondas
45
Cocción de huevos en su horno microondas
46
Cocción de verduras en su microondas
46
Cocción de frutos de mar en su horno microondas
46
Limpieza y mantenimiento
47
9 ADVERTENCIA
47
Limpieza
47
Guía de limpieza
47
Limpieza de los filtros de ventilación del horno
48
9 ATENCION
48
AVISO:
48
1. Para retirar los filtros de ventilación, liberar el cierre presionándolo hacia abajo con el dedo. El filtro se deslizará hacia abajo por la parte frontal. A continuación, extraer el filtro hacia sí para retirarlo. El filtro saldrá de su siti...
48
2. Remojar los filtros de ventilación en agua caliente con un detergente suave. Enjuagarlos bien y sacudirlos para que se sequen. Los filtros también pueden lavarse en el lavavajillas.
48
3. Para volver a instalar el filtro de ventilación, introducir las dos clavijas de la parte trasera del filtro en las ranuras situadas en la parte trasera de la abertura del mismo. A continuación, empujar el filtro hacia la parte frontal hasta que ...
48
Mantenimiento
48
Reemplazo del filtro de carbón activo
48
1. Desconecte la energía del horno de microondas en el panel de disyuntores o desenchúfelo.
48
2. Retire los tornillos de montaje del grill de ventilación.
48
3. Saque el grill de ventilación de la unidad.
48
4. Cambie el filtro de carbón activo.
48
5. Con cuidado, vuelva a colocar el grill de ventilación en su lugar haciendo presión y vuelva a colocar los tornillos que se retiraron en el Paso 2.
48
Nota:
48
Resolución de problemas
49
Soporte técnico de THERMADOR®
50
Antes de llamar al servicio
50
Placa de datos
50
Servicio técnico
50
Piezas y accesorios
50
DECLARACIÓN DE GARANTÍA LIMITADA DEL PRODUCTO
51
Cobertura de esta garantía y a quiénes se aplica
51
Duración de la garantía
51
Reparación/reemplazo como único recurso
51
Producto fuera de garantía
51
Exclusiones de la garantía
52
File type: PDF
File name: Thermador MU30WSU Professional Series 30 Inch Over the Range 2.1 cu. ft. Capacity Microwave Oven .pdf
File size: 2.26 MB
File Language: English
Pages: 56
Author: Thermador
Published: 2020-10-17
Updated: 2023-09-07
Verified by
Taryn Deckow
on 2023-09-07
Download File
Specifications
Brand:
Thermador
Model: MU30WSU
Category:
Microwaves
See other models:
MU30RSU
MED302LWS
T24UW910LS
T18IF901SP
MB30WS
Photos
Download User Manual
Related Products
Gaggenau BM484710
Fulgor Milano F4OTR30S1
Toshiba MV-AM20T(BK)
Maytag MMV4205FZ
Ariston MP796 IXA EX
Candy CMXG 25DCS-04
Siemens CP565AGS0B
Commercial Chef CHM770W
Thermador MU30RSU
Thermador T36BB920SS
Thermador MED302RWS
Thermador PH60GWS
Thermador PRG366WH
Thermador MEM301WS
Thermador PH36HWS
Table of Contents
×
Table of ContentsUse and care manual
3
9 Safety DefinitionsSafety Definitions
4
9 WARNING
4
9 CAUTION
4
NOTICE:
4
Note:
4
9 PRECAUTIONS TO AVOID POSSIBLE EXPOSURE TO EXCESSIVE MICROWAVE ENERGY
4
IMPORTANT SAFETY INSTRUCTIONS
5
READ ALL INSTRUCTIONS BEFORE USING THE APPLIANCE
5
WARNING
5
WARNING
5
WARNING
5
Risk of injury
5
WARNING
5
Risk of injury
5
Grounding Instructions
5
TV / Radio Interference
6
Intended Use
6
Child Safety
6
Cleaning Safety
6
CAUTION
6
WARNING
6
Cooking Safety
6
CAUTION
6
To avoid personal injury or property damage, observe the following:
6
WARNING
7
In Case of Fire
7
1. Keep door closed
7
2. Turn appliance off
7
3. Unplug the appliance or shut off at fuse or circuit breaker
7
Liquids
7
CAUTION
7
Cooking Items
7
CAUTION
7
Cooking Utensils
8
Glass Tray / Turntable Ring
8
Note:
8
Exhaust Mode Operation
8
WARNING
8
Thermometers
8
Pacemakers
8
CAUTION
8
State of California Proposition 65 Warnings:
9
WARNING
9
Fan Motor Operation
9
Room Venting with Carbon Filter
9
Note:
9
Causes of Damage
10
NOTICES:
10
Protecting the environment
10
Getting Started
11
Parts
11
Cooling Fan
11
Oven Vent
11
Oven light (LED)
11
Control Panel
11
Touch keys
11
Display elements
12
Accessories
12
How to fit the turntable
12
1. Place the roller rest a in the recess in the oven cavity.
12
2. Place the turntable b on the drive c in the center of the floor of the oven cavity.
12
Note:
12
Using the metal rack
12
1. Place rack securely in the four plastic supports.
12
Note:
12
2. Place equal amounts of food both above and below rack.
12
Note:
12
9 CAUTION
12
Microwave utensil guide
13
Suitable ovenware
13
Unsuitable ovenware
13
Ovenware test
13
1. Heat the empty ovenware at maximum power for ½ to 1 minute.
13
2. Check the temperature occasionally during that time.
13
Before Using the Appliance for the First Time
13
Cleaning accessories
13
Applying the program label
13
Operation
14
Setting the clock
14
1. Touch CLOCK once.
14
2. Enter the time using the number keys. Example: To set the clock to 12:41 type in 1 2 4 1.
14
3. Touch CLOCK to confirm.
14
Setting the Kitchen Timer
14
1. Touch KITCHEN TIMER.
14
2. Enter the desired time using the number keys.
14
3. Touch KITCHEN TIMER to confirm.
14
Operating the Ventilation Fan
14
Note:
14
Turning the Surface Light on/off
14
Turning the turntable on / off
14
9 CAUTION
14
Operating the microwave
14
1. Enter the desired cooking duration with the number keys. The timer display will fill in from right to left. Example: To set a microwave cooking time of 20 minutes and 30 seconds, enter the numbers 2 0 3 0. START is blinking.
14
2. You can start microwave operation with the default power level 10 by touching START/ENTER, or - you can adjust the power level. Touch POWER LEVEL. The default power level ˜–‚‹ is blinking. The segments in the bar underneath the number displ...
14
3. Enter the desired power level using the number keys. ˜–and the selected power level and START are blinking in the display.
14
4. Touch START/ENTER to start microwave operation.
14
Opening appliance door during operation
15
Cancel operation
15
Microwave power levels
15
Suggestions for best results
15
Adding cook time (ADD 30 SECONDS)
15
Auto Defrost
16
Setting Auto Defrost
16
1. Touch AUTO DEFROST once. š“”‚ and START are blinking and the à symbol lights up in the display.
16
2. Touch AUTO DEFROST repeatedly until the desired program number is shown in the display. Check the menu label at the bottom of the oven cavity or see program table below.
16
3. Touch START/ENTER. ‹.‹ lb is blinking in the display.
16
4. Enter the weight of the food using the number keys.
16
5. Touch START/ENTER to start the program.
16
Note:
16
Opening appliance door during operation
16
Cancel operation
16
Auto Defrost programs
16
Tips for defrosting
16
9 WARNING
16
Health Risk
16
Defrosting suggestions for meat
16
Sensor Reheat
17
Setting Sensor Reheat
17
1. Touch SENSOR REHEAT once. †§ -‚ and START are blinking in the display.
17
2. Touch SENSOR REHEAT repeatedly until the desired program number is shown in the display. Check the menu label at the bottom of the oven cavity or see program table below.
17
3. Touch START/ENTER to start sensor reheat mode. The appliance starts sensing, SENS. lights up in the display. The microwave is operating during sensing.
17
Note:
17
Notes
17
Cancel operation
17
Sensor Reheat programs
17
Reheat cooking suggestions
17
Sensor Cook
18
Setting Sensor Cook
18
1. Touch SENSOR COOK once. †™-‚ and START are blinking.
18
2. Touch SENSOR COOK repeatedly until the desired program number is shown in the display.
18
3. Touch START/ENTER to start sensor cook mode. SENS. lights up in the display and the appliance starts sensing.
18
Note:
18
Cancel operation
18
Sensor Cook programs
18
Panel Lock
19
Settings
19
Changing the settings
19
1. Touch SETTINGS twice.
19
2. Touch the number key 1 to turn the clock display on, touch 2 to turn the clock display off.
19
3. Touch START/ENTER.
19
4. Touch CLEAR/OFF to exit the settings menu.
19
Note:
19
Cooking Charts
19
The charts can be used as a guide. Follow package or recipe directions.
19
Cooking meat in your microwave
19
Cooking poultry in your microwave
20
Cooking eggs in your microwave
20
Cooking vegetables in your microwave
20
Cooking seafood in your microwave
21
Cleaning and Maintenance
21
9 WARNING
21
Cleaning
21
Cleaning Guide
21
Cleaning the oven vent filters
22
9 CAUTION
22
NOTICE:
22
1. To remove the ventilation filters, release the catch by pulling it down with your finger. The filter will drop down at the front. Then pull filter towards you to remove it. The filter will drop out. Repeat for the 2nd filter.
22
2. Soak the ventilation filters in hot water using a mild detergent. Rinse well and shake to dry. You can also wash the filters in a dishwasher.
22
3. To reinstall the ventilation filter, slide the two pins at the rear side of the filter into the slots at the rear of the filter opening, then push up filter at the front until the catch locks in place with a click. Reinstall the 2nd filter using t...
22
Maintenance
22
Charcoal filter replacement
22
1. Disconnect power to the microwave oven at the circuit breaker panel or by unplugging.
22
2. Remove the vent grill mounting screws.
22
3. Pull the vent grill away from the unit.
22
4. Change the charcoal filter.
23
5. Carefully push the vent grill back into place and replace the screws removed in Step 2.
23
Note:
23
Before Calling for Service
23
THERMADOR® Support
24
Before Calling Service
24
Data Plate
24
Service
24
Parts and Accessories
24
STATEMENT OF LIMITED PRODUCT WARRANTY
25
What this Warranty Covers & Who it Applies to
25
How Long the Warranty Lasts
25
Repair/Replace as Your Exclusive Remedy
25
Out of Warranty Product
25
Warranty Exclusions
25
ContenidoManual de instrucciones
27
9 Definiciones de seguridadDefiniciones de seguridad
28
9 ADVERTENCIA
28
9 ATENCION
28
AVISO:
28
Nota:
28
9 PRECAUCIONES PARA EVITAR UNA POSIBLE EXPOSICIÓN A UNA EXCESIVA CANTIDAD DE ENERGÍA DE MICROONDAS
28
INSTRUCCIONES DE SEGURIDAD IMPORTANTES
0
LEER TODAS LAS INSTRUCCIONES ANTES DE UTILIZAR EL APARATO
0
ADVERTENCIA
0
ADVERTENCIA
0
ADVERTENCIA
0
Riesgo de lesiones
0
ADVERTENCIA
0
Riesgo de lesiones
0
Instrucciones para la conexión a tierra
0
Interferencia con la TV/radio
0
Uso previsto
0
Seguridad de los niños
0
Seguridad en la limpieza
0
ATENCION
0
ADVERTENCIA
0
Seguridad al cocinar
0
ATENCION
0
Para evitar lesiones personales o daños materiales, debe tenerse en cuenta lo siguiente:
0
ADVERTENCIA
0
En caso de incendio
0
1. Mantenga la puerta cerrada
0
2. Apague el electrodoméstico
0
3. Desenchufe el electrodoméstico o corte la alimentación eléctrica desde el panel de fusibles o el disyuntor.
0
Liquidos
0
ATENCION
0
Artículos de cocina
0
ATENCION
0
Utensilios de cocina
0
Charola de vidrio/anillo de la bandeja giratoria
0
Nota:
0
Operación en modo de salida
0
ADVERTENCIA
0
Termómetros
0
Marcapasos
0
ATENCION
0
Advertencia en virtud de la Proposición 65 del estado de California:
0
ADVERTENCIA
0
Funcionamiento del motor del ventilador
0
Ventilación de ambiente con filtro de carbón
0
Nota:
0
Causas para los daños
34
AVISOS:
34
Protección del medio ambiente
34
Cómo comenzar
35
Componentes
35
Ventilador de refrigeración
35
Ventilación del horno
35
Luz del horno (LED)
35
Panel de control
35
Teclas digitales
36
Elementos del display
36
Accesorios
36
Para colocar la bandeja giratoria
36
1. Colocar el anillo de la bandeja giratoria a en la hendidura del compartimento de cocción.
36
2. Enclavar la bandeja giratoria b en el accionamiento c del centro de la base del compartimento de cocción.
36
Nota:
36
Utilización del rack de metal
37
1. Coloque el rack firmemente en los cuatro soportes de plástico.
37
Nota:
37
2. Coloque la misma cantidad de alimentos encima y debajo del rack.
37
Nota:
37
9 ATENCION
37
Guía de utensilios para microondas
37
Utensilios para horno adecuados
37
Utensilios no aptos horno
37
Prueba de la vajilla
38
1. Introducir el recipiente vacío en el aparato durante ½ a 1 minuto a la potencia máxima.
38
2. Comprobar la temperatura de vez en cuando.
38
Antes de usar el horno por primera vez
38
Limpieza de accesorios
38
Aplicación de la etiqueta de programas
38
Operación
38
Programación del reloj
38
1. Pulse CLOCK (Reloj) una vez.
38
2. Ingrese la hora utilizando las teclas numéricas. Ejemplo: para programar el reloj en 12:41, ingrese 1, 2, 4, 1.
38
3. Pulse CLOCK para confirmar.
38
Programación del temporizador de cocina
38
1. Pulse KITCHEN TIMER (Temporizador de cocina).
38
2. Ingrese el tiempo deseado utilizando las teclas numéricas.
38
3. Pulse KITCHEN TIMER para confirmar.
38
Manejo del ventilador de ventilación
38
Nota:
38
Encendido/Apagado de la luz de superficie
39
Encendido/Apagado del plato giratorio
39
9 ATENCION
39
Programación del microondas
39
1. Ingrese la duración de cocción deseada con las teclas numéricas. El display del temporizador se llenará de derecha a izquierda. Ejemplo: para programar un tiempo de microondas de 20 minutos y 30 segundos, ingrese los números 2, 0, 3, 0. Titil...
39
2. Puede comenzar la operación del microondas con el nivel de potencia predeterminado 10 pulsando START/ENTER (Comenzar/Intro) o bien Puede ajustar el nivel de potencia. Pulse la tecla POWER LEVEL (Nivel de potencia). Titila el nivel de potencia pre...
39
3. Ingrese el nivel de potencia deseado utilizando las teclas numéricas. Titilan ˜– y el nivel de potencia seleccionado, y START (Comenzar) en el display.
39
4. Pulse la tecla START/ENTER para iniciar el funcionamiento del microondas.
39
Abertura de la puerta del aparato durante el funcionamiento
39
Cancelación del funcionamiento
39
Niveles de potencia del microondas
39
Sugerencias para obtener los mejores resultados
40
Añadido de tiempo de cocción (ADD 30 SECONDS)
40
Auto Defrost (Descongelar automáticamente)
41
Programación de Auto Defrost (Descongelar automáticamente)
41
1. Presione una vez AUTO DEFROST (Descongelar automáticamente). Titilan š“”‚ y START (Comenzar) y se enciende el símbolo à en el display.
41
2. Pulse AUTO DEFROST repetidamente hasta que se muestre el número de programa deseado en el display. Verifique la etiqueta del menú en la parte inferior de la cavidad del horno o consulte la tabla de programas que figura a continuación.
41
3. Pulse START/ENTER (Comenzar/Intro). Titila ‹.‹ lb en el display.
41
4. Ingrese el peso del alimento con las teclas numéricas.
41
5. Pulse START/ENTER para iniciar el programa.
41
Nota:
41
Abertura de la puerta del aparato durante el funcionamiento
41
Cancelación del funcionamiento
41
Programas Auto Defrost (Descongelar automáticamente)
41
Consejos para descongelar
41
9 ADVERTENCIA
41
Riesgo para la salud
41
Sugerencias para descongelar carne
42
Sensor Reheat (Recalentar por sensor)
42
Programación de recalentamiento por sensor
42
1. Pulse una vez SENSOR REHEAT (Recalentamiento por sensor). Titilan †§ -‚ y START (Comenzar) en el display.
42
2. Pulse SENSOR REHEAT repetidamente hasta que se muestre el número de programa deseado en el display. Verifique la etiqueta del menú en la parte inferior de la cavidad del horno o consulte la tabla de programas que figura a continuación.
42
3. Pulse START/ENTER (Comenzar/Intro) para iniciar el modo de recalentamiento por sensor. Se activa el sensor del aparato, se enciende SENS. en el display. El aparato está funcionando mientras la detección.
42
Nota:
42
Notas
42
Cancelación del funcionamiento
42
Programas de Sensor Reheat (Recalentamiento por sensor)
43
Sugerencias para recalentar
43
Sensor Cook (Cocción por sensor)
43
Programación de la cocción por sensor
43
1. Pulse una vez SENSOR COOK (Cocción por sensor). Titilan †™-‚ y START (Comenzar).
43
2. Pulse SENSOR COOK repetidamente hasta que se muestre el número de programa deseado en el display.
43
3. Pulse START/ENTER (Comenzar/Intro) para iniciar el modo de cocción por sensor. Se enciende SENS. en el display y se activa el sensor del aparato.
43
Nota:
43
Cancelación del funcionamiento
44
Programas de Sensor Cook (Cocción por sensor)
44
Bloqueo de Panel
44
Valores
44
Cambio de los valores
44
1. Pulse dos veces SETTINGS (Valores).
44
2. Pulse la tecla numérica 1 para encender el display del reloj, pulse 2 para apagar el display del reloj.
44
3. Pulse START/ENTER (Comenzar/Intro).
44
4. Pulse CLEAR/OFF (Borrar/Apagar) para salir del menú de valores.
44
Nota:
44
Cuadros de cocción
45
Los cuadros pueden usarse como guía. Siga las instrucciones del envase o la receta.
45
Cocinar carne de res en su horno de microondas
45
Cocción de carne de ave en su horno de microondas
45
Cocción de huevos en su horno microondas
46
Cocción de verduras en su microondas
46
Cocción de frutos de mar en su horno microondas
46
Limpieza y mantenimiento
47
9 ADVERTENCIA
47
Limpieza
47
Guía de limpieza
47
Limpieza de los filtros de ventilación del horno
48
9 ATENCION
48
AVISO:
48
1. Para retirar los filtros de ventilación, liberar el cierre presionándolo hacia abajo con el dedo. El filtro se deslizará hacia abajo por la parte frontal. A continuación, extraer el filtro hacia sí para retirarlo. El filtro saldrá de su siti...
48
2. Remojar los filtros de ventilación en agua caliente con un detergente suave. Enjuagarlos bien y sacudirlos para que se sequen. Los filtros también pueden lavarse en el lavavajillas.
48
3. Para volver a instalar el filtro de ventilación, introducir las dos clavijas de la parte trasera del filtro en las ranuras situadas en la parte trasera de la abertura del mismo. A continuación, empujar el filtro hacia la parte frontal hasta que ...
48
Mantenimiento
48
Reemplazo del filtro de carbón activo
48
1. Desconecte la energía del horno de microondas en el panel de disyuntores o desenchúfelo.
48
2. Retire los tornillos de montaje del grill de ventilación.
48
3. Saque el grill de ventilación de la unidad.
48
4. Cambie el filtro de carbón activo.
48
5. Con cuidado, vuelva a colocar el grill de ventilación en su lugar haciendo presión y vuelva a colocar los tornillos que se retiraron en el Paso 2.
48
Nota:
48
Resolución de problemas
49
Soporte técnico de THERMADOR®
50
Antes de llamar al servicio
50
Placa de datos
50
Servicio técnico
50
Piezas y accesorios
50
DECLARACIÓN DE GARANTÍA LIMITADA DEL PRODUCTO
51
Cobertura de esta garantía y a quiénes se aplica
51
Duración de la garantía
51
Reparación/reemplazo como único recurso
51
Producto fuera de garantía
51
Exclusiones de la garantía
52
Search:
×
Search