Loading ...
Loading ...
Loading ...
64 Servicing Your Honda
Clutch System
• Replace the clutch discs (1) if they show signs of
scoring or discoloration.
Measure the thickness of each clutch disc.
Service Limit: 0.112 in (2.85 mm)
Replace the clutch discs and clutch plates as a
set.
• Check the clutch plates (2) for excessive
warpage or discoloration.
Check the plate warpage on a surface plate using
a feeler gauge.
Service Limit: 0.006 in (0.15 mm)
Replace the clutch discs and plates as a set.
• If you feel the clutch slippage when replacing the
clutch discs and plates, replace the clutch
springs.
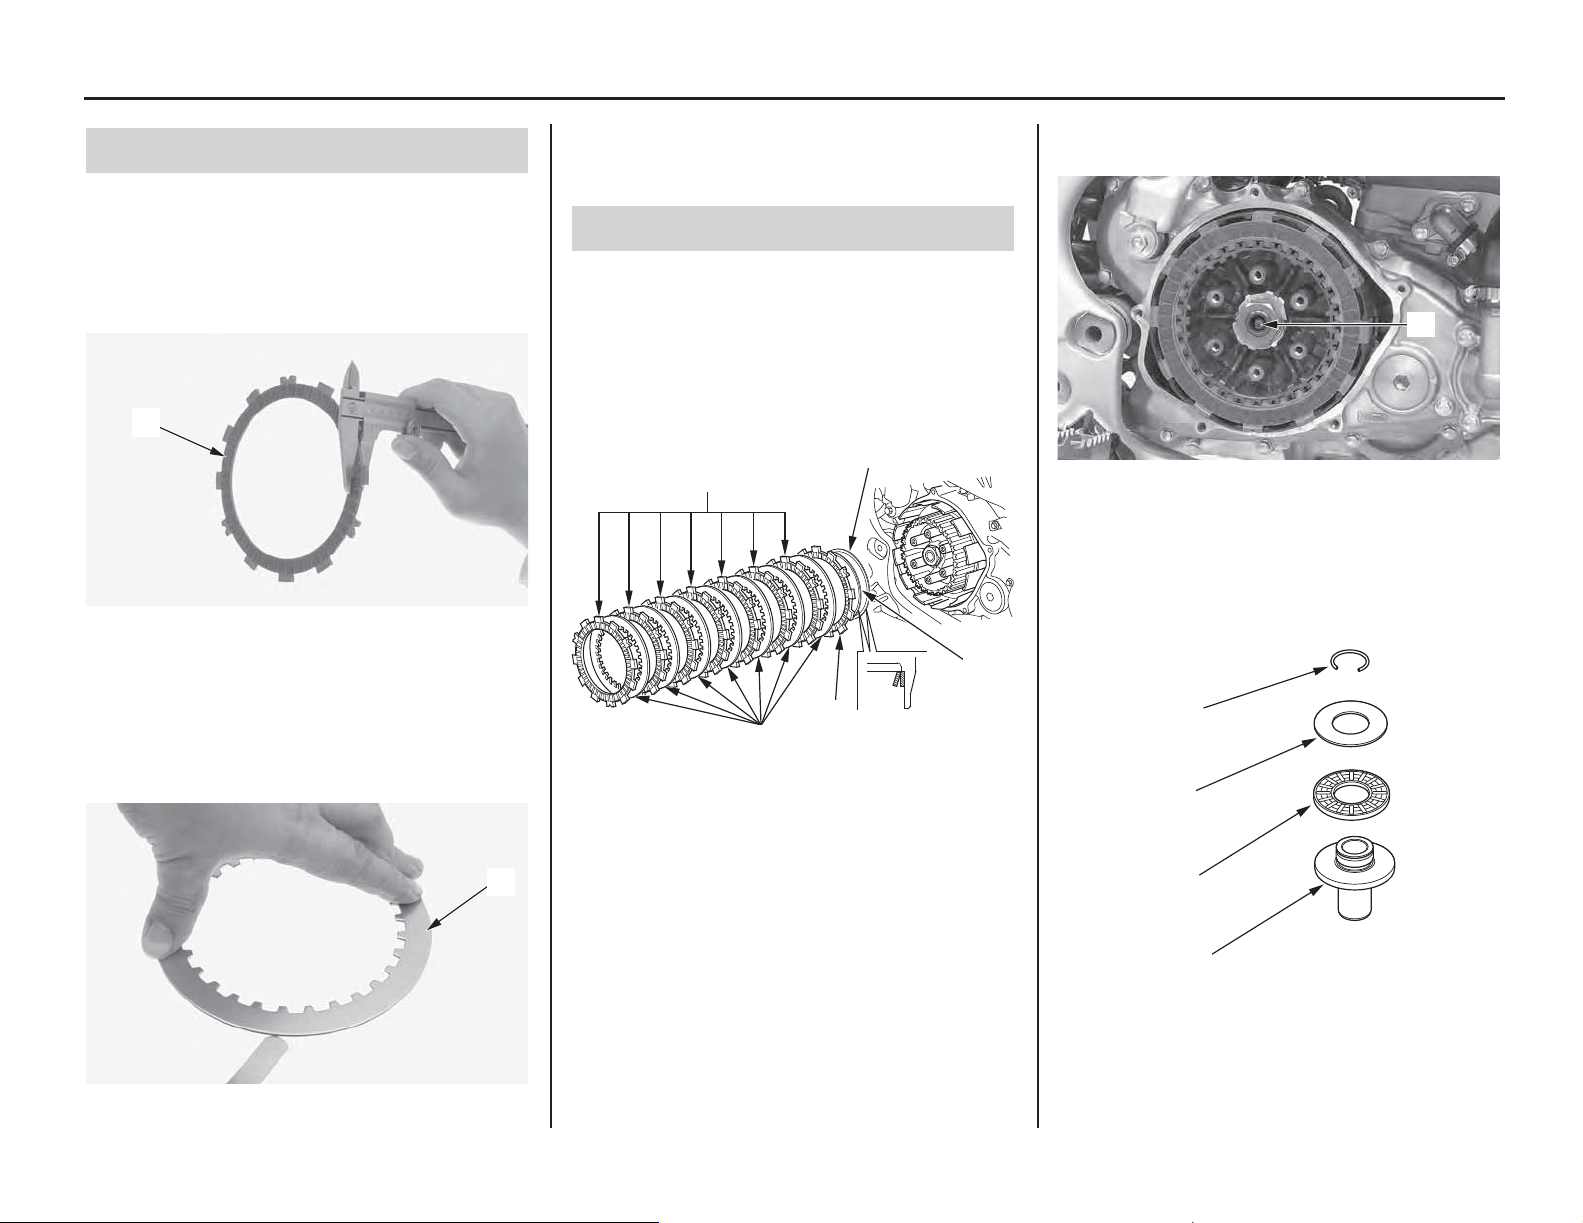
1. Install the spring seat (1) and judder spring (2)
onto the clutch center as shown.
Coat the clutch discs with engine oil.
2. Install the clutch disc A (larger I.D. disc) (3)
onto the clutch outer.
Stack the seven clutch plates (4) and seven
clutch discs B (5) alternately.
3. Insert the clutch lifter rod (6) into the
mainshaft.
4. Apply engine oil to the needle bearing (7).
Install the needle bearing and washer (8) onto
the clutch lifter (9). Then, install a new clip
(10) by fitting it into the groove in the clutch
lifter.
Clutch Disc/Plate Inspection
(1) clutch discs
(2) clutch plates
(1)
(2)
Clutch Disc/Plate Installation
(1) spring seat (4) clutch plates
(2) judder spring (5) clutch discs B
(3) clutch disc A
(1)
(2)
(3)
(4)
(5)
(6) clutch lifter rod
(7) needle bearing (9) clutch lifter
(8) washer (10) clip (new)
(6)
(9)
(7)
(8)
(10)
Loading ...
Loading ...
Loading ...