Loading ...
Loading ...
Loading ...
Fuel Tank
34 Servicing Your Honda
Fuel Tank
Refer to Important Safety Precautions on page 23.
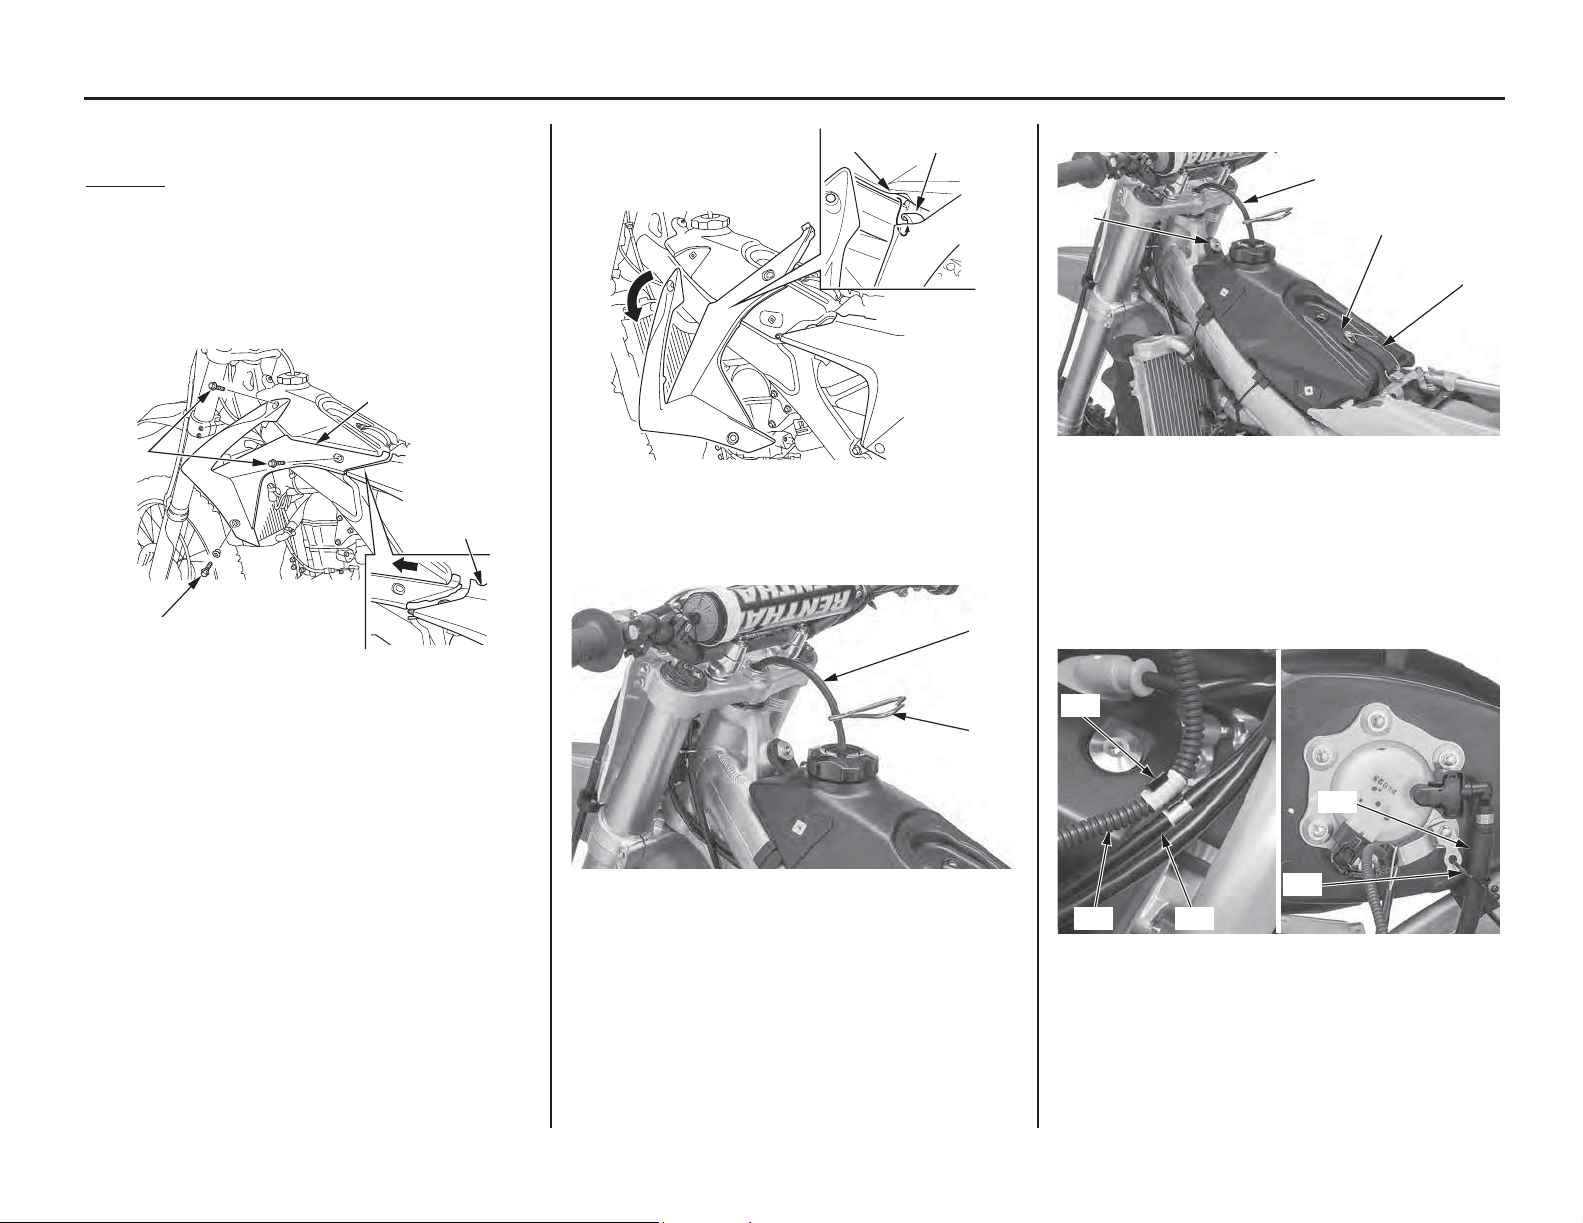
Removal
1. Remove the seat (page 33).
2. Remove the shroud A bolts and collars (1).
3. Remove the shroud B bolts (2).
4. Slide the shrouds (3) toward the front to
separate them from the air cleaner housing
covers (4).
5. Slide the shrouds toward the rear until their
hooks (5) are aligned with the recesses (6) of
the fuel tank.
6. Turn the shrouds as shown in the figure, and
then remove them.
The right and left shrouds can be removed in the
same manner.
7. Install a hose clamp (7) to the breather tube (8)
and shut the hose clamp securely.
8. Pull the breather tube (8) out of steering stem
nut.
9. Unhook the fuel tank band (9) and air cleaner
rubber (10).
10. Remove the fuel tank bolt and collar (11).
11. Remove the clamp A (12) from the throttle
cable (13) and fuel pump wire (14).
12. Unhook the fuel feed hose (15) from the clamp
B (16).
(1) shroud A bolts and collars
(2) shroud B bolts
(3) shrouds
(4) air cleaner housing covers
(1)
(2)
(3)
(4)
(5) hooks (6) recesses
(7) hose clamp (8) breather tube
(6) (5)
(8)
(7)
(8) breather tube
(9) fuel tank band
(10) air cleaner rubber
(11) fuel tank bolt and collar
(12) clamp A (15) fuel feed hose
(13) throttle cable (16) clamp B
(14) fuel pump wire
(11)
(8)
(9)
(10)
(15)
(16)
(13)(14)
(12)
Loading ...
Loading ...
Loading ...