Loading ...
Loading ...
Loading ...
120 Adjustments for Competition
Front Suspension Adjustments
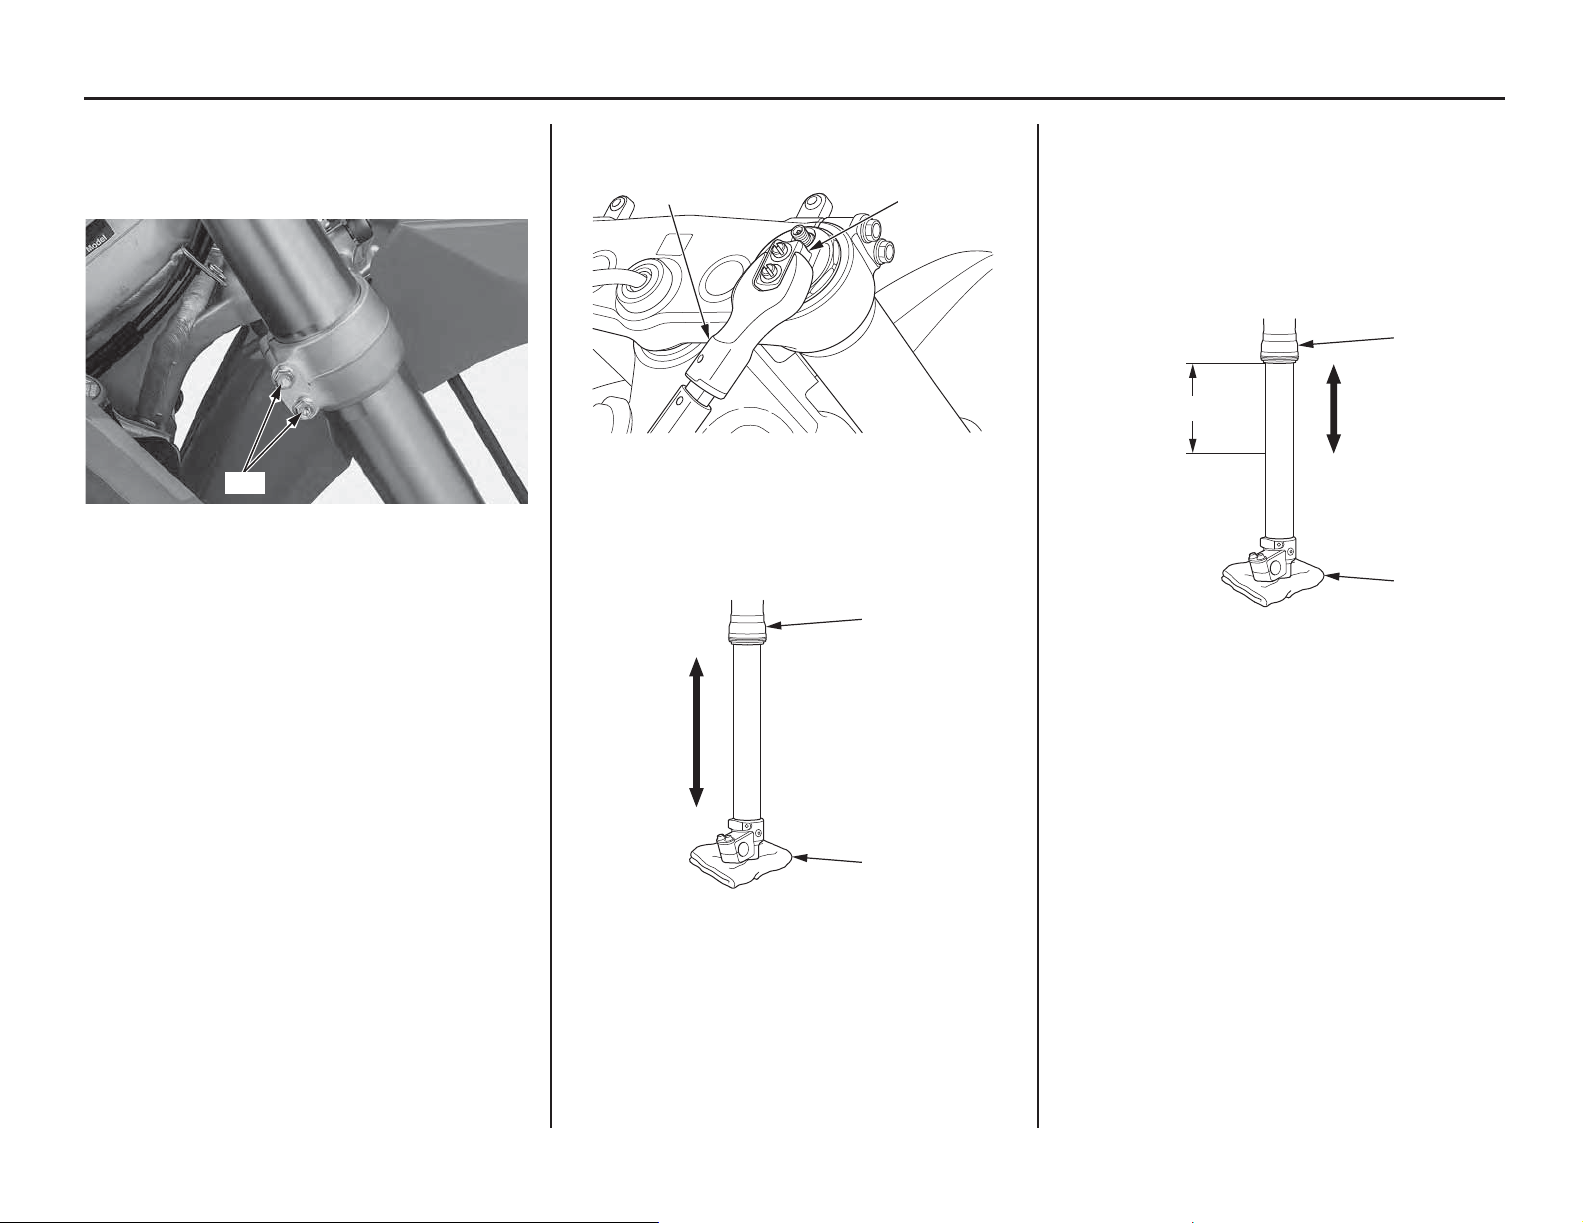
15. Temporarily insert both fork legs into the fork
clamps. Tighten the fork bridge lower pinch
bolts (13) to the specified torque:
15 lbf·ft (20 N·m, 2.0 kgf·m)
16. Tighten the fork cap (12) to the specified
torque using the open end wrench (14):
Actual:
33 lbf·ft (45 N·m, 4.6 kgf·m)
Torque wrench scale reading:
31 lbf·ft (42 N·m, 4.3 kgf·m)
The shape of the fork cap increases the torque
wrench’s leverage, so the torque wrench reading
will be less than the torque actually applied to the
fork cap.
17. Loosen the fork bridge lower pinch bolts, then
pull the fork legs down and out.
18. Cover the fork leg with shop towel (15) to
prevent fork damage. Pump the outer tube (9)
up and down until resistance is felt.
19. Apply air pressure of 44 psi (300 kPa, 3.1 kgf/
cm
2
) to the fork assembly and check that there
is no air leakage.
20. Cover the fork leg with shop towel (15) to
prevent fork damage.
Compress the outer tube (9) 5.9 in (150 mm)
from fully extended position.
Repeat above procedure about 10 times.
21. Temporarily insert both fork legs into the fork
clamps (this page).
(13) fork bridge lower pinch bolts
(13)
(12) fork cap
(14) open end wrench
(9) outer tube
(15) shop towel
(12)
(14)
(15)
(9)
(9) outer tube
(15) shop towel
5.9 in (150 mm)
(15)
(9)
Loading ...
Loading ...
Loading ...