Loading ...
Loading ...
Loading ...
Emergencies
Note
There is also a valve mark on the back of
the centr
al wheel trim that indicates the
correct alignment.
Integral wheel trim
Fig. 33 Remove the wheel cover.
The wheel covers must be removed for ac-
cess t
o the wheel nuts.
Removing
●
Take the wheel brace and the wire hook
from the vehicle tool kit
›››
page 40.
●
Hook the wire through one of the grooves of
the trim.
●
Insert the box spanner through the hook,
rest it on the tyre and remove the wheel trim
›››
Fig. 33.
Fitting
●
Press the trim against the wheel so that the
hole for the valve fits over the tyre valve.
●
Make sure that the trim is correctly fitted all
the way around the wheel. If you are using an
anti-theft wheel lock, screw it in the opposite
position to the valve.
Wheel bolt caps
Fig. 34 Wheel: wheel nuts with caps.
Removal
●
Fit the plastic clip (vehicle tools
›
››
Fig. 30)
over the cap until it clicks into place
›››
Fig. 34.
●
Remove the cap with the plastic clip.
The caps protect the wheel nuts and should
be remounted after changing the tyre.
The anti-theft wheel locking bolt has a
special cap. This only fits on anti-theft locking
bolts and is not for use with standard wheel
nuts.
Anti-theft wheel nuts
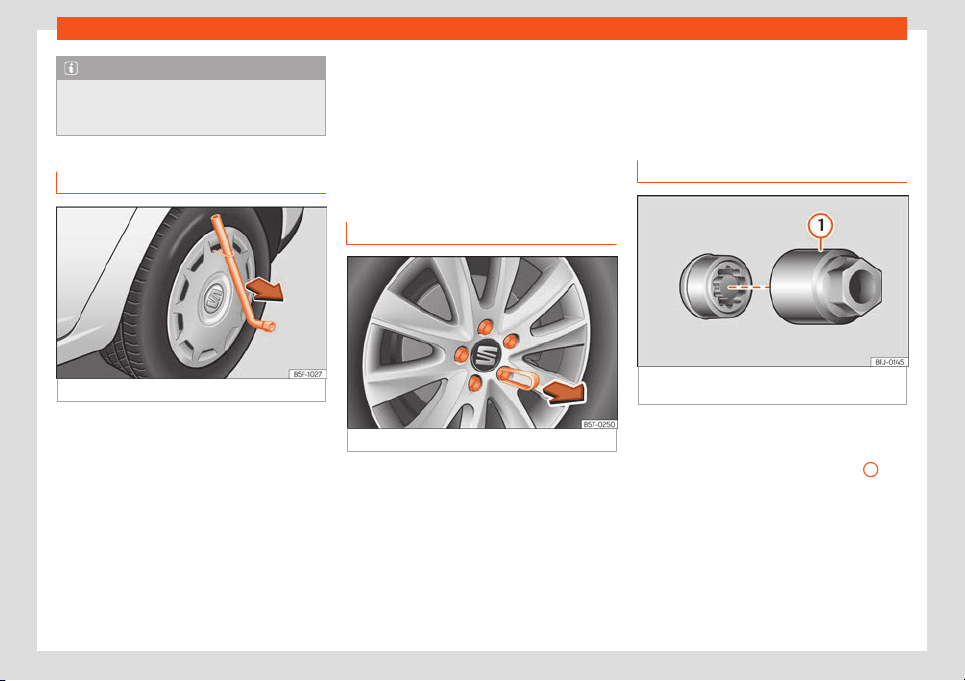
Fig. 35
Anti-theft wheel bolt with cap and
adapt
er.
Loosening the anti-theft wheel bolt
●
Remove the wheel cover or the cap.
●
Insert the special adapter
›
››
Fig. 35
1
(ve-
hicl
e tools
›››
page 40) onto the anti-theft
wheel bolt and push it on as far as it will go.
●
Insert the wheel brace (vehicle tools) onto
the adapter as far as it will go.
●
Remove the wheel bolt
›››
page 45.
44
Loading ...
Loading ...
Loading ...