Loading ...
Loading ...
Loading ...
Emergencies
Note
●
Pl
ease check at regular intervals that all
lighting (especially the exterior lighting) on
your vehicle is functioning properly. This is
not only in the interest of your own safety,
but also that of all other road users.
●
Before changing a bulb, make sure you
have the correct new bulb.
Changing the bulbs in the head-
lights
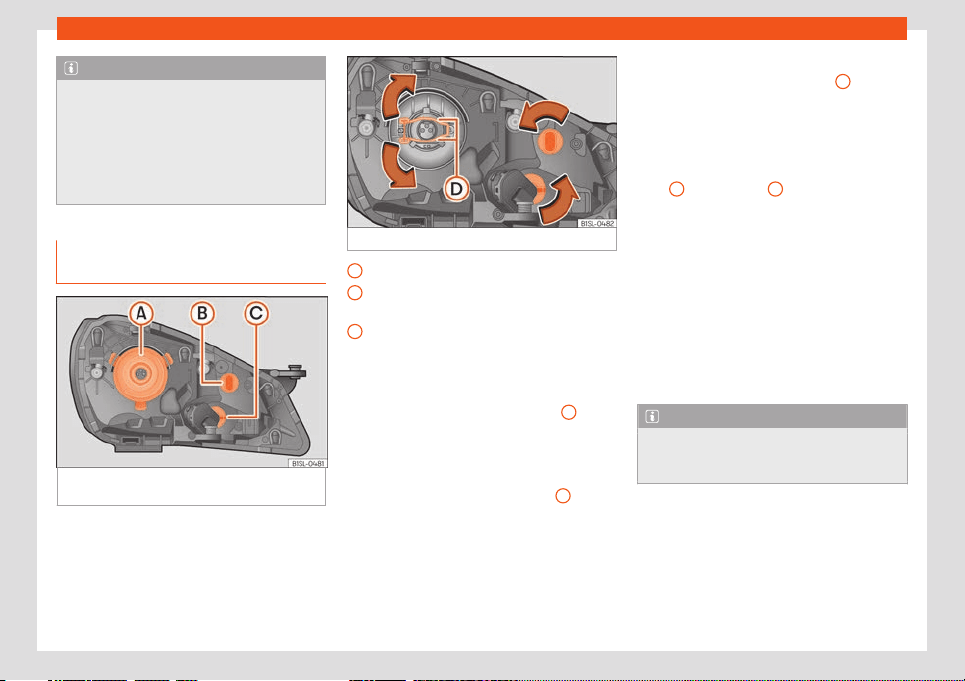
Fig. 48
In the engine compartment: rear view
of the l
eft headlight with rubber cover.
Fig. 49 Left headlight
Dipped and main beam headlights
Dipped beam lights and daytime running
lights
T
urn signal
There is no need to remove the headlight to
replace bulbs.
Dipped and main beam headlight
A
●
Open the bonnet .
●
Remove the H4 lamp connector and the
rubber co
ver from the tabs.
●
Press the retaining clip
›››
Fig. 49
D
down-
w
ards in the direction of the arrow, unclip
sideways, and remove it.
●
Remove the bulb from the holder. If neces-
sary, press the lock on the bulb holder.
●
Replace the faulty bulb with a new identical
bulb.
A
B
C
●
Insert the bulb
, return it to its position and
insert the retaining clip
›››
Fig. 49
D
.
●
Place the rubber cover and check that is in
the corr
ect position. Insert the connector to
the bulb H4.
Dipped beam light and daytime running
light
B
/ Turn signal
C
●
Open the bonnet
●
Turn the bulb holder in an anticl
ockwise
direction as far as it will go and remove it,
along with the bulb, pulling backwards.
●
Remove the bulb from the holder. If neces-
sary, press the lock on the bulb holder.
●
Replace the faulty bulb with a new identical
bulb.
●
Insert the bulb holder in the headlight and
turn it clockwise as far as the stop.
Note
The images show the left hand headlight
fr
om behind. The structure of the right hand
side headlight is symmetric.
50
Loading ...
Loading ...
Loading ...