Loading ...
Loading ...
Loading ...
30
ENGLISH
1
Enter into the [User BPM] menu
• Click the [User BPM] menu to enter.
• The [User BPM] requires image acquisition because it visually examines the image to which the result of
the [Calibration] is applied.
NOTE
• The following pop-up appears when entering into the menu without completing the [Calibration].
2
Check the History file
• Check if the [History] name created from the [Calibration] matches the name shown in the current
[History] window.
• Apply the selected History file and carry out the [User BPM] process.
3
Acquire Images
• Click the [Acquisition] button and acquire a Bright Image. The image name will be shown in the
[Image(s)] list.
• The information about the image will be shown below the image view.
4
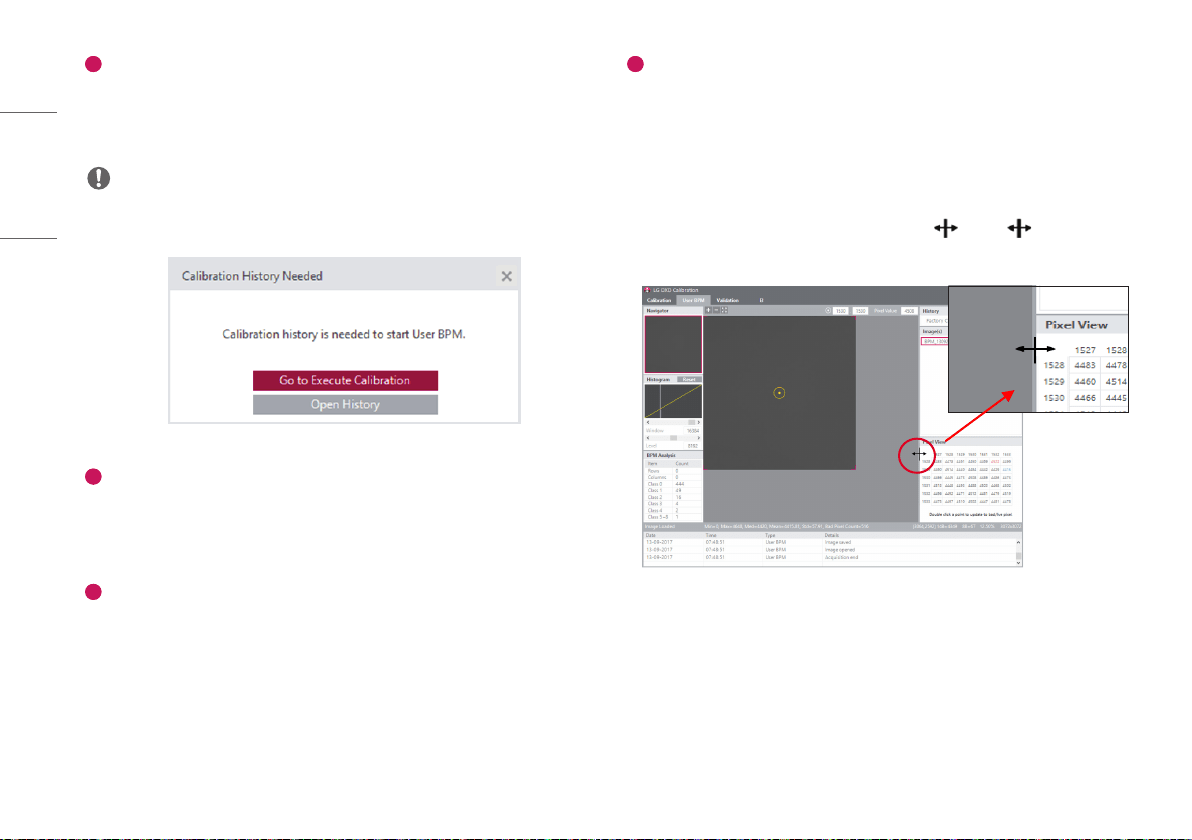
[Pixel View]
• Check the pixel values in the [Pixel View].
- Pixel values from the center of the image viewer are provided in the [Pixel View].
- Here, minimum value, maximum value, and possible Bad Pixel are shown as follows:
* Minimum value: Shown in blue numbers.
* Maximum value: Shown in red numbers.
* Possible Bad Pixel: Shown in the gray background.
- The window size of [Pixel View] can be changed using the icon. The icon appears when
hovering the mouse over the border between the [Pixel View] and the image viewer.
Loading ...
Loading ...
Loading ...