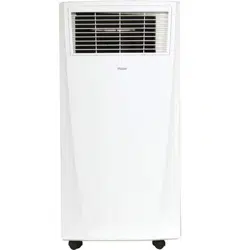
Haier QPCD05NXTW Portable Air Conditioner

Owner’s Manual and Installation Instruction

For QPCD05NXTW. Additionally, the document applies to other Haier models: HPB08XCM

PDF File Manual, 32 pages, Read Online | Download pdf file

QPCD05NXTW photo
background
Owner’s Manual and
Installation Instruction
Manual del propietario y
instrucciones de instalación
QPCD05NXTW
HPB08XCM
Portable Air Conditioner
Acondicionador de aire portatil
49-7782-1 12-18 GEA
Design may vary by model number.
Some models may have an additional
letter after the model number
El diseño puede variar según el número
de modelo
Algunos modelos pueden tener una
letra adicional después del número del
modelo
Loading page 2...
Loading page 3...
Loading page 4...
Loading page 5...
Loading page 6...
Loading page 7...
Loading page 8...
Loading page 9...
Loading page 10...
Loading page 11...
Loading page 12...
Loading page 13...
Loading page 14...
Loading page 15...
Loading page 16...
Loading page 17...
Loading page 18...
Loading page 19...
Loading page 20...
Loading page 21...
Loading page 22...
Loading page 23...
Loading page 24...
Loading page 25...
Loading page 26...
Loading page 27...
Loading page 28...
Loading page 29...
Loading page 30...
Loading page 31...
Loading page 32...

Other documents for Haier QPCD05NXTW

The following documents are available:
User Manual Photos

Specifications

Owner’s Manual and Installation Instruction - Transcript

  • Page 1 - Spanish - : Owners Manual and Installation Instruction Manual del propietario y instrucciones de instalación QPCD05NXTW HPB08XCM Portable Air Conditioner Acondicionador de aire portatil 4977821 1218 GEA Design may vary by model number Some models may have an additional letter after the model number El diseño puede variar según el número de modelo Algunos modelos pueden tener una letra adicional después del número del modelo
  • Page 3 - English - : 4977821 3 ENGLISH TABLE OF CONTENTS SAFTEY INFORMATION 4 CONTROL PANEL 5 PARTS AND FEATURES 8 INSTALLATION REQUIREMENTS 9 INSTALLATION INSTRUCTIONS 10 AIR CONDITIONER USE 13 AIR CONDITIONER CARE 13 TROUBLESHOOTING 14 LIMITED WARRANTY 15 RECORD KEEPING Thank you for purchasing this Haier product This user manual will help you get the best performance from your new range For future reference record the model and serial number located on the front behind the range storage drawer and the date of purchase Staple your proof of purchase to this manual to aid in obtaining warranty service if needed Model number Serial number Date of purchase HAIER WEBSITE Have a question or need assistance with your appliance Try the Haier Website 24 hours a day any day of the year You can also shop for more great Haier products and take advantage of all our online support services designed for your convenience In the US Haierappliancescom
  • Page 4 - English - : 4 4977821 ENGLISH IMPORTANT SAFETY INSTRUCTIONS WARNING To reduce the risk of fire electrical shock injury to persons or damage when using the air conditioner follow basic precautions including the following Read all of the instructions before using this appliance Plug into a grounded 3 prong outlet Do not remove ground prong Do not use an adapter Do not use an extension cord Do not operate the air conditioner if it has a damaged cord or plug if it is not working properly or if it has been damaged or dropped The air conditioner should be serviced only by qualified service personnel Call an authorized service company for examination repair or adjustment Disconnect power before servicing Disconnect power before cleaning NOTE Turning off power by pressing the Power button does NOT disconnect the appliance from the power supply Do not install or use the air conditioner in any area where the atmosphere contains combustible gases or where the atmosphere is contaminated Avoid any chemicals coming in contact with your air conditioner Do not store anything directly on top of the air conditioner Use two or more people to move and install air conditioner Never operate the air conditioner without the filters in place Do not use the air conditioner near a bathtub shower or wash basin or other wet area READ AND SAVE THESE INSTRUCTIONS IMPORTANT SAFETY INFORMATION READ ALL INSTRUCTIONS BEFORE USING THE APPLIANCE SAFETY INFORMATION
  • Page 5 - English - : 4977821 5 ENGLISH Features and appearance will vary Lights next to the touch pads on the air conditioner control panel indicate the selected settings BUTTONS A Display B Warning Light Condensed water may accumulate in the unit If the internal tank becomes full the warning light will light up and the unit will not operate until the unit has been drained C Power Control The power control turns the unit on and off D Mode Control The mode control has three settings COOL DEHUMIDIFY and FAN The settings are adjusted with Mode Control button A light will indicate which setting is currently being used Cooling Mode When cool mode is selected the indicator light turns blue During the cooling mode the air is cooled and hot air is exhausted to the outside through the exhaust tube Adjust fan speed and air temperature to suite your desired comfort level NOTE The air exchange hoses must vent outside the room when using cool mode Dehumidify Mode When dehumidify mode is selected the indicator light turns yellow Air is dehumidified as it passes through the unit without being in full cooling mode If room temperature is higher than 77 degrees Fahrenheit fan speed can be adjusted otherwise fan speed is fixed to Low NOTE If the unit is to be used as a dehumidifier do not connect the exhaust hose let the warm air return to the room Continuous drainage is then necessary Fan Mode When fan mode is selected the indicator light will shine green Air is circulated throughout the room with no cooling NOTE Unit does not need to be vented in Fan mode E Fan Speed Control Select between multiple fan speeds Number of fan speeds vary by model Hold the FAN button for 3 seconds the fan will continue running even when the compressor stops due to the temperature being reached F Timer Auto Turn Off With machine in running mode press timer button to select number of hours you would like the unit to run in air conditioning mode until it automatically shuts off Auto Turn On With machine in stand by mode press timer button to select number of hours until you would like the unit to automatically start running in air conditioning mode F TimerTemp Set Controls Used for adjusting the timer and thermostat The default display is room temperature In cooling mode when ޔ or ޕ button is pressed the set temperature is displayed and may be adjusted After 15 seconds the display will revert back to room temperature Temperature is only adjustable in cool mode The time is adjustable between 124 hours NOTE By pressing both ޔ and ޕ buttons at the same time the display will toggle between Celsius and Fahrenheit The temperature cannot be adjusted in the fan or dehumidification modes CONTROL PANEL After switching the air conditioner off you must wait 3 minutes before switching it back on again A B C D E F G Hold 3 Sec for Constant Cool CONSTANT COOL COOL DEHUM FAN LOW HIGH
  • Page 6 - English - : 6 4977821 ENGLISH CONTROL PANEL Cool Mode Use the COOL mode for cooling and for economy cooling To set the COOL mode 1 Press the MODE pad until the COOL indicator light is lit 2 Press the FAN pad to set HIGH or LOW fan speed 3 Press or to set the desired temperature between 61F and 89F in 1F increments After settings have been made the display will change back to show the room temperature The temperature control is used to maintain the room temperature The compressor will cycle on and off to keep the room at the set level of comfort Set the temperature control at a lower number and the indoor air will become cooler Set the temperature control at a higher number and the indoor air will become warmer NOTE If the air conditioner is off and is then turned on while set to COOL it will take approximately 3 minutes for the compressor to start and cooling to begin Cooling Descriptions For Normal CoolingSelect the COOL mode or HIGH fan speed with a middle set temperature For Maximum CoolingSelect the COOL mode and HIGH fan speed with a lower set temperature For Quieter amp Nighttime CoolingSelect the COOL mode and LOW fan speed with a middle set temperature NOTE If you switch from COOL or DRY mode setting to OFF wait 3 minutes before restarting In Cool mode the fan will cycle off with the compressor when the room temperature is reached Then the fan will cycle 10 minutes off and 2 minutes on to sample the air temperature DRY ModeDehumidification Use the DRY mode to provide dehumidification only The fan will run at a fixed speed at this setting so a fan speed cannot be set Keep windows and doors closed for the best dehumidifying effects To set the DRY mode Press the MODE pad until the DRY indicator light is lit In the DRY mode a set temperature will not be displayed After DRY mode has been set the display will change back to show the room temperature NOTE If you switch from a DRY setting to OFF or to a fan setting wait at least 3 minutes before switching back to a DRY setting If using the unit in the DRY mode as a dehumidifier for an extended time 1 Unplug the power cord 2 Connect a drain hose not included to the center drain port see page 9 upper drain 8 and lead hose to floor drain 3 Reconnect the power cord and press the MODE pad until the DRY indicator light is lit FAN Mode Use the FAN mode to provide air circulation and filtering without cooling To set the FAN mode Press the FAN pad until the desired indicator light for HIGH or LOW fan speed is lit Since fan only settings do not provide cooling a set temperature will not be displayed After FAN speed has been set the display will change back to show the room temperature Constant Cool Mode Use Constant Cool mode when you do not want the fan to stop running To Set Constant Cool Mode 1 Press the FAN pad for 3 seconds until the Constant Cool indicator light is lit 2 Press the FAN pad to set High or Low fan speed 3 Press or to set the desired temperature between 61F and 89F in 1F increments In Constant Cool Mode the fan will continue running even when the compressor stops due to the set temperature being reached Power Outage Recovery Feature In the case of a power outage or interruption the unit will automatically restart in the settings last used after the power is restored NOTE If the TIMER was set before the power outage it will need to be reset after power is restored The display will always default to show the room temperature When the air conditioner is turned on it will automatically start in the last mode and fan settings selected
  • Page 7 - English - : 4977821 7 ENGLISH CONTROL PANEL REMOTE CONTROL 1 Power OnOff 2 Mode Cool Blue LED lights when in cooling mode Dehumidification Yellow LED lights when in dehumidification mode Fan Green LED lights when in fan mode 3 Fan Speeds Select between multiple fan speeds Number of fan speeds vary by model In dehumidification mode and room temperature is greater than 77 F fan speed can be adjusted Otherwise fan speed is fixed to low 4 OnOff Timer To set the timer for a 1 24hour delay until the air conditioner turns off 1 When you use the timer setting button while the unit is operating you can preset a time for the unit to turn off When you use the timer setting button while the unit is on standby you can preset a time for the unit to turn on 3 If you press the ONOFF button the preset timer function will be canceled 4 Timer setting range is 124 hours To clear Timer Delay program NOTE Air conditioner can be either on or off 1 Press the Timer Button 2 Press the or buttons continuously till 00 appears to cancel the timer function To change the remaining time in hours 1 Press the Timer Button 2 Press the plus or minus button to change the delay time from 1 to 24 hours 3 The new delay time will display 5 Setting the Temperature To set the temperature press the ޔ or ޕ keys to raise or lower the temperature The temperature can be raised or lowered in the cool mode The temperature cannot be adjusted in fan or dehumidification mode NOTE The temperature can be set between 61 F to 89 F Cool Mode
  • Page 8 - English - : 8 4977821 ENGLISH Power Cord TEST When this button is pressed or when there is a current leak the unit will not operate RESET After resolving the problem press the reset button to resume operation PARTS AND FEATURES 1 Control Panel 2 Air Outlet 3 Handle hole 4 Caster 5 Air Filter 6 Exhaust Hose Connection 7 Air Intake 8 Upper Drain 9 Lower Drain NOTE Please ensure if the water outlet drain is well installed before use 10 Power Supply Cord 11 Rocker Switch
  • Page 9 - English - : 4977821 9 ENGLISH INSTALLATION REQUIREMENTS TOOLS AND PARTS Gather the required tools and parts before starting installation TOOLS NEEDED Flatblade Screwdriver Phillips Screwdriver PARTS SUPPLIED Exhaust Hose Hose Connector Hose Connector Cover 5 Window Panel and Extension Panel 3 Foam Seals
  • Page 10 - English - : 10 4977821 ENGLISH Questions Call Haier Appliances at 18773373639 or visit our Website at HaierAppliancescom BEFORE YOU BEGIN Read these instructions completely and carefully IMPORTANT Save these instructions for local inspectors use IMPORTANT Observe all governing codes and ordinances Note to Installer Be sure to leave these instructions with the Consumer Note to Consumer Keep these instructions for future reference Skill level Installation of this appliance requires basic mechanical skills Completion time Approximately 1 hour We recommend that two people install this product Proper installation is the responsibility of the installer Product failure due to improper installation is not covered under the Warranty You MUST use all supplied parts and use proper installation procedures as described in these instructions when installing this air conditioner Location Requirements Place the air conditioner on a flat level surface in a location that is at least 20 51 cm from any wall NOTE A minimum clearance of 30 762 cm from the air conditioner to the wall must be maintained to ensure proper airflow Maintain a minimum 20 51 cm clearance around the air conditioner to not block airflow Keep the air conditioner free of any obstructions such as drapes curtains blinds etc The exhaust hose should be free of any obstructions Do not place the air conditioner on an unstable or raised surface because it could fall and cause damage or injury Do not place the air conditioner in direct sunlight or near a heat source such as baseboard heaters stoves etc The window panel can be installed in a window with a minimum 20 51 cm to a maximum 40 1016 cm opening 20 51 CM 20 51 CM ÎÕÎÌÝÛÒÌÊÕÛÎÚÞÒÛÎÖÎÝÜ Some models require a 115120volt AC 60Hz grounded outlet protected with a 15amp timedelay fuse or circuit breaker The 3prong grounding plug minimizes the possibility of electric shock hazard If the wall outlet you plan to use is only a 2prong outlet it is your responsibility to have it replaced with a properly grounded 3prong wall outlet CAUTION Do not under any circumstances cut or remove the third ground prong from the power cord Do not change the plug on the power cord of this air conditioner Aluminium house wiring may present special problems consult a qualified electrician Power cord includes a current interrupter device A test and reset button is provided on the plug case The device should be tested on a periodic basis by first pressing the TEST button and then the RESET button while plugged into the outlet If the TEST button does not trip or if the RESET button will not stay engaged discontinue use of the air conditioner and contact a qualified service technician INSTALLATION INSTRUCTIONS
  • Page 11 - English - : 4977821 11 ENGLISH 1 Unpack the Air Conditioner WARNING Excessive Weight Hazard Use two or more people to move and install air conditioner Failure to do so can result in back or other injury Remove packaging materials Save the carton and the foam packaging for storing the air conditioner when not in use NOTE There are NO packing materials inside the air conditioner to removeDo Not open the cabinet Properly dispose ofrecycle all packing material Handle the air conditioner gently Keep the air conditioner upright and level Do not set the air conditioner on its side front back or upside down 2 Install Exhaust 1 Connect the connectors 2 and 3 to two sides of exhaust hose 1 to create an exhaust assembly 2 Install Exhaust cont 2 Sliding in one end of hose assembly with hose connector 2 to rear panel ÝëèñóøöëëèõòæîèõöúìæëòĤûëèëòöèäööèðåïü Ĥõðïü INSTALLATION INSTRUCTIONS 2 1 3
  • Page 12 - English - : 12 4977821 ENGLISH 3 Install Window Panels 1 Insert the window panel B and C to each end of the main panel A Adjust to fix the length of window 2 Open the window and place window panels into úìñçòúÊçíøöëèèûèñöìòñóäñèïöòĤúìçëòõ height of window by the screw and nut sets mounted on the main ptanel A 4 Attach Exhaust Hose to the Exhaust Nozzle 1 Insert the other end of the exhaust hose assembly with hose connector 3 onto the window bracket INSTALLATION INSTRUCTIONS 5 Complete Installation WARNING Electrical Shock Hazard Plug into a grounded 3 prong outlet Do not remove the ground prong from the power cord plug Do not use an adapter Do not use an extension cord Failure to do so can result in death fire or electrical shock 1 Plug the power cord into a grounded 3 prong outlet 2 Press the Reset button on the power cord to ensure the safety plug is providing power to the air conditioner CA B
  • Page 13 - English - : 4977821 13 ENGLISH IMPORTANT If the air conditioner has been tilted on its side wait 24 hours before turning on the air conditioner to allow the oil to return to the compressor This will prevent the air conditioner from failing prematurely Allow 20 51 cm of space around the unit for proper air circulation Do Not operate the air conditioner without air filters in place Do not spill liquid on the control panel it may cause an electrical short to the interior electronic parts that would either disable them or cause them to function improperly When turning on the air conditioner for the first time after plugging it into an electrical outlet the unit will start in Cooling mode set at 75ºF 24C and at High fan speed The control panel will display the current room temperature When turning on the unit after previous use it will remember the last settings used After a normal shut down please wait for 3 minutes before restarting the unit In Cooling mode this unit should not require water to be removed This model has a unique design that continuously evaporates the water When the unit is operated in high humidity conditions you may need to empty the water tank periodically The unit will shut down automatically when the water tank is full The Full indicator illuminates to alert you of this condition WARNING Electrical Shock Hazard Disconnect power before cleaning Failure to do so can result in death or electrical shock Cleaning 1 Unplug or disconnect power 2 Use only a soft cloth dampened with water to clean the cabinet NOTE Do not use a liquid or spray cleaner to clean the air conditioner NOTE DO NOT use chemicals abrasives ammonia chlorine bleach concentrated detergents solvents or scouring pads Some of these chemicalsitems may damage andor discolor your air conditioner 3 Dry thoroughly with a soft cloth 4 Plug in or reconnect power Air Filters The air filters should be cleaned at least once a week for your unit to operate at optimum efficiency IMPORTANT Do Not operate the air conditioner without the air filters in place 1 Unplug or disconnect the power 2 Pull on the tabs to slide out the filters from the back of the air conditioner NOTE The secondary filters are accessible once the main filters are removed 3 Wash or vacuum the dust from the air filters NOTE If washed gently shake the filter to remove the excess water and dust particles trapped in the filter 4 Reinstall the filters 5 Plug in or reconnect power Internal Water Tank The Full indicator illuminates when the internal water tank has filled with condensed water To Empty the Internal Water Tank 1 Unplug or disconnect power 2 Place a shallow 1 quart or larger pan not included below the lower drain located on the back near the bottom of the air conditioner 3 Remove the cap and the rubber plug and drain the water tank 4 Reinsert the drain plug and screw the cap snugly into place 5 Plug in or reconnect power Storage If the unit is not being used for a long period of time 1 Unplug or disconnect power 2 Drain the water from the water tank See Air Conditioner Care 3 Use the original packaging to repack the unit to avoid a buildup of dust or dirt 4 Store the air conditioner in a cool dry location AIR CONDITIONER USE AIR CONDITIONER CARE
  • Page 14 - English - : 14 4977821 ENGLISH Problem Possible Causes Solution Unit does not start or operate Power supply cord is not plugged into an outlet Plug the power cord into a grounded 3 prong outlet Power supply cord has tripped Press and release the RESET button on the power supply cord The Power button has not been pressed Press the Power button on the Control Panel or Remote Control to turn ON the air conditioner There is no power to the electrical outlet Plug a working lamp into the outlet to check for power A household fuse has blown or a circuit breaker has tripped Replace the fuse or reset the circuit breaker The control was programmed for a Time Delay Cancel the Time Delay See Control Panel The batteries in the remote control are dead Replace the batteries The internal water tank is full NOTE The air conditioner automatically turns off and the Water Full indicator illuminates to alert you of this condition Empty the water tank See Air Conditioner Care Remote control is not working Batteries are dead Replace the batteries Batteries are installed incorrectly Make sure the batteries are inserted in the correct position Air conditioner is working but the room is not cooling The room temperature is hot NOTE On extremely hot and humid daysthe air conditioner will take longer to cool the room Allow time for the room to cool when you first turn on the unit Make sure the air conditioner has an adequate BTU rating for the size of the room being cooled The control is set incorrectly to Fan or Dehum mode Set the Mode to Cool and the Fan Speed to High Airflow is restricted Remove any obstacles to the airflow and redirect airflow for uniform cooling Temperature set too high Lower the set temperature Air filters are dirty or restricted Clean the air filter See Air Conditioner Care Air conditioner installed incorrectly Check the exhaust hose and window panel for proper installation Doors and windows are open Close the doors and windows to the room being cooled to prevent cooled air from escaping TROUBLESHOOTING
  • Page 15 - English - : 4977821 15 ENGLISH LIMITED WARRANTY EXCLUSION OF IMPLIED WARRANTIES Your sole and exclusive remedy is product repair as provided in this Limited Warranty Any implied warranties including the implied warranties of merchantability or fitness for a particular purpose are limited to one year or the shortest period allowed by law For US Customers This limited warranty is extended to the original purchaser and any succeeding owner for products purchased for home use within the USA If the product is located in an area where service by a GE Appliances Authorized Servicer is not available you may be responsible for a trip charge or you may be required to bring the product to an Authorized GE Appliances Service location for service In Alaska the limited warranty excludes the cost of shipping or service calls to your home Some states do not allow the exclusion or limitation of incidental or consequential damages This limited warranty gives you specific legal rights and you may also have other rights which vary from state to state To know what your legal rights are consult your local or state consumer affairs office or your states Attorney General Warrantor US GE Appliances a Haier company Louisville KY 40225 Ŷ Customer instruction This owners manual provides information regarding operating instructions and user controls Ŷ Improper installation If you have an installation problem or if the air conditioner is of improper capacity contact your dealer or installer You are responsible for providing adequate electrical connecting facilities Ŷ Failure of the product resulting from modifications to the product or due to unreasonable use including failure to provide reasonable and necessary maintenance Ŷ Replacement of house fuses or resetting of circuit breakers Ŷ Failure due to corrosion on models not corrosionprotected Ŷ Damage to the product caused by improper power supply voltage accident fire floods or acts of God Ŷ Incidental or consequential damage caused by possible defects with this air conditioner Ŷ Damage caused after delivery What Will Not Cover For The Period Of Will Replace One Year From the date of the original purchase Replacement repair or refund of the original retail price for any product which fails due to a defect in materials or workmanship If the unit is exchanged the replacement unit is warranted for the remainder of your products original oneyear warranty period GE will at its sole discretion replace the product with a product of the same or comparable functionality and quality or refund the original retail price Ŷ Properly pack your unit We recommend using the original carton and packing materials ŶReturn the product to the retail location where it was purchased Ŷ Include in the package a copy of the sales receipt or other evidence of date of original purchase Also print your name and address and a description of the defect In Order to Make a Warranty Claim During the First 90 Days from the Date of Original Purchase Ŷ Locate your original sales receipt and make a note of your model and serial number Ŷ Call 18773373639 in the United States to initiate the product replacement process ŶYou will be asked to provide your name address date of purchase model and serial number ŶGE Appliances will arrange for a carton to be sent to your home to recover the product Ŷ Please return all requested materials postage prepaid in the carton provided Please include a description of the defect ŶYou should receive your replacement product or refund within 7 to 10 business days after your package is received In Order to Make a Warranty Claim During the Remainder of the OneYear Warranty
  • Page 17 - Spanish - : 4977821 17 ESPAÑOL ÍNDICE SEGURIDAD DEL ACONDICIONADOR DE AIRE 19 PANEL DE CONTROL 20 PIEZAS Y CARACTERÍSTICAS 23 REQUISITOS DE INSTALACIÓN 24 INSTRUCCIONES DE INSTALACIÓN 25 USO DEL ACONDICIONADOR DE AIRE 28 CUIDADO DEL ACONDICIONADOR DE AIRE 28 SOLUCIÓN DE PROBLEMAS 29 GARANTÍA LIMITADA 31 SITIO WEB DE HAIER Desea realizar una consulta o necesita ayuda con su electrodoméstico Intente a través del Sitio Web de Haier las 24 horas del día cualquier día del año Usted también puede comprar más electrodomésticos maravillosos de Haier y aprovechar todos nuestros servicios de soporte a través de Internet diseñados para su conveniencia En EEUU Haierappliancescom INFORMACIÓN A TENER EN CUENTA Le agradecemos la compra de este producto de marca Haier Este manual para el usuario le ayudará a obtener el mejor funcionamiento de su nueva estufa Para referencia futura registre el modelo y número de serie ubicados en el frente detrás del cajón de almacenamiento de la cocina y la fecha de compra Engrape la prueba de compra a este manual para asistirle cuando necesite obtener servicio bajo la garantía Número de modelo Número de serie Fecha de compra
  • Page 19 - Spanish - : 4977821 19 ESPAÑOL INSTRUCCIONES IMPORTANTES DE SEGURIDAD ADVERTENCIA Para reducir el riesgo de incendio choque eléctrico lesiones a personas o daños al utilizar el acondicionador de aire siga precauciones básicas incluyendo las siguientes Lea todas las instrucciones antes de usar este electrodoméstico Conecte a un contacto de pared de conexión a tierra de 3 terminales No quite el terminal de conexión a tierra No use un adaptador No use un cable eléctrico de extensión No ponga a funcionar el acondicionador de aire si tiene un cable o enchufe dañado si no funciona correctamente o si se ha dañado o caído El acondicionador de aire solo debe ser reparado por personal de servicio competente Llame a la compañía de servicio técnico autorizada para su inspección reparación o ajuste Desconecte el suministro de energía antes de darle servicio técnico Desconecte el suministro de energía antes de limpiarlo NOTA Si apaga la unidad presionando el botón Power Encendido esto NO desconecta el electrodoméstico del suministro de energía No instale ni utilice el acondicionador de aire en áreas donde la atmósfera contenga gases combustibles o donde la atmósfera esté contaminada Evite que cualquier producto químico entre en contacto con el acondicionador de aire No almacene nada directamente encima del acondicionador de aire Con la ayuda de dos o más personas mueva e instale el acondicionador de aire Nunca haga funcionar el acondicionador de aire si los filtros de aire no están colocados en su lugar No utilice el acondicionado de aire cerca de una tina ducha o lavabo ni otra zona húmeda INFORMACIÓN IMPORTANTE DE SEGURIDAD LEA TODAS LAS INSTRUCCIONES ANTES DE USAR LEA Y GUARDE ESTAS INSTRUCCIONES SEGURIDAD DEL ACONDICIONADOR DE AIRE
  • Page 21 - Spanish - : 4977821 21 ESPAÑOL PANEL DE CONTROL Modo de Refrigeración Use el modo COOL Refrigeración para enfriar Para configurar el modo COOL Refrigeración 1 Presione la tecla MODE Modo hasta que la luz indicadora de COOL Refrigeración esté encendida 2 Presione la tecla FAN Ventilador para configurar la velocidad del ventilador en HIGH Alto LOW Bajo 3 Presione o para configurar la temperatura deseada entre 61F y 89F por incrementos de 1F Una vez aplicadas las configuraciones la pantalla volverá a mostrar la temperatura ambiente El control de temperatura se usa para mantener la temperatura del ambiente El compresor realizará el ciclo de encendido y apagado para mantener la sala en el nivel de confort configurado Configure el control de temperatura en un número más bajo y el aire interior comenzará a ser más frío Configure el control de temperatura en un número más alto y el aire interior comenzará a ser más caliente NOTA Si el acondicionador de aire está apagado y luego es encendido en la configuración COOL Refrigeración pasarán aproximadamente 3 minutos hasta que el compresor se inicie y comience la refrigeración Descripciones de Refrigeración Para un Enfriamiento NormalSeleccione el modo COOL Refrigeración y la velocidad del ventilador en HIGH Alto o MEDIUM Medio con una temperatura en la configuración intermedia Para un Enfriamiento MáximoSeleccione el modo COOL Refrigeración y la velocidad del ventilador en HIGH Alto con una temperatura en una configuración baja Para un Enfriamiento Más Suave y NocturnoSeleccione el modo COOL Refrigeración y la velocidad del ventilador en LOW Bajo con una temperatura en la configuración intermedia NOTA Si pasa de la configuración del modo COOL Refrigeración o DRY Seco a OFF Apagado espere 3 minutos antes de realizar el reinicio En el modo Frío el ventilador se apagará con el compresor cuando se alcance la temperatura ambiente Luego el ventilador realizará un ciclo de 10 minutos de apagado y 2 minutos en la temperatura del aire Modo DRY Seco Deshumidificación Use el modo DRY Seco sólo para aplicar la deshumidificación El ventilador funcionará en una velocidad fija en esta configuración de modo que no será posible configurar la velocidad de la ventilación Mantenga las ventanas y puertas cerradas para lograr los mejores efectos de deshumidificación Para configurar el modo DRY Seco Presione la tecla MODE Modo hasta que la luz indicadora de DRY Seco esté encendida En el modo DRY Seco no se mostrará una temperatura configurada Una vez configurado el modo DRY Seco la pantalla volverá a mostrar la temperatura ambiente NOTA Si pasa de una configuración de DRY Seco a OFF Apagado o a una configuración del ventilador espere por los menos 3 minutos antes de volver a pasar a una configuración de DRY Seco Si usará la unidad en el modo DRY Seco como deshumidificador durante un período de tiempo prolongado 1 Desenchufe el cable de corriente 2 Conecte una manguera de drenaje no incluida al puerto de drenaje central consulte la página 9 drenaje superior nº 8 y una manguera principal al drenaje del piso 3 Vuelva a conectar el cable de corriente y presione la tecla MODE Modo hasta que la luz indicadora de DRY Seco esté encendida Modo de Ventilación Use el modo FAN Ventilación para brindar circulación de aire y filtrar sin refrigerar Para configurar el modo FAN Ventilación Presione la tecla FAN Ventilación hasta que la luz indicadora deseada de velocidad en HIGH Alto or LOW Bajo Inactivo esté encendida Debido a que las configuraciones de sólo ventilador no brindan refrigeración no será exhibida una temperatura configurada Una vez configurada la velocidad de FAN Ventilación la pantalla volverá a mostrar la temperatura ambiente Función de Recuperación por Corte de Suministro En caso de corte de suministro o interrupción la unidad se reiniciará de forma automática en las configuraciones usadas por última vez una vez restablecido el servicio NOTA Si TIMER Temporizador fue configurado antes del corte de corriente será necesario reiniciar el mismo una vez restablecido el servicio La pantalla siempre mostrará la temperatura del ambiente por omisión Cuando el acondicionador de aire sea encendido se iniciará de forma automática en las configuraciones de modo y ventilación que fueron usadas por última vez Modo de enfriamiento constante Utilice el modo de enfriamiento constante para un enfriamiento económico Para establecer el modo de enfriamiento constante 1 Presione el botón FAN durante 3 segundos hasta que se encienda la luz indicadora Constant Cool 2 Presione el botón FAN para establecer la velocidad alta o baja del ventilador 3 Presione o para configurar la temperatura deseada entre 61 F y 89 F en incrementos de 1 F En el modo de enfriamiento constante el ventilador continuará funcionando cuando se alcance la temperatura
  • Page 22 - Spanish - : 22 4977821 ESPAÑOL PANEL DE CONTROL Control Remoto ÒñèõõøóòõèñØñØééÎñæèñçìçòÊóäêäçò 2 Modo Refrigeración Luces LED azules al estar en el modo de refrigeración Deshumidificación Luces LED amarillas al estar en el modo de deshumidificación ßèñìïäçòõÕøæèöÕÎÍùèõçèöäïèöäõèñèïðòçòçè ventilación ßèïòæìçäçèöçèïùèñìïäçòõ Seleccione entre varias velocidades de ventilador El número de velocidades del ventilador varía según el modelo En el modo de deshumidificación la temperatura del ambiente es superior a los 77 F y la velocidad del ventilador puede ser ajustada de otra forma el ventilador es configurado en velocidad baja ÝèðóòõìýäçòõçèÎñæèñçìçòÊóäêäçò Para configurar el temporizador con un retraso de entre 1 y 24 horas hasta que el acondicionador de aire se apague ÊïøöäõèïåòſñçèæòñéìêøõäæìſñðìèñõäöïäøñìçäçèöŹ en funcionamiento usted puede hacer una configuración previa de un tiempo para que la unidad se apague quotÊïøöäõèïåòſñçèæòñéìêøõäæìſñðìèñõäöïäøñìçäç está en el modo de espera usted puede realizar una configuración previa de un tiempo para que la unidad se encienda Üìóõèöìòñäèïåòſñ稨ÏÏĔÎñæèñçìçòÊóäêäçòïä función presente del temporizador será cancelada 4 El rango de configuración del temporizador es de entre 1 y 24 horas ÙäõäåòõõäõèïóõòêõäðäçèÝìðèõÍèïäüÛèõäöòçèï Ýèðóòõìýäçòõ ØÝÊÎïäæòñçìæìòñäçòõçèäìõèóòçõŹèöäõèñæèñçìçòò apagado ÙõèöìòñèèïåòſñÝÒÖÎÛÝèðóòõìýäçòõ 2 Mantenga presionado el botón menos hasta que la pantalla del temporizador haya sido borrada Ùäõäæäðåìäõèïìèðóòõèöäñèèñëòõäö ÙõèöìòñèèïåòſñÝÒÖÎÛÝèðóòõìýäçòõ 2 Presione los botones o continúe hasta que aparezca 00 para cancelar la función del temporizador 3 Será exhibido el nuevo tiempo de retraso 5 ÌòñéìêøõäæìſñçèïäÝèðóèõäøõä Para configurar la temperatura presione las teclas o v para subir o bajar la temperatura La temperatura podrá ser liberada o bajada en el modo de refrigeración La temperatura no podrá ser ajustada en los modos de ventilador o deshumidificación ØÝÊÕäèðóèõäøõäóòçõŹöèõæòñéìêøõäçäèñõèampÏü ÏÖòçòçèÛèéõìêèõäæìſñ
  • Page 23 - Spanish - : 4977821 23 ESPAÑOL PIEZAS Y CARACTERÍSTICAS Cable de Corriente PRUEBA Cuando este botón sea presionado o cuando haya una pérdida de corriente la unidad no funcionará REINICIO Luego de resolver el problema presione el botón de reanudar para reiniciar el funcionamiento 1 Panel de Control 2 Salida de Aire 3 Hueco de la manija 4 Ruedita 5 Filtro de Aire 6 Conexión de la Manguera del Extractor 7 Entrada de Aire 8 Drenaje Superior 9 Drenaje Inferior NOTA Por favor asegúrese de que el drenaje de la salida de agua esté bien instalado antes del uso 10 Cable de Suministro de Corriente 11 Interruptor Basculante
  • Page 24 - Spanish - : 24 4977821 ESPAÑOL HERRAMIENTAS Y PIEZAS Reúna las herramientas y piezas necesarias antes de comenzar la instalación HERRAMIENTAS NECESARIAS Destornillador de hoja plana Destornillador Phillips PIEZAS SUMINISTRADAS REQUISITOS DE INSTALACIÓN Exhaust Hose Hose Connector Hose Connector Cover 5 Window Panel and Extension Panel 3 Foam Seals
  • Page 25 - Spanish - : 4977821 25 ESPAÑOL Preguntas Llame a Haier Appliances al 18773373639 o visite nuestro sitio web en HaierAppliancescom ANTES DE INICIAR Lea estas instrucciones completa y cuidadosamente IMPORTANTE Guarde estas instrucciones para uso del inspector local IMPORTANTE Observe todos los códigos y órdenes de ley Nota al instalador Asegúrese de dejar estas instrucciones con el consumidor Nota al consumidor Conserve estas instrucciones para referencia futura Nivel de destreza La instalación de este aparato requiere de destrezas mecánicas básicas Tiempo de ejecución Aprox 1 hora Recomendamos dos personas para la instalación de este producto La instalación apropiada es la responsabilidad del instalador La falla del producto debido a una instalación inadecuada no está cubierta por la garantía Cuando instale este acondicionador de aire DEBE usar todas las piezas suministradas y usar procedimientos adecuados de instalación Requisitos De Ubicación Coloque el acondicionador de aire sobre una supercie plana y nivelada en una ubicación que esté al menos a 20 51 cm de la pared NOTA La distancia recomendada de la ventana para un rendimiento óptimo es de 30 76 cm Mantenga un espacio libre mínimo de 20 51 cm alrededor del acondicionador de aire para no bloquear el flujo de aire Mantenga el acondicionador de aire libre de obstrucciones como cortinas con pliegues cortinas persianas etc La manguera de escape debe estar libre de cualquier obstrucción No coloque el acondicionador de aire en una supercie inestable o elevada ya que podría caerse y provocar daños o lesiones No exponga el acondicionador de aire a la luz directa del sol o cerca una fuente de calor como zócalos radiantes estufas etc El panel de la ventana puede instalarse en una ventana con una abertura mínima de 20 51 cm hasta un máximo de 40 1016 cm Requisitos eléctricos Algunos modelos requieren tomacorrientes de 115120 voltios de corriente alterna y 60 Hz conectados a tierra protegidos con un fusible de dilatación de tiempo de 15 amperios o un cortacircuitos El enchufe de tres púas con conexión a tierra minimiza la posibilidad de descargas eléctricas Si el tomacorriente de la pared que usted planea usar solamente tiene 2 tomas es su responsabilidad hacer que un técnico lo reemplace por uno de tres tomas con conexión a tierra PRECAUCIÓN Bajo ninguna circunstancia corte o remueva la tercera púa conexión a tierra del cable eléctrico No cambie el enchufe en el cable eléctrico de este acondicionador de aire Los cables caseros de aluminio podrían presentar problemas especiales Consulte a un técnico electricista calificado El cable de alimentación incluye un dispositivo para interrupción de corriente Se incluye un botón de prueba y de reinicio en el dispositivo El dispositivo debe ponerse a prueba periódicamente primero se presiona el botón de TEST prueba y luego RESET reinicio mientras se encuentra enchufado al tomacorriente Si el botón TEST no se dispara o si el botón RESET no queda enganchado deje de utilizar el acondicionador de aire y comuníquese con un técnico calificado INSTRUCCIONES DE INSTALACIÓN 20 51 CM 20 51 CM
  • Page 26 - Spanish - : 26 4977821 ESPAÑOL INSTRUCCIONES DE INSTALACIÓN 2 Instalación Del Extractor 1 ÌòñèæèïòöæòñèæòõèöñĀquotüñĀöòåõèïòöçòö ïäçòöçèïäðäñêøèõäçèïèûõäæòõñĀäéìñçèæõèäõ un ensamble con el extractor 2 Instalación Del Extractor cont 2 Íèöïìæèøñèûõèðòçèïèñöäðåïèçèïäðäñêøèõäæòñ èïæòñèæòõçèðäñêøèõäñĀquotöòåõèóäñèïõäöèõò Luego empuje el interruptor basculante para que el ensamble de la manguera sea colocado de manera firme 2 1 3 1 Desempaque Su Acondicionador De Aire ADVERTENCIA Peligro de Peso Excesivo Use dos o más personas para mover e instalar el acondicionador de aire No seguir esta instrucción puede ocasionar una lesión en la espalda u otro tipo de lesiones Quite los materiales de empaque Guarde la caja y el empaque de espuma para almacenar el acondicionador de aire cuando no esté en uso NOTA NO hay materiales de empaque internos dentro del acondicionador de aire para quitar No abra el gabinete Deshágase adecuadamente de todos los materiales de empaque o recíclelos Manipule el acondicionador de aire con cuidado Mantenga el acondicionador de aire en posición vertical y nivelado No coloque el acondicionador de aire de costado sobre su parte frontal su parte posterior o al revés
  • Page 27 - Spanish - : 4977821 27 ESPAÑOL INSTRUCCIONES DE INSTALACIÓN Instale Los Paneles De Ventana 1ÒñöèõèïòöóäñèïèöçèùèñäñäËüÌèñæäçäèûõèðò çèïóäñèïóõìñæìóäïÊÑäêääíøöèöóäõäëäæèõæòìñæìçìõ la extensión de la ventana 2Êåõäïäùèñäñäüæòïòôøèïòöóäñèïèöçèùèñäñäèñ ïäùèñäñäÊíøöèïòöóäñèïèöçèùèñäñäóäõäôøè coincidan con el ancho y alto de la ventana con el conjunto de tornillos y tuercas montados en el panel óõìñæìóäïÊ 4 Adhiera La Manguera Del Extractor A La Boca Del Extractor 1 Inserte el otro extremo del ensamble de la manguera çèïèûõäæòõæòñèïæòñèæòõçèðäñêøèõäñĀèñèï soporte de la ventana ÌÊ Ë 5 Complete La Instalación ADVERTENCIA Peligro de Choque Eléctrico Conecte a un contacto de pared de conexión a tierra de 3 terminales No quite el terminal de conexión a tierra del cable de alimentación No use un adaptador No use un cable eléctrico de extensión No seguir estas instrucciones puede ocasionar la muerte incendio o choque eléctrico 1 Conecte el cable eléctrico a un toma corriente de 3 terminales con conexión a tierra 2 Presione el botón Reset Restablecer en el cable eléctrico para asegurar que el tapón de seguridad está proporcionando energía al acondicionador de aire
  • Page 28 - Spanish - : 28 4977821 ESPAÑOL IMPORTANTE Si el acondicionador de aire se ha inclinado hacia un lado espere 24 horas antes de encender el acondicionador de aire a fin de permitir que el aceite vuelva al compresor Esto evitará que el acondicionador de aire falle antes de tiempo Deje 20 51 cm de espacio alrededor de la unidad para permitir una circulación adecuada de aire No haga funcionar el acondicionador de aire si los ltros de aire no están colocados en su lugar No derrame líquido en el panel de control puede causar un cortocircuito a las piezas electrónicas del interior que lo desactivaría o haría que funcione incorrectamente Al encender el acondicionador de aire por primera vez después de conectarlo a un toma corriente eléctrico la unidad comenzará a funcionar en el modo Cooling Enfriamiento fijado en 75 ºF 24 ºC y a la velocidad alta del ventilador El panel de control mostrará la temperatura actual de la habitación Al encender la unidad después de un uso anterior recordará los últimos ajustes utilizados Después de un apagado normal espere 3 minutos antes de volver a poner en marcha la unidad En el modo de enfriamiento esta unidad no deberá requerir que se elimine el agua Este modelo cuenta con un diseño único que evapora continuamente el agua Cuando la unidad funciona en condiciones de alta humedad es posible que usted tenga que vaciar periódicamente el tanque de agua La unidad se apagará automáticamente cuando el tanque de agua esté lleno El indicador Water Full Máximo nivel de agua se iluminará para avisarle acerca de esta condición ADVERTENCIA Peligro de choque eléctrico Desconecte el suministro de energía antes de limpiarlo No seguir esta instrucción puede ocasionar la muerte o choque eléctrico Limpieza 1 Desenchufe o desconecte el suministro de energía 2 Utilice solamente un paño suave humedecido con agua para limpiar el gabinete NOTA No utilice un limpiador líquido o con rociador para limpiar el acondicionador de aire NOTA NO utilice productos químicos abrasivos amoníaco blanqueador con cloro detergentes concentrados solventes o estropajos de metal Algunos de estos artículosproductos químicos pueden dañar yo decolorar su acondicionador de aire 3 Seque bien con un paño suave 4 Enchufe o vuelva a conectar el suministro de energía Filtros De Aire Los filtros de aire deben limpiarse al menos una vez a la semana para que la unidad funcione con óptima eficacia IMPORTANTE No haga funcionar el acondicionador de aire si los filtros de aire no están colocados en su lugar 1 Desenchufe o desconecte el suministro de energía 2 Jale de las lengüetas para deslizar los filtros de la parte posterior del acondicionador de aire NOTA Los filtros secundarios son accesibles una vez que se quitan los filtros principales 3 Lave o aspire el polvo de los filtros de aire NOTA Si se lavan agite suavemente el filtro para eliminar el exceso de agua y las partículas de polvo atrapadas en el filtro 4 Vuelva a instalar los filtros 5 Enchufe o vuelva a conectar el suministro de energía Tanque De Agua Interno El indicador Water Full Máximo nivel de agua se ilumina cuando el tanque de agua interno se llena de agua condensada Para vaciar el tanque de agua interno 1 Desenchufe o desconecte el suministro de energía 2 Coloque una bandeja profunda grande o de 1 cuarto de galón no incluida debajo del desagüe inferior situado en la parte posterior cerca de la base del acondicionador de aire 3 Quite la tapa y el tapón de goma y desagüe el tanque de agua 4 Vuelva a colocar el tapón de desagüe y enrosque la tapa para que firme en su lugar 5 Enchufe o vuelva a conectar el suministro de energía Almacenamiento Si la unidad no se utiliza durante un período prolongado de tiempo 1 Desenchufe o desconecte el suministro de energía 2 Desagüe el agua del tanque de agua Vea Cuidado del acondicionador de aire 3 Utilice el empaque original para volver a empacar la unidad y evitar acumulación de polvo o suciedad 4 Guarde el acondicionador de aire en un lugar fresco y seco USO DEL ACONDICIONADOR DE AIRE CUIDADO DEL ACONDICIONADOR DE AIRE
  • Page 29 - Spanish - : 4977821 29 ESPAÑOL Problema Causas posibles Qué hacer La unidad no se pone en marcha ni funciona El cable de suministro de energía no está enchufado en un toma corriente Conecte el cable eléctrico a un toma corriente de 3 terminales con conexión a tierra El cable de suministro de energía se ha disparado Presione y libere RESET Restablecer en el cable de suministro de energía El botón Power Encendido no se ha presionado Presione el botón Power Encendido en el panel de control o el control remoto para ENCENDER el acondicionador de aire El toma corriente eléctrico no recibe suministro eléctrico Enchufe una lámpara de trabajo en el toma corriente para verificar si hay energía Se ha fundido un fusible de la casa o se ha disparado un cortacircuitos Reemplace el fusible o reposicione el cortacircuitos El control fue programado para un tiempo diferido Cancele el tiempo diferido Vea Panel de control Las pilas del control remoto están agotadas Reemplace las pilas El tanque de agua interno está lleno NOTA El acondicionador de aire se apaga automáticamente y el indicador Water Full Máximo nivel de agua se ilumina para avisarle de este estado Vacíe el tanque de agua Vea Cuidado del acondicionador de aire El control remoto no funciona Las pilas están agotadas Reemplace las pilas Las pilas están insertadas de forma incorrecta Asegúrese de que las pilas se inserten en la posición correcta El acondicionador de aire está funcionando perola habitación no se enfría La temperatura de la habitación está caliente NOTA En días muy calurosos y húmedosel acondicionador de aire necesitará más tiempo para enfriar la habitación Dé tiempo para que la habitación se enfríe cuando enciende la unidad por primera vez Asegúrese de que el acondicionador de aire tenga una categoría de BTU Unidad Térmica Británica adecuada para el tamaño de la habitación que desea enfriar El control se ha fijado incorrectamente en modo Fan Ventilador o Dry Seco Fije el modo Cool Enfriamiento y la velocidad del ventilador en High Alta El flujo de aire ha disminuido Quite los obstáculos que bloquean el flujo de aire y redirija el flujo de aire para lograr un enfriamiento uniforme La temperatura está fijada demasiada alta Baje la temperatura fijada Los filtros de aire están sucios u obstruidos Limpie el filtro de aire Vea Cuidado del acondicionador de aire El acondicionador de aire se ha instalado incorrectamente Verifique que la manguera de escape y el panel de la ventana estén correctamente instalados Las puertas y las ventanas están abiertas Cierre las puertas y las ventanas de la habitación que desea enfriar para evitar que el aire enfriado se escape SOLUCIÓN DE PROBLEMAS
  • Page 31 - Spanish - : 4977821 31 ESPAÑOL GARANTÍA LIMITADA EXCLUSIÓN DE GARANTÍAS IMPLÍCITASSu única y exclusiva alternativa es la reparación del producto como se indica en la Garantía Limitada Las garantías implícitas incluyendo garantías implícitas de comerciabilidad o conveniencia sobre un propósito particular se limitan a un año o al período más corto permitido por la ley Para Clientes de EEUU Esta garantía se extiende al comprador original y a cualquier dueño subsiguiente de productos comprados para uso hogareño dentro de EEUU Si el producto está en un área donde no se encuentra disponible un Proveedor Autorizado del Servicio Técnico de GE Appliances usted será responsable por el costo de un viaje o se podrá requerir que traiga el producto a una ubicación del Servicio Técnico de GE Appliances Autorizado para recibir el servicio En Alaska la garantía excluye el costo de envío o llamadas del servicio técnico a su hogar Algunos estados no permiten la exclusión o limitación de daños fortuitos o consecuentes Esta garantía le da derechos legales específicos y es posible que tenga otros derechos legales que varían entre un estado y otro Para conocer cuáles son sus derechos legales consulte a la oficina de asuntos del consumidor local o estatal o al Fiscal de su estado Garante en EEUU GE Appliances a Haier company Louisville KY 40225 Ŷ Instrucción al cliente Este manual del propietario brinda información relacionada con instrucciones de funcionamiento y controles del usuario Ŷ Instalación inadecuada Si tiene un problema de instalación òèïäæòñçìæìòñäçòõçèäìõèñòóòöèèïäæäóäæìçäçäçèæøäçä contacte a su vendedor minorista o instalador Usted es responsable de brindar instalaciones de conexión eléctrica adecuadas Ŷ Falla del producto como resultado de modificaciones sobre èïðìöðòòçèåìçòäøñøöòìõõäýòñäåïèìñæïøüèñçòïäéäïä de mantenimiento razonable o necesario Ŷ Reemplazo de fusibles del hogar o reinicio de disyuntores Ŷ Fallas como consecuencia de corrosión en modelos sin protección contra ésta Ŷ Daños ocasionados sobre el producto por nivel de öøðìñìöõòçèùòïäíèìñäçèæøäçòäææìçèñèìñæèñçìò inundaciones o catástrofes naturales Ŷ Daños consecuentes o incidentales causados por posibles defectos del acondicionador de aire Ŷ Daño causado después de la entrega Qué No Será Cubierto Por el Período de Reemplazaremos ÞñÊƻò Desde la fecha de la compra original Ûèèðóïäýòõèóäõäæìſñòõèèðåòïöòdel costo minorista original de cualquier producto que falle debido a un defecto en los materiales o la fabricación Si la unidad es cambiada la unidad de reemplazo posee garantía por el resto del período de la garantía original de un año sobre su óõòçøæòÐÎÊóóïìäñæèöõèèðóïäýäõŹäöøèûæïøöìùòæõìèõìòèïóõòçøæòóòõòõòçèïäðìöðäò de una funcionalidad y calidad comparable o hará un reembolso por el precio minorista original Ŷ Embale la unidad correctamente Le recomendamos usar la caja de cartón y los materiales de embalaje originales ŶEntregue el producto en la ubicación del vendedor minorista donde fue adquirido Ŷ Incluya en el paquete una copia del receptor de la venta u otro comprobante de la fecha de compra original También escriba su nombre y domicilio y una descripción del defecto A Fin de Realizar una Reclamo sobre la Garantía Durante los Primeros 90 Días desde la Fecha Original de Compra Ŷ Ubique su recibo de venta original y haga una nota de su modelo y número de serie ŶÕïäðèäïampèñÎöäçòöÞñìçòöóäõäìñìæìäõèï proceso de reemplazo del producto ŶÜèöòïìæìäõŹöøñòðåõèçòðìæìïìòéèæëäçèæòðóõäü números de modelo y serie ŶGE Appliances hará arreglos para que se envíe una caja de cartón a su hogar para recuperar el producto Ŷ Ùòõéäùòõèñõèêøèòçòöïòöðäèõìäïèööòïìæìäçòöèñùżò óòöäïóõèóäêòèñïäæäíäçèæäõſñóõòùìöäÙòõéäùòõìñæïøüä una descripción del defecto ŶDebería recibir el producto de reemplazo o un reembolso entre los 7 y 10 días hábiles una vez que hayamos recibido su paquete A Fin de Realizar un Reclamo sobre la Garantía Durante el Resto de la Garantía de un Año