Loading ...
Loading ...
Loading ...
270 Practical information
3. Carefully remove the cover
1
towards the lever ⇒ Fig. 153 A.
4.
Pull the release
3
in the connector
2
in the direction of the arrow
⇒ Fig. 153 B. Use the screwdriver in the vehicle tool kit.
5. Press position
4
and remove the connector
2
⇒ Fig. 153 B.
6. Unscrew the wing nut
5
⇒ Fig. 153 B.
7.
Remove the tail light from the bodywork by carefully pulling back-
wards.
8. Disassemble the tail light unit and place it on a flat, clean surface.
To change the bulb
9.
Unlock the bulb holder locking tab (arrow) ⇒ Fig. 154 C and remove
the bulb holder from the tail light.
10. Replace the faulty bulb by a new identical bulb ⇒ Fig. 154 D.
11.
Place the lamp holder in the tail light unit. The attachment tabs (ar-
row) should audibly click into place ⇒ Fig. 154 C.
Assembling the tail light units
12. Carefully insert the tail light unit into the opening in the bodywork.
13.
Support the tail light with one hand in the assembly position and
securely screw the wing nut with the other
5
⇒ Fig. 153 B.
14.
Ensure that the tail light unit has been correctly fitted and is firmly
secured.
15.
Insert the connector
2
into the bulb holder and press the lock
3
on the connector in the opposite direction to the arrow ⇒ Fig. 153
B.
16. Insert the cover. The cover should lock into place.
17. Close the rear lid ⇒ page 40.
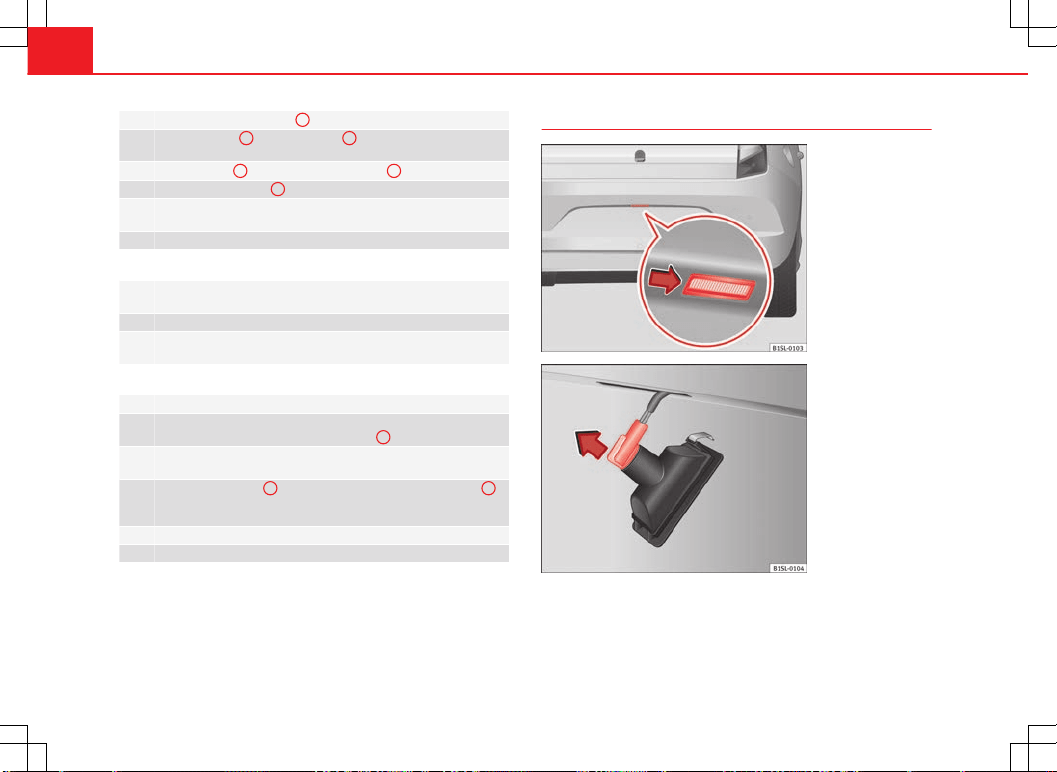
Changing the number plate light
Fig. 155 On the rear
bumper: Remove number
plate light
Fig. 156 Number plate
light: Remove the lamp
holder
Loading ...
Loading ...
Loading ...